Godmin
Admin framework for Rails 5+
Install / Use
/learn @varvet/GodminREADME
Godmin


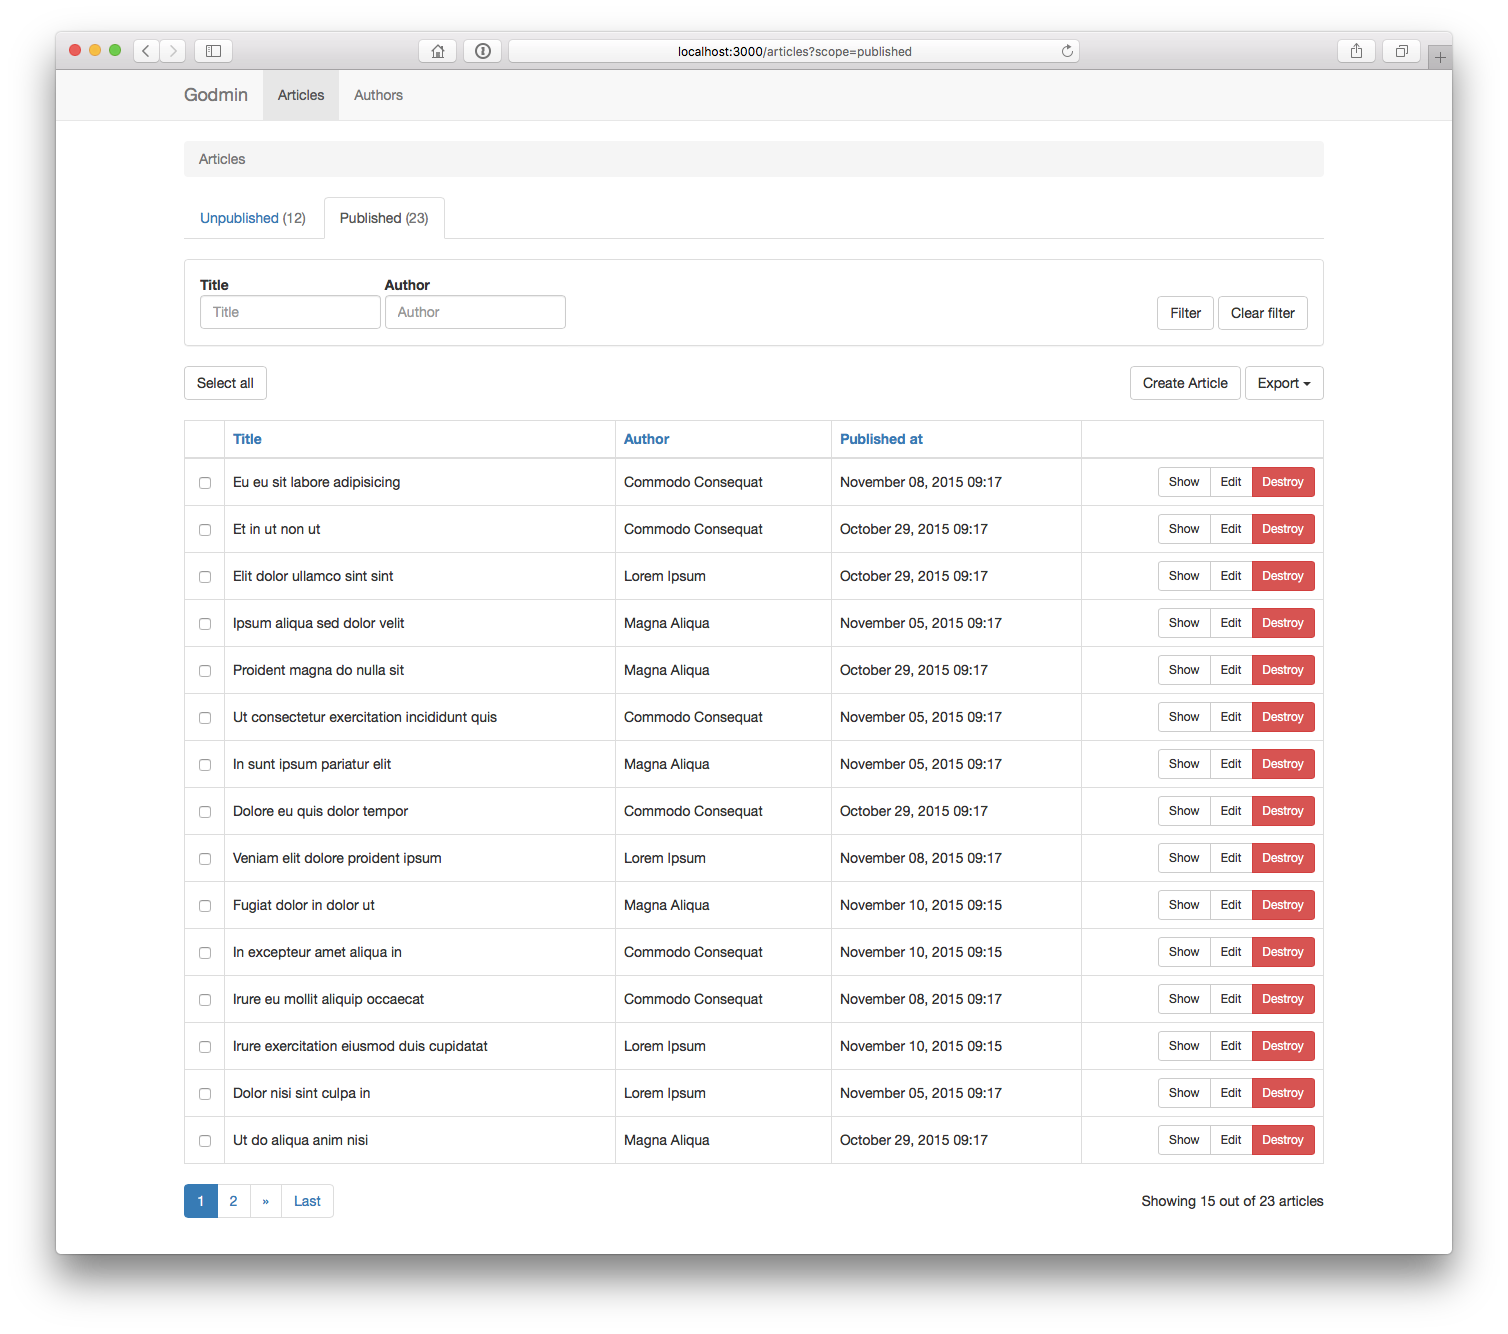
Godmin is an admin framework for Rails 5+. Use it to build dedicated admin sections for your apps, or stand alone admin apps such as internal tools. It has support for common features such as scoping, filtering and performing batch actions on your models. Check out the demo app and its source code to get a feel for how it works.
Godmin differs from tools like ActiveAdmin and RailsAdmin in how admin sections are created. Rather than being DSL-based, Godmin is a set of opt-in modules and helpers that can be applied to regular Rails apps and engines. An admin section built with Godmin is just that, a regular Rails app or Rails engine, with regular routes, controllers and views. That means there is less to learn, because you already know most of it, and fewer constraints on what you can do. After all, administrators are users too, and what better way to provide them with a tailor made experience than building them a Rails app?
- Installation
- Getting started
- Resources
- Views
- Authentication
- Authorization
- Localization
- JavaScript
- Plugins
- Contributors
- License
Installation
Godmin supports two common admin scenarios:
- Standalone installation
- Engine installation
If you want to set up an example app that you can play around with, run the following:
rails new sandbox --skip-spring -m https://raw.githubusercontent.com/varvet/godmin/master/template.rb
Standalone installation
Use for admin-only applications, or for architectures where the admin lives in its own app. E.g. you want to access the admin section at localhost:3000.
Add the gem to the application's Gemfile:
gem "godmin"
Bundle, then run the install generator:
$ bundle install
$ bin/rails generate godmin:install
Godmin should be up and running at localhost:3000.
Engine installation
Use when the admin is part of the same codebase as the main application. E.g. you want to access the admin section at localhost:3000/admin.
Generate a mountable engine:
$ bin/rails plugin new admin --mountable
Add the engine to the application's Gemfile:
gem "admin", path: "admin"
Mount the engine in the application's config/routes.rb:
mount Admin::Engine, at: "admin"
Add the gem to the engine's gemspec, admin/admin.gemspec:
s.add_dependency "godmin", "~> x.x.x"
Bundle, then run the install generator within the scope of the engine, i.e. note the leading admin/:
$ bundle install
$ admin/bin/rails generate godmin:install
Godmin should be up and running at localhost:3000/admin
Installation artefacts
Installing Godmin does a number of things to the Rails application.
The application controller is modified as such:
class ApplicationController < ActionController::Base
  include Godmin::ApplicationController
end
Require statements are placed in both app/assets/javascripts/application.js and app/assets/stylesheets/application.css.
If Godmin was installed inside an engine, a require "godmin" statement is placed in {namespace}/lib/{namespace}.rb.
An app/views/shared/_navigation.html.erb partial is created.
And finally, the app/views/layouts folder is removed by default, so as not to interfere with the Godmin layouts. It can be added back in case you wish to override the built in layouts.
Getting started
Godmin deals primarily with resources. A resource is something that can be administered through the Godmin user interface, often a Rails model. Let's say the application has an Article model with attributes such as title, body and published. To get going quickly, we can use a generator:
$ bin/rails generate godmin:resource article title published
Or for an engine install:
$ admin/bin/rails generate godmin:resource article title published
This does a number of things.
It inserts a route in the config/routes.rb file:
resources :articles
It inserts a navbar_item in the app/views/shared/_navigation.html.erb partial:
<%= navbar_item Article %>
If Godmin was installed inside an engine, it creates a model class:
module Admin
  class Article < ::Article
  end
end
It creates a controller:
class ArticlesController < ApplicationController
  include Godmin::Resources::ResourceController
end
It creates a service object:
class ArticleService
  include Godmin::Resources::ResourceService

  attrs_for_index :title, :published
  attrs_for_show :title, :published
  attrs_for_form :title, :published
end
Using attrs_for_index we can control what fields are displayed in the table listing, using attrs_for_show we can control what fields are displayed on the show page, and using attrs_for_form we can control what fields are available in the new and edit forms. We can, for instance, add the body field to attrs_for_form to make it appear in forms:
attrs_for_form :title, :body, :published
For quick prototyping, we could build the parameters this way (if appropriate).
attrs_for_show *Article.column_names
By now we have a basic admin interface for managing articles.
Resources
As we saw in the example above, resources are divided into controllers and service objects. Actions, redirects, params permitting etc go in the controller while resource fetching, building, sorting, filtering etc go in the service object. This makes the service objects small and easy to test.
We have already seen three methods at play: attrs_for_index, attrs_for_show and attrs_for_form. We will now look at some additional resource concepts.
Scopes
Scopes are a way of sectioning resources, useful for quick navigation, and can be created as follows:
class ArticleService
  include Godmin::Resources::ResourceService

  scope :unpublished, default: true
  scope :published

  def scope_unpublished(resources)
    resources.where(published: false)
  end

  def scope_published(resources)
    resources.where(published: true)
  end
end
Filters
Filters offer great flexibility when it comes to searching for resources, and can be created as follows:
class ArticleService
  include Godmin::Resources::ResourceService

  filter :title

  def filter_title(resources, value)
    resources.where("title LIKE ?", "%#{value}%")
  end
end
There are three types of filters: string, select and multiselect, specified using the as parameter.
When using select or multiselect, a collection must be specified. The collection must conform to the format used by Rails options_for_select helpers. It can be either an array consisting of name/value tuples, or a collection of ActiveRecords.
filter :category, as: :select, collection: -> { [["News", 1], ["Posts", 2]] }
When specifying a collection of ActiveRecords, two additional parameters, option_text and option_value can be specified. They default to to_s and id respectively.
filter :category, as: :select, collection: -> { Category.all }, option_text: "title"
Batch actions
Batch actions can be created as follows:
class ArticleService
  include Godmin::Resources::ResourceService

  batch_action :publish
  batch_action :unpublish
  batch_action :destroy, confirm: true

  def batch_action_publish(resources)
    resources.each(&:publish!)
  end
end
In addition, batch actions can be defined per scope using only and except:
batch_action :publish, only: [:unpublished]
batch_action :unpublish, only: [:published]
If you wish to implement your own redirect after a batch action, it needs to be implemented in the controller:
class ArticlesController < ApplicationController
  include Godmin::Resources::ResourceController

  private

  def redirect_after_batch_action_publish
    articles_path(scope: :published)
  end
end
If you are using Godmin's built in authorization functionality you must authorize your batch actions in your policy.
Custom ordering
By default, Godmin supports ordering of database columns in the index view table. However, it cannot automatically sort associations, custom attributes and so on. If you want to order something that Godmin doesn't support out of the box, or you just want to customize how a columns is ordered, you can implement your own or
Related Skills
node-connect
347.9kDiagnose OpenClaw node connection and pairing failures for Android, iOS, and macOS companion apps
frontend-design
108.7kCreate distinctive, production-grade frontend interfaces with high design quality. Use this skill when the user asks to build web components, pages, or applications. Generates creative, polished code that avoids generic AI aesthetics.
openai-whisper-api
347.9kTranscribe audio via OpenAI Audio Transcriptions API (Whisper).
qqbot-media
347.9kQQBot 富媒体收发能力。使用 <qqmedia> 标签,系统根据文件扩展名自动识别类型(图片/语音/视频/文件)。
