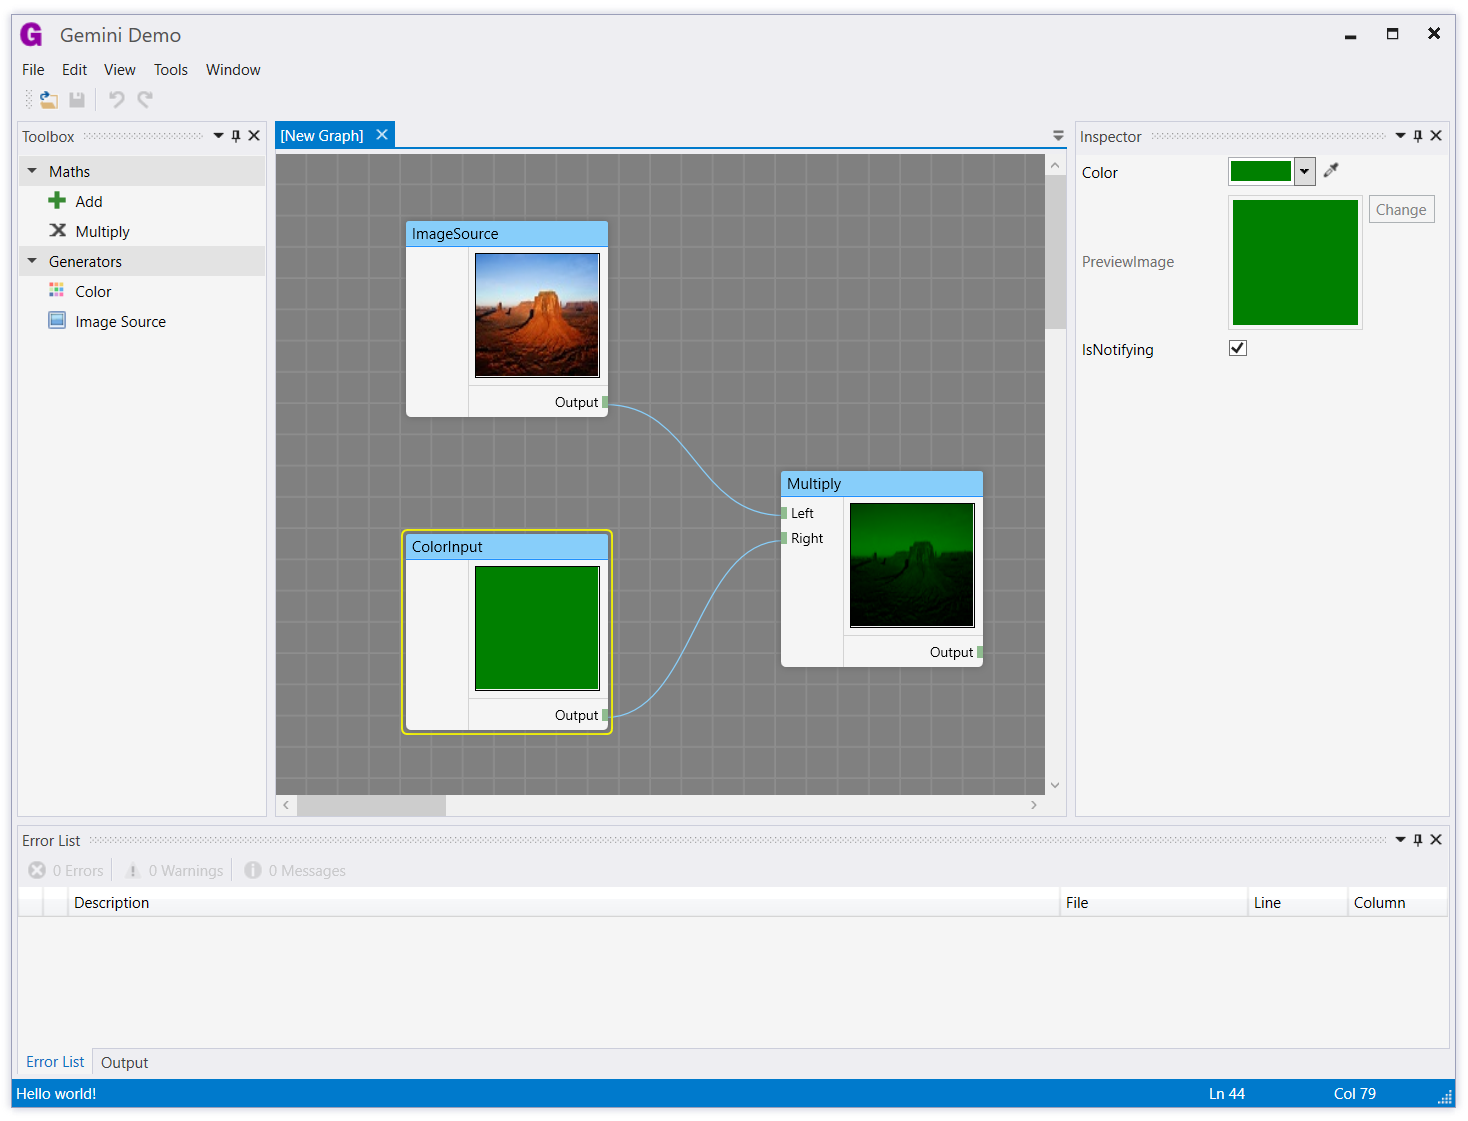
Gemini
Gemini is an IDE framework similar in concept to the Visual Studio Shell. It uses AvalonDock and has an MVVM architecture based on Caliburn Micro.
Install / Use
/learn @tgjones/GeminiREADME
Gemini 


Gemini is a WPF framework designed specifically for building IDE-like applications. It builds on some excellent libraries:
- AvalonDock (specifically Dirkster99's fork, because it supports .NET Core)
- Caliburn Micro
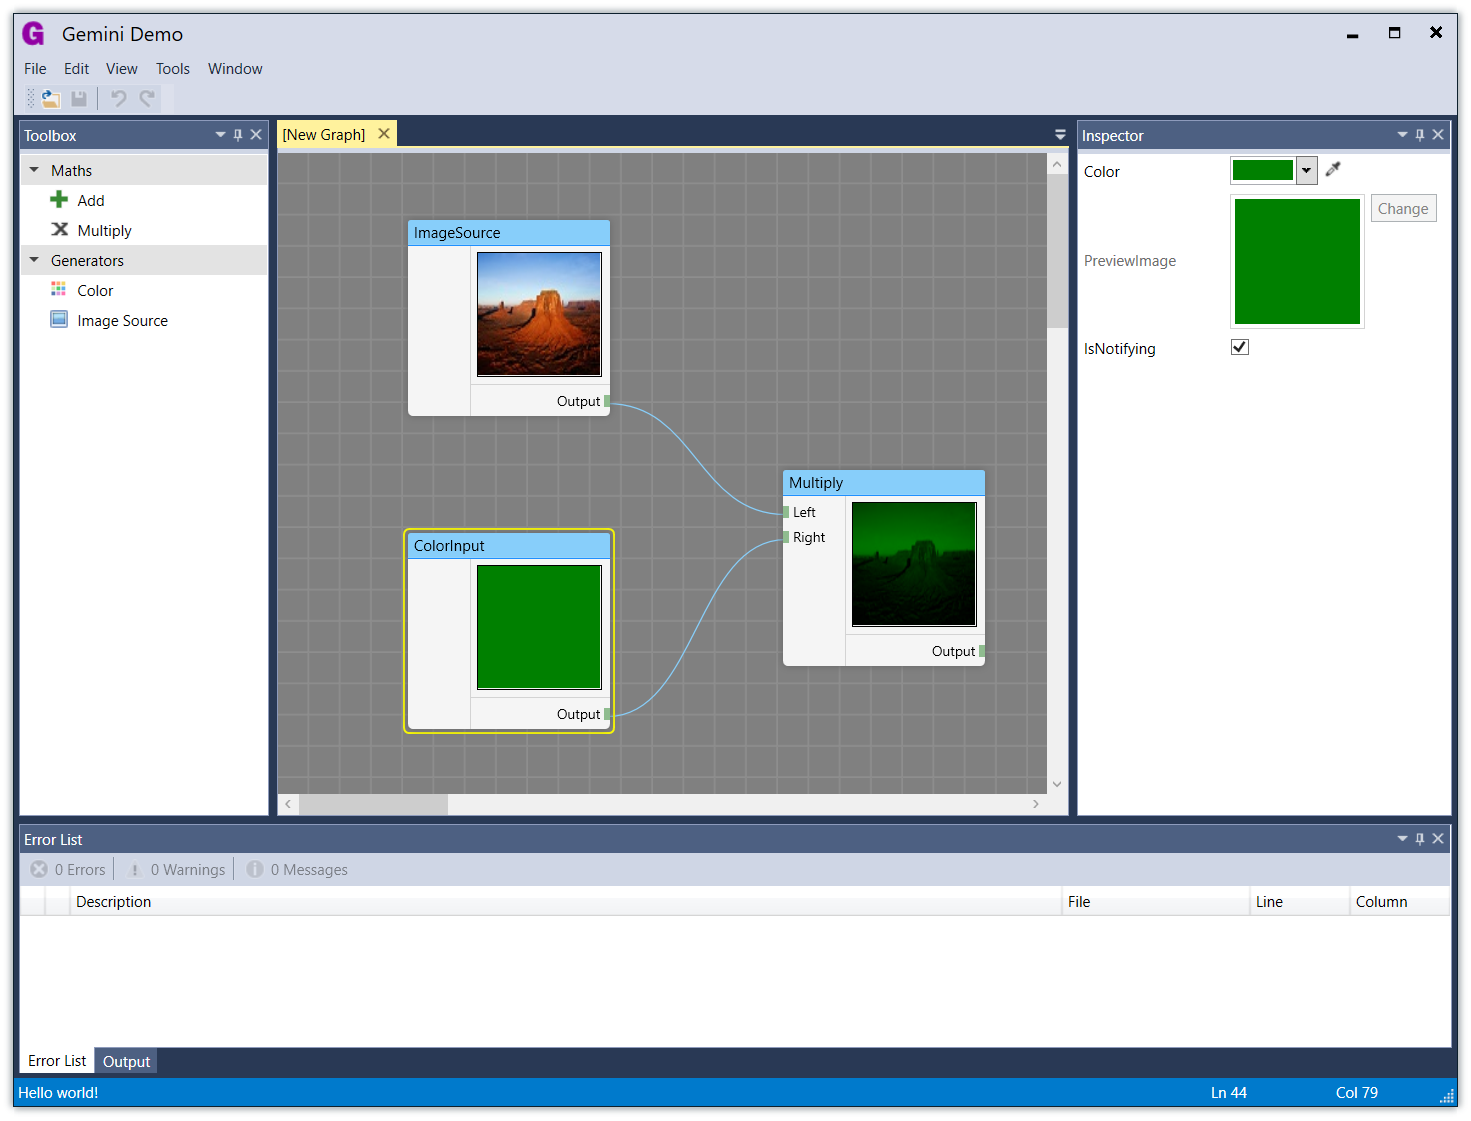
Gemini ships with two themes: a Light theme and a Blue theme. There is also an in-development Dark theme.
Getting started
If you are creating a new WPF application, follow these steps:
- Install the Gemini NuGet package.
- Delete
MainWindow.xaml- you don't need it. - Open
App.xamland delete theStartupUri="MainWindow.xaml"attribute. - Add
xmlns:gemini="http://schemas.timjones.tw/gemini"toApp.xaml. - Add
<gemini:AppBootstrapper x:Key="bootstrapper" />to aResourceDictionarywithin<Application.Resources>.
So the whole App.xaml should look something like this:
<Application x:Class="Gemini.Demo.App"
             xmlns="http://schemas.microsoft.com/winfx/2006/xaml/presentation"
             xmlns:x="http://schemas.microsoft.com/winfx/2006/xaml"
             xmlns:gemini="http://schemas.timjones.tw/gemini">
    <Application.Resources>
        <ResourceDictionary>
            <ResourceDictionary.MergedDictionaries>
                <ResourceDictionary>
                    <gemini:AppBootstrapper x:Key="bootstrapper" />
                </ResourceDictionary>
            </ResourceDictionary.MergedDictionaries>
        </ResourceDictionary>
    </Application.Resources>
</Application>
Now hit F5 and see a very empty application!
By far the easiest way to get started with Gemini is to use the various NuGet packages.
First, install the base Gemini package (note that the package ID is GeminiWpf, to
distinguish it from another NuGet package with the same name):
Then add any other modules you are interested in (note that some modules have dependencies on other modules, but this is taken care of by the NuGet package dependency system):
- Gemini.Modules.CodeCompiler
- Gemini.Modules.CodeEditor
- Gemini.Modules.ErrorList
- Gemini.Modules.GraphEditor
- Gemini.Modules.Inspector
- Gemini.Modules.Output
- Gemini.Modules.PropertyGrid
Continuous builds
We use AppVeyor to build Gemini after every commit to the master branch, and also to generate pre-release NuGet packages so you can try out new features immediately.
To access the pre-release NuGet packages, you'll need to add a custom package source in Visual Studio, pointing to this URL:
https://ci.appveyor.com/nuget/gemini-g84phgw340sm
Make sure you select "Include Prerelease" when searching for NuGet packages.
What does it do?
Gemini allows you to build your WPF application by composing separate modules. This provides a nice way of separating out the code for each part of your application. For example, here is a very simple module:
[Export(typeof(IModule))]
public class Module : ModuleBase
{
	[Import]
	private IPropertyGrid _propertyGrid;

    public override IEnumerable<Type> DefaultTools
    {
        get { yield return typeof(IInspectorTool); }
    }

	public override void Initialize()
	{
		var homeViewModel = IoC.Get<HomeViewModel>();
		Shell.OpenDocument(homeViewModel);

		_propertyGrid.SelectedObject = homeViewModel;
	}

	private IEnumerable<IResult> OpenHome()
	{
		yield return Show.Document<HomeViewModel>();
	}
}
Documents
Documents are (usually) displayed in the main area in the middle of the window. To create a new document
type, simply inherit from the Document class:
public class SceneViewModel : Document
{
	public override string DisplayName
	{
		get { return "3D Scene"; }
	}

	private Vector3 _position;
	public Vector3 Position
	{
        get { return _position; }
        set
        {
            _position = value;
            NotifyOfPropertyChange(() => Position);
        }
	}
}
To open a document, call OpenDocument on the shell (Shell is defined in ModuleBase, but you can also
retrieve it from the IoC container with IoC.Get<IShell>()):
Shell.OpenDocument(new SceneViewModel());
You can then create a SceneView view, and Caliburn Micro will use a convention-based lookup to find the correct view.
Persisted documents
If you have a document that needs to be loaded from, and saved to, a file, you can use the PersistedDocument
base class, to remove a lot of the boilerplate code that you would usually have to write. You only need to
implement the DoNew, DoLoad, and DoSave methods.
public class EditorViewModel : PersistedDocument
{
	private EditorView _view;
	private string _originalText;

	protected override Task DoNew()
	{
		_originalText = string.Empty;
		ApplyOriginalText();
		return TaskUtility.Completed;
	}

	protected override Task DoLoad(string filePath)
	{
		_originalText = File.ReadAllText(filePath);
		ApplyOriginalText();
		return TaskUtility.Completed;
	}

	protected override Task DoSave(string filePath)
	{
		var newText = _view.textBox.Text;
		File.WriteAllText(filePath, newText);
		_originalText = newText;
		return TaskUtility.Completed;
	}

	private void ApplyOriginalText()
	{
		_view.textBox.Text = _originalText;

		_view.textBox.TextChanged += delegate
		{
			IsDirty = string.Compare(_originalText, _view.textBox.Text) != 0;
		};
	}

	protected override void OnViewLoaded(object view)
	{
		_view = (EditorView) view;
	}
}
Tools
Tools are usually docked to the sides of the window, although they can also be dragged free to become floating windows. Most of the modules (ErrorList, Output, Toolbox, etc.) primarily provide tools. For example, here is the property grid tool class:
[Export(typeof(IPropertyGrid))]
public class PropertyGridViewModel : Tool, IPropertyGrid
{
	public PropertyGridViewModel()
	{
		DisplayName = "Properties";
	}

	public override PaneLocation PreferredLocation
	{
		get { return PaneLocation.Right; }
	}

	private object _selectedObject;
	public object SelectedObject
	{
		get { return _selectedObject; }
		set
		{
			_selectedObject = value;
			NotifyOfPropertyChange(() => SelectedObject);
		}
	}
}
For more details on creating documents and tools, look at the demo program and the source code for the built-in modules.
Commands
Commands are one of the core concepts in Gemini. Commands help you to avoid duplicating code by letting you define command handlers in a single place, regardless of whether the command is invoked through a menu item, toolbar item, or other trigger. Gemini's commands are conceptually similar to WPF commands, but they are more powerful.
First, create a command definition. Here's Gemini command definition for opening files:
[CommandDefinition]
public class OpenFileCommandDefinition : CommandDefinition
{
	public const string CommandName = "File.OpenFile";

	public override string Name
	{
		get { return CommandName; }
	}

	public override string Text
	{
		get { return "_Open"; }
	}

	public override string ToolTip
	{
		get { return "Open"; }
	}

	public override Uri IconSource
	{
		get { return new Uri("pack://application:,,,/Gemini;component/Resources/Icons/Open.png"); }
	}

	[Export]
    public static CommandKeyboardShortcut KeyGesture = new CommandKeyboardShortcut<OpenFileCommandDefinition>(new KeyGesture(Key.O, ModifierKeys.Control));
}
Then, provide a command handler. You can do this in one of two ways. For global commands, that don't depend on a document context, create a global handler:
[CommandHandler]
public class OpenFileCommandHandler : CommandHandlerBase<OpenFileCommandDefinition>
{
	public override void Update(Command command)
	{
		// You can enable / disable the command here with:
		// command.Enabled = true;

		// You can also modify the command text / icon, which will affect
		// any menu items or toolbar items bound to this command.
	}

	public override async Task Run(Command command)
	{
		// ... implement command handling here
	}
}
For commands that depend on a document context, and should be disabled when there is no active document or the active document is not of the correct type, define the command in the document class:
public class MyDocument : Document, ICommandHandler<ClearTextCommandDefinition>
{
	void ICommandHandler<ClearTextCommandDefinition>.Update(Command command)
	{
		command.Enabled = this.Text.Any();
	}

	Task ICommandHandler<ClearTextCommandDefinition>.Run(Command command)
	{
		this.Text = string.Empty;
		return TaskUtility.Completed;
	}
}
To remove built-in keyboard shortcuts, you can exclude them declaratively:
[Export]
public static ExcludeCommandKe
Related Skills
node-connect
343.1kDiagnose OpenClaw node connection and pairing failures for Android, iOS, and macOS companion apps
frontend-design
90.0kCreate distinctive, production-grade frontend interfaces with high design quality. Use this skill when the user asks to build web components, pages, or applications. Generates creative, polished code that avoids generic AI aesthetics.
openai-whisper-api
343.1kTranscribe audio via OpenAI Audio Transcriptions API (Whisper).
qqbot-media
343.1kQQBot 富媒体收发能力。使用 <qqmedia> 标签,系统根据文件扩展名自动识别类型(图片/语音/视频/文件)。
