Cef168
EF & EF-S Lens Controller for Raspberry Pi® Camera – Canon® Lens Compatible
Install / Use
/learn @pinefeat/Cef168README
EF & EF-S lens controller for Raspberry Pi® Camera – Canon® Lens Compatible
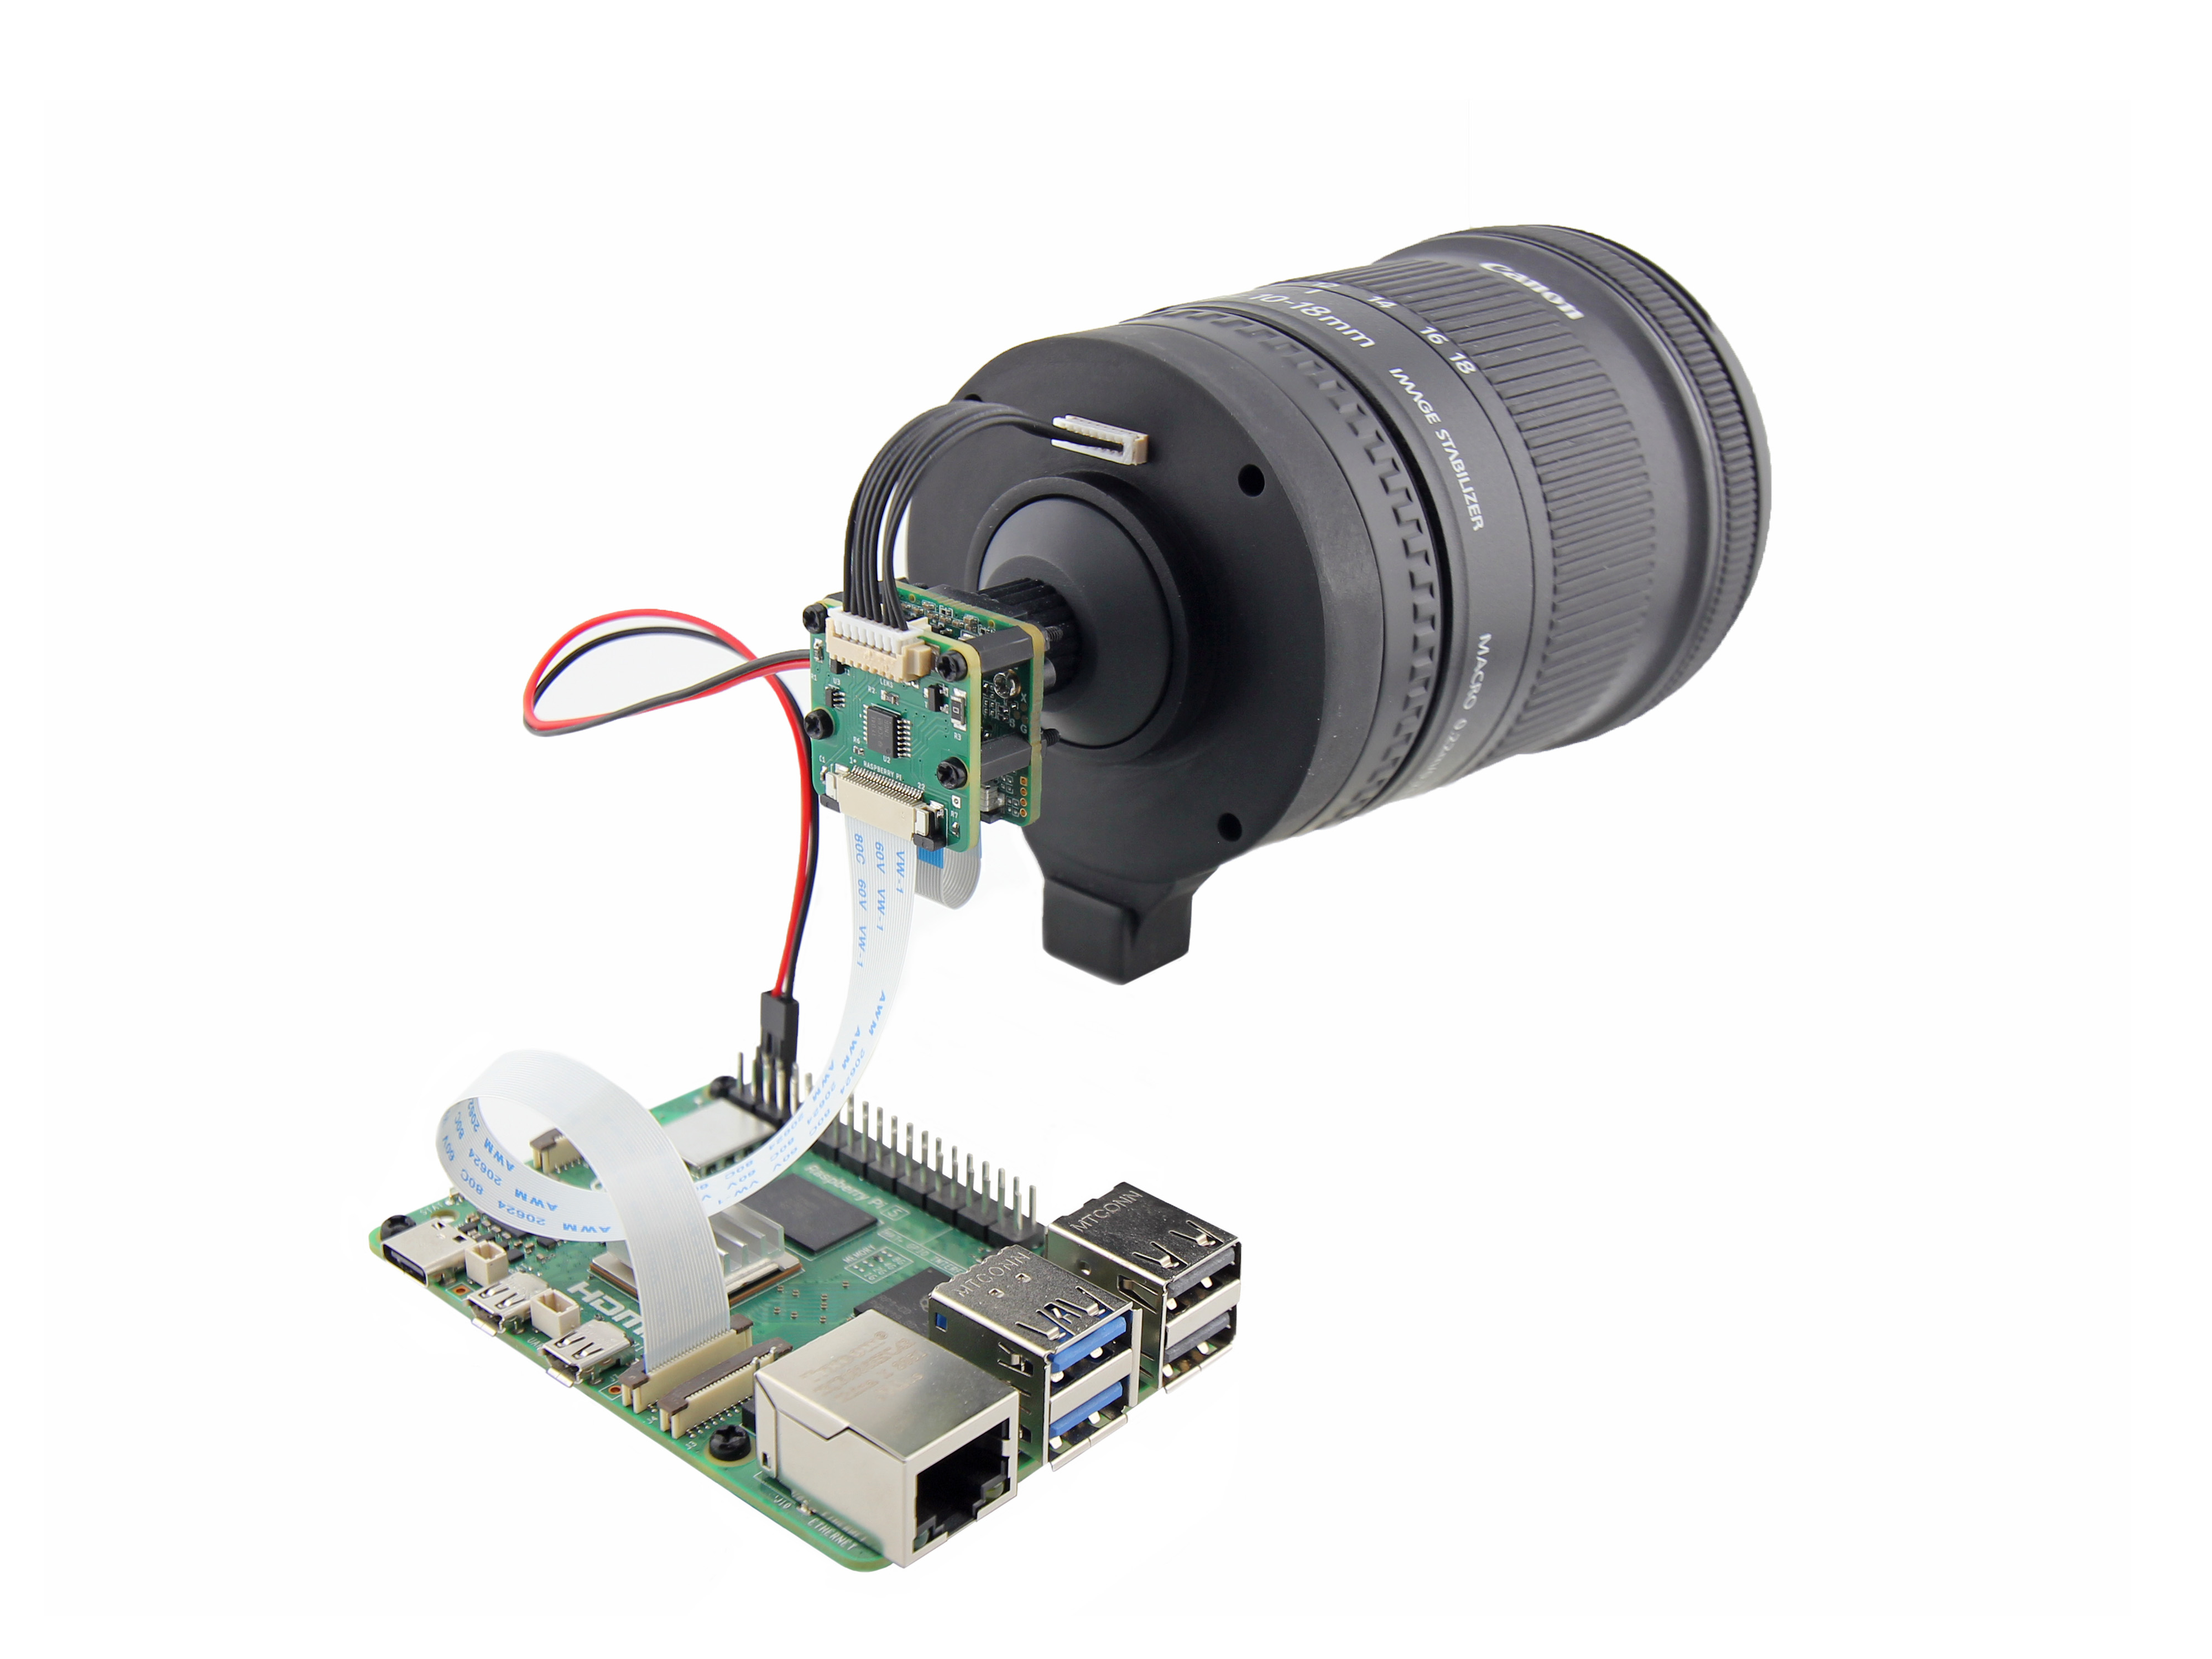
Pinefeat produces the adapter designed to interface between Canon EF & EF-S lenses and non-Canon camera bodies, incorporating features for electronic focus and aperture adjustments. Circuit board cef168, that comes with the adapter, provides software programming interface allowing control of the lens focus and aperture positions.
This repository contains kernel driver, configuration and calibration tools that allow you to use the adapter with Raspberry Pi Camera.
The solution allows you to mount Canon EF or EF-S lens onto the Raspberry Pi High Quality Camera and have features like autofocus and aperture control available in rpicam-apps, libcamera or V4L2 (Video4Linux2) API.
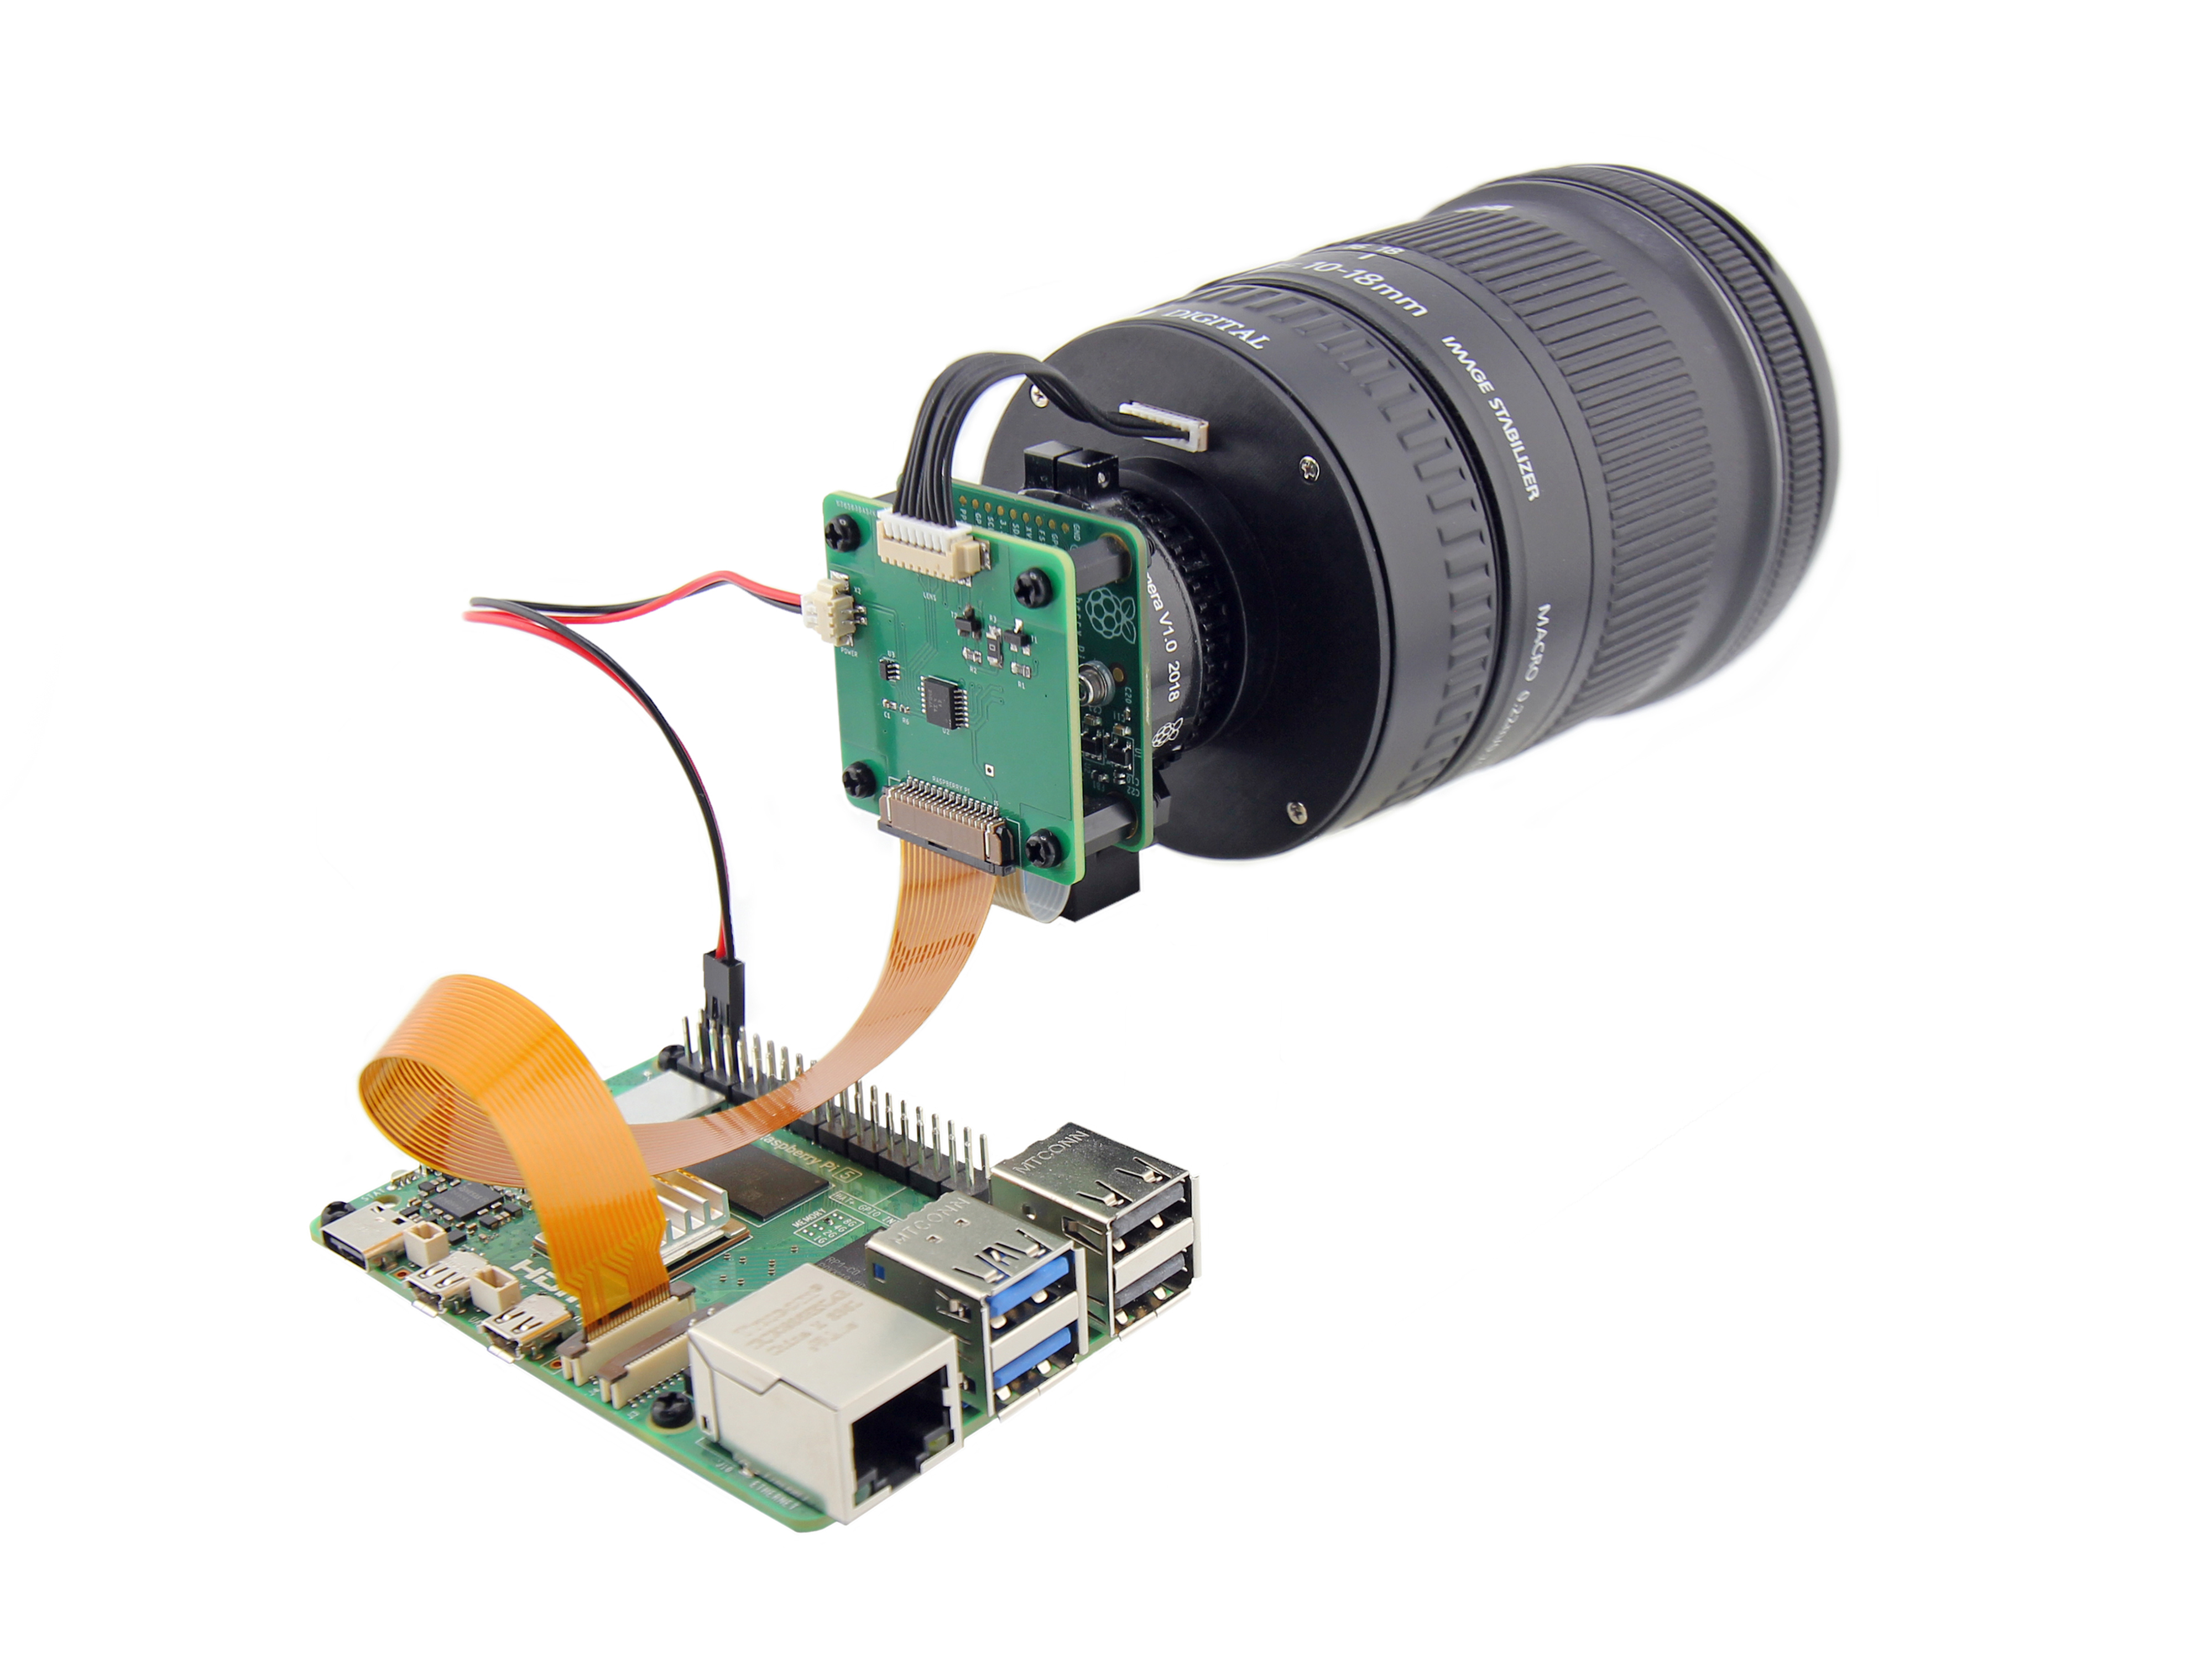
Raspberry Pi cameras use libcamera as their primary driver and API to interact with the Linux system. This lens controller driver integrates into libcamera stack, communicating with the lens hardware through the I2C bus.
Table of contents
- Disclaimer
- Assembly
- Quick test
- Installation
- Calibration
- Tuning
- Autofocus
- Aperture Control
- Serial Interface
- Helpful Hints
- Troubleshooting
Disclaimer
The adapter has electronic communication capabilities obtained by reverse engineering Canon’s communication protocol. While we have extensively tested the adapter with a variety of Canon lenses, compatibility cannot be guaranteed with all lens models, particularly given the numerous versions manufactured since 1987.
Due to potential firmware differences, electronic variations, and undiscovered incompatibilities, some lenses may not function as expected, resulting in limitations in autofocus or aperture control.
This product is provided as is, without any express or implied warranties regarding its compatibility with specific lenses. Pinefeat is not liable for any damage, malfunctions, or performance issues arising from its use.
Assembly
Theoretically, this solution supports any Raspberry Pi-compatible camera with a C/CS or M12 mount. In practice, compatibility depends on:
- CSI Connector Matching – The control board must have the same CSI connector as the camera module.
- Physical Alignment – The camera and control board must have compatible sizes and matching mount holes.
- Back Focus Length – The lens mount must provide the correct back focus distance for the Canon lens.
For tested and ready-to-use assemblies, refer to the PDF guides below. These include step-by-step instructions for attaching the lens controller, securing the camera module, and making electrical connections.
- Raspberry Pi High Quality Camera (CS Mount variant)
- Arducam IMX708 Camera Module (M12 Mount variant)
- OneInchEye Camera Board
To assemble the setup, 3D-print the following mount to hold all components together.
Ensure you follow the assembly guide carefully before proceeding with the setup and usage instructions in this manual.
Quick test
The adapter features a Self-Test Mode to verify focus and aperture communication with the lens.
To activate Self-Test Mode, ensure the Raspberry Pi is powered on and supplies power to the adapter, then toggle the AF/MF switch on the lens three times within 15 seconds. The control board will then run a test sequence:
- Focus Test: moves focus from minimum to infinity, then back to minimum in four steps.
- Aperture Test: closes the aperture fully, then reopens it gradually in four steps to the maximum aperture.
This sequence lasts for a few seconds and confirms that the control board is communicating correctly with the lens.
Keep in mind that STM lenses are designed to be very quiet, and their focus movements are often smooth and hard to notice. If you're unsure whether the motor is working, try placing your ear close to the lens to listen for engagement.
If the lens does not complete any part of this sequence and the issue persists after repeated attempts, it indicates that the lens and adapter are not fully compatible. In such cases, some or all electronic functions (focus and/or aperture control) may not operate reliably.
Note: Self-Test Mode does not affect any camera or lens settings and can be safely repeated at any time.
Installation
Make sure you've installed Raspberry PI OS 64-bit version. Do not install the 32-bit version, as it cannot build kernel drivers. The project is compatible only with the Raspberry Pi OS Bookworm version and does not support the legacy camera stack available in Bullseye and earlier Raspberry Pi OS releases.
1. Clone the repository and change the current directory:
git clone https://github.com/pinefeat/cef168.git
cd cef168
2. Run the following script and select the image sensor of your camera (imx477 for HQ Camera):
./configure.sh
⚠️ For newer sensors whose drivers and overlay files are not yet included in the Linux source tree, refer to this guide.
The script will download the device tree overlay files for your camera from the Raspberry Pi Git repository, corresponding to your Raspberry Pi firmware version. It will then adjust the overlays to add the lens node. The lens is controlled via the I2C bus, and the kernel needs to load the lens driver. Make sure the script output confirms that the All overlays files were updated successfully.
3. Compile and install the kernel driver and the overlay:
make
sudo make install
The compiled overlay file is copied to /boot/firmware/overlays, with a backup created first (e.g., imx477.dtbo.~1~). If you need to revert the change, simply restore the backup file.
You will need to repeat this operation if you upgrade your Raspberry Pi firmware, as the overlay files are overwritten during the upgrade.
4. If you are using a camera other than the native Raspberry Pi High Quality Camera, you may need to disable automatic camera detection by setting camera_auto_detect=0 in /boot/firmware/config.txt, then add one of the overlays:
| Camera sensor | Line in /boot/firmware/config.txt |
|---------------|-------------------------------------|
| imx219 | dtoverlay=imx219,vcm |
| imx283 | dtoverlay=imx283 |
| imx296 | dtoverlay=imx296 |
| imx477 | dtoverlay=imx477 |
| imx519 | dtoverlay=imx519 |
| imx708 | dtoverlay=imx708 |
| ov5647 | dtoverlay=ov5647,vcm |
| ov9281 | dtoverlay=ov9281 |
If you want to enable the camera with the lens on the cam0 port of Raspberry Pi 5, please make the following modification: dtoverlay=imx477,cam0.
5. Reboot Raspberry Pi.
Calibration
The autofocus algorithm implemented in libcamera is responsible for controlling the lens driver. It requires knowledge of the minimum and maximum possible lens positions, as well as the piecewise linear (PWL) function that relates inverse distance to the hardware lens setting. These parameters depend on the specific lens, which is why calibration is required.
Many Canon lenses are zoom lenses, meaning their focal length can be adjusted. For example, a 10–18mm zoom lens allows you to go from a wide-angle view (10mm) to a more standard view (18mm). The parameters required by the algorithm may vary when the lens's focal length changes, so calibration may need to be repeated after such adjustments.
The calibration procedure produces the parameters that must be included in the camera tuning file.
To detect the lens V4L2 sub-device, set the following environment variables in your terminal or add them to your ~/.bashrc or ~/.profile file:
export DEV_MEDIA=$(v4l2-ctl --list-devices | awk '/unicam|rp1-cfe/ {found=1} found && /\/dev\/media/ {print; exit;}')
export DEV_LENS=$(media-ctl -d $DEV_MEDIA -p | awk '/entity.*cef168.*-000d/ {found=1} found && /\/dev\/v4l-subdev/ {print $4; exit;}')
Then reboot or run source ~/.bashrc (or source ~/.profile) to apply the changes.
Now perform the calibration:
./calibrate -d $DEV_LENS
The program will move the lens focus from minimum to infinity capturing focus position and focus distance at several points. The output should look as follows:
------------------------------------------------------------
Parameters for "rpi.af" section of camera tuning JSON fi
