Gistpad
📘 VS Code extension for managing and sharing code snippets, notes and interactive samples using GitHub Gists
Install / Use
/learn @lostintangent/GistpadQuality Score
Category
Development & EngineeringSupported Platforms
README
GistPad 📘
GistPad is a Visual Studio Code extension that allows you to edit GitHub Gists and repositories from the comfort of your favorite editor. You can open, create, delete, fork, archive, and star gists/repositories, and then seamlessly begin editing files as if they were local, without ever cloning, pushing or pulling anything. It's like your very own developer library for building and referencing code snippets, commonly used config/scripts, programming-related notes, knowledge bases and interactive samples.
<img src="https://user-images.githubusercontent.com/116461/69910156-96274b80-13fe-11ea-9be4-d801f4e9c377.gif" width="750px" />🏃 Getting Started
-
Install this extension from the marketplace, then run
Developer: Reload Window. -
Open the
GistPadtab (look for the notebook icon in the activity bar). From there, you can open a gist or GitHub repo by ID/URL, or sign in with a GitHub account in order to manage your gists and repositories. To sign-in, simply click theSign Inbutton and follow the provided flow in order to authenticate with your GitHub account.
From here, you can create and edit gists, repositories, wikis and runnable code samples. And in addition to doing this from the Gists tree view, you can also do it from Copilot chat (thanks to a built-in MCP server). Have fun, and let us know how we can make your knowledge-management experience even more awesome! 🙌
<details open> <summary><h2> ✍️ Gist Management</h2></summary>
In order to create a new gist, simply open the Gists tree in the GistPad tab, and click the + icon in the toolbar. Specify the description and files to seed it with (including support for directories!). Additionally, you can create gists from local files or snippets by right-clicking them in the Explorer tree, or by right-clicking an editor window/tab and selecting Copy File to Gist, Add Selection to Gist, or Paste Gist File Contents (details).
Alternatively, you can run the
GistPad: New GistandGistPad: New Secret Gistcommands.
From here, you can edit gists by expanding the gist and clicking on the desired file. You can open, rename, delete, etc. gists by right-clicking them in the tree and selecting the desired command.
Sorting and Grouping
By default, the Gists tree sorts gists by their update time, which allows you to focus on your most recently used gists. If you'd like to sort your gists alphabetically, click the Sort toggle button on the Gists tree's toolbar.
By default, your gists are displayed as a flat list. If you'd like to group them by type, you can click the group toggle button on the Gists tree's toolbar.
Gist Types
When grouping is enabled, gists are grouped into the following built-in types:
- note - Gists that are composed of nothing but
.txt,.md/.markdownor.adocfiles. - notebook - Gists that are composed of nothing but Jupyter Notebook files (
.ipynb). - code-swing - Gists that include either a
codeswing.jsonfile and/or anindex.htmlfile. Read more about swings here. - code-swing-template - Swings whose
codeswing.jsonfile sets thetemplateproperty totrue. Read more about swing templates here. - code-swing-tutorial - Swings whose
codeswing.jsonfile specifies atutorialproperty. Read more about tutorials here. - code-tour - Gists that include a
main.tourfile, and were created by exporting a CodeTour. - diagram - Gists that include a
.drawiofile. - flash-code - Gists that include a
.deckfile. - code-snippet - Gists that don't match any of the above more-specific types.
If you want to group gists by your own custom types, add a tag to the end of the gist's description in the format #tag or #tag-name. Then, when you enable grouping, your gists will be grouped by both the aforementioned types, as well as by your custom tags. You can identify tag groups by the # icon.
Files and Directories
When you create a gist with the New Gist or New Secret Gist commands, you can specify a comma-separated list of file names to seed the gist with. Furthermore, you can add / to your filenames to add them to a sub-directory within the gist.
For example, if you create a new gist, and specify reminders.txt,todos/personal.txt,todos/work.txt, the gist will include a reminders.txt file at the root of the gist, and files called personal.txt and reminders.txt in a directory called todos.
You can add new files to a gist or directory from the Explorer at any time by right-clicking them and selecting Add New File(s) or Upload File(s). You can also rename/delete directories as well, by right-clicking them in the tree and selecting the appropriate command. If you'd like to move a file from one directory to another, simply right-click the file, select Rename File and edit the directory name that it's in. It's that simple!
Archiving Gists
To help keep your gist list organized, you can archive gists that you want to keep but don't actively use. To archive a gist, simply right-click it in the Gists tree and select Archive Gist. Archived gists will appear in a separate Archived gists node at the bottom of the Gists tree view.
To unarchive a gist, right-click it in the Archived gists node and select Unarchive Gist. This will move it back to the main gist list. Additionally, archived gists can be edited/used/shared exactly like "regular" gists.
Gist Commenting
Gist comments are exposed within the editor at the bottom of open gist files. If a gist includes multiple files, then the comment thread will be displayed at the bottom of them all (duplicated and synchronized).
<img src="https://user-images.githubusercontent.com/116461/70118599-42467d80-161d-11ea-85eb-7f4cc6e4006b.gif" width="700px" />If you're not authenticated, you can view existing comments, but you can't reply to them. If you are authenticated, you can add/reply, as well as edit/delete your own comments. In order to control the behavior of how gist comment threads are displayed, refer to the GistPad > Comments: Show Thread config setting.
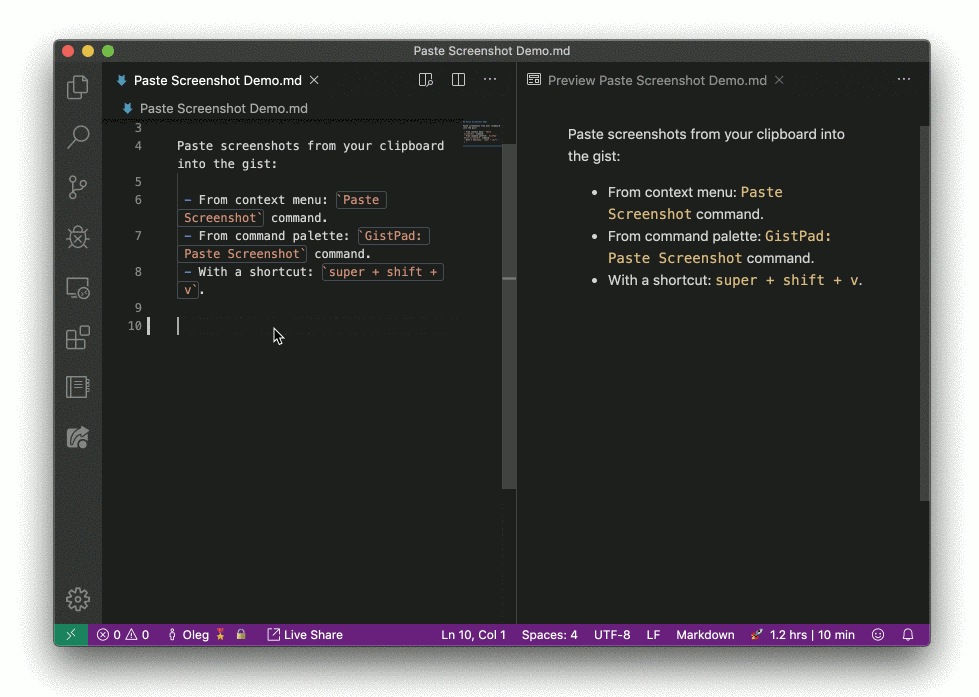
Pasting Images
In order to make it easy to author Markdown and HTML/Pug files that include image assets, you can copy images into your clipboard (e.g. taking a screenshot, clicking Copy Image in your browser, etc.) and then paste it directly into a gist file by right-clicking the editor and selecting Paste Image, or with ctrl + shift + v (Windows/Linux), or cmd + shift + v (macOS).
By default, when you paste an image into a gist file, it's uploaded as a .png to the gist, and the appropriate reference is added to it from the document (e.g. inserting an <img />). However, this behavior can be changed by using the GistPad > Images: Paste Format and/or GistPad > Images: Paste Type settings. Refer to the config settings section below for more details.
By default, when you paste an image, it is uploaded to a directory called images within the gist. However, if you'd like to change this (e.g. to assets instead), you can set the GistPad > Images: Directory Name setting.
Following Users
GitHub Gists already allows you to star other user's gists, and when you do that, those will appear in the Gists tree, underneath a Starred Gists node. However, if you want to follow a GitHub user, and easily browse all of their current and future gists (without having to star each one!), you can run the GistPad: Follow User command and specify their GitHub user name. Once you've done that, you'll see a new node in the Gists tree which displays all of their public gists, and allows you to open/fork/clone/star them just like any other gist.
Exporting to Repositories
At some point, your code/notes might outgrow the feature set offered by Gists (e.g. when you want to start collaborating on the content with other developers). When this occurs, you can simply right-click the gist, and select the Export to Repository command in order to create a new GitHub repository, that contains the content of your gist. The created repo will be public or private, depending on the public/private state of the exported gist.
Daily Notes
To make it easy to capture ephemeral/fleeting notes as you learn new things throughout the day, GistPad allows you to create "daily notes" by clicking the New daily note command under the Daily Notes node in the Gists tree (or running the GistPad: New Daily Note command). A daily note is simply a text document named by default for the time it was created.
By default, daily notes are Markdown documents, but you can customize that behavior (e.g. to create text/AsciiDoc/etc. files) by customizing the `GistPad > Daily
