Kint
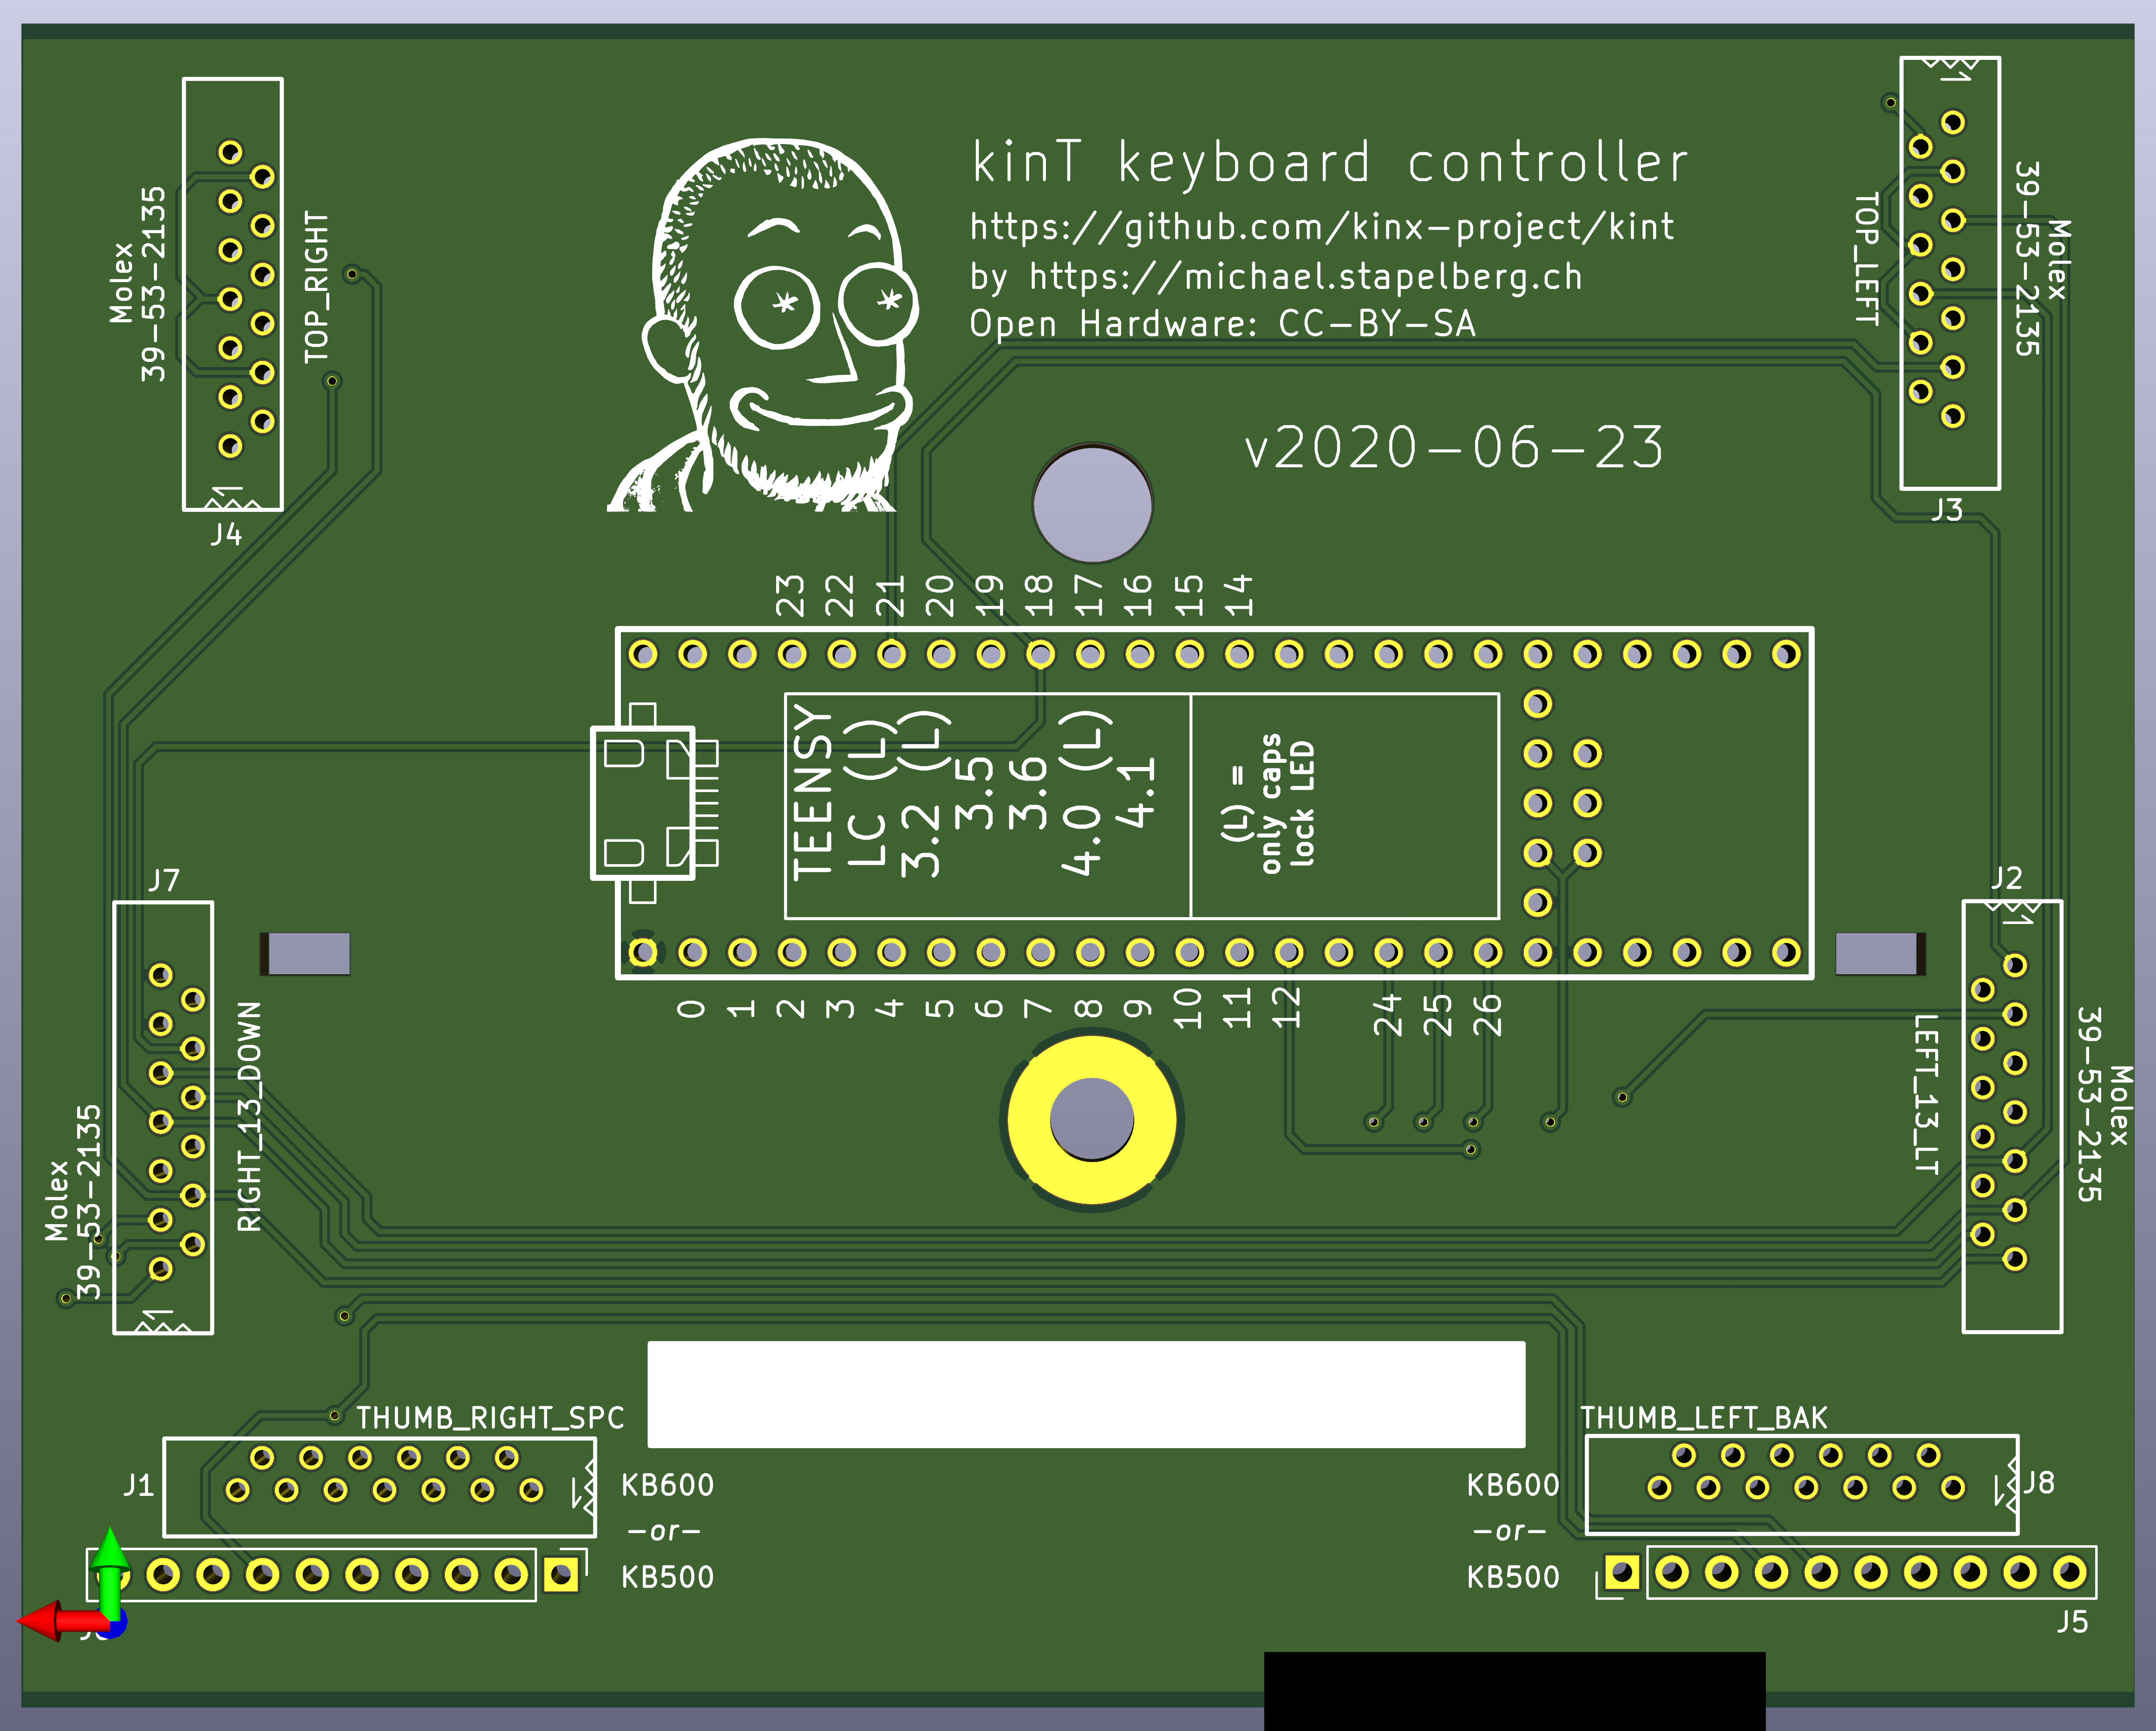
kinT keyboard controller (Kinesis controller replacement)
Install / Use
/learn @kinx-project/KintREADME
![]()
![]()
The kinT keyboard controller is a replacement for your Kinesis Advantage or Advantage 2 ergonomic keyboards.
You can use it for example…
- to build or modify your own keyboard
- to work around bugs in the standard controller
- to resurrect a keyboard with a failing Kinesis keyboard controller
- because you prefer to run open source software such as the QMK firmware, even on your keyboard
See also:
- My blog post introducing the kinT keyboard controller
- My twitch stream recording introducing the kinT keyboard controller
Quick overview
<table border="0" width="100%"> <tr> <td width="33%"> <img src="https://github.com/kinx-project/kint/raw/main/pcb-3d-render-front-v2021-06-26.png"> 3D render (front, LEDs) </td> <td width="33%"> <img src="https://github.com/kinx-project/kint/raw/main/pcb-3d-render-back-v2021-06-26.png"> 3D render (back, components) </td> <td width="33%"> <a href="https://github.com/kinx-project/kint/blob/main/schematic-v2021-06-26.pdf"><img src="https://github.com/kinx-project/kint/raw/main/thumbnail-schematic-v2021-06-26.jpg"></a> schematic </td> </tr> </table>Compatibility
The kinT keyboard controller was made for the Kinesis Advantage or Advantage 2 series.
The kinT keyboard controller is not compatible with the newer Kinesis Advantage 360 series, introduced in 2022, because the 360 is a split keyboard that uses an entirely different form factor for its electronics (Kinesis 360 teardown photos).
The kinT keyboard controller is also not compatible with very old Advantage keyboards, where the left and right keywell circuit boards plug directly into the controller. See issue #42 for details and pictures.
Building your own kinT keyboard controller
-
Follow “Buying the board and components (Bill of materials)”. When ordering from OSH Park (board) and Digi-Key (components), you’ll get the minimum quantity of 3 boards for 72 USD (24 USD per board), and one set of components for 49 USD.
- If you have any special requirements regarding which Teensy microcontroller to use, this is the step where you would replace the Teensy 3.6 with your choice.
-
Wait for the components to arrive. When ordering from big shops like Digi-Key or Mouser, this typically takes 2 days to many places in the world.
-
Wait for the boards to arrive. This takes 6 days in the best case when ordering from OSH Park with their Super Swift Service option. In general, the longer you are willing to wait, the cheaper it is going to get.
-
Follow the soldering guide. This will take about an hour.
Installing the kinT replacement controller in your Kinesis keyboard
After replacing your existing Kinesis controller with the kinT controller, you have some options with respect to the USB cable:
-
The easiest way is to remove the existing cable from the Kinesis keyboard, and use a regular USB cable instead (going through the existing hole in the case, no mod required).
-
If you want to keep using the existing Kinesis cable, you could build the kinX open hardware hub, which uses a compatible connector.
-
Another way is to cut open a USB cable and solder it onto the matching pins of the Kinesis cable. You can confirm the pinout in the hardware design files for the kinX hub. From issue #9, the 7-pin variant and the 9-pin variant.
-
And yet one more option is to use a right angle USB dashboard extension instead of the Kinesis cable as described in this issue #9 comment. You would then plug a regular USB cable into this extension.
Why use the kinT instead of the older replacement board?
-
The kinT supports both, the older Kinesis Advantage (KB500) and the newer Kinesis Advantage 2 (KB600) keyboards. They differ in how the thumb pads are connected. See the soldering instructions below.
- NOTE: If this is the only feature you’re interested in, and you already have a custom keyboard controller for your older Kinesis, check out the u6w5 adapter board I made!
-
The kinT is made for the newer Teensy 3.x and 4.x series, which will remain widely available for years to come, whereas the Teensy++ 2.0 is discontinued.
-
The kinT is a smaller PCB (4.25 x 3.39 inches, or 108.0 x 86.1 mm), which makes it:
-
more compact: can be inserted/removed without having to unscrew a key well.
-
cheaper: 72 USD for 3 boards at oshpark, instead of 81 USD.
-
-
The kinT silkscreen (front, back) and schematic are much much clearer, making assembly a breeze.
-
The kinT is a good starting point for your own project:
-
kinT was designed in the open source KiCad program, meaning you do not need any license subscriptions.
-
The clear silkscreen and schematic make development and debugging easier.
-
-
On the kinT, the Teensy no longer has to be soldered onto the board upside down.
-
On the kinT, the FPC connectors have been moved for less strain on the cables.
-
The kinT makes possible lower-cost builds: if you don’t need the scroll lock, num lock and keypad LEDs, you can use a Teensy LC for merely 11 USD.
Compatibility: which Teensy to use?
The kinT keyboard controller was made for the Teensy 3.x and 4.x series of devices, which are ARM based.
The older Atmel based Teensy++ 2.0 are also supported, but they require cutting one set of solder jumpers and closing a second set, to account for clashing pin assignments.
Which Teensy should you buy for your build? Here are a few considerations:
-
I have been using the Teensy 4.1 for many months without problems.
-
I used the Teensy 3.6 for multiple years, and many others are happy with it, too.
-
The Teensy++ 2.0 used to be the most popular choice, in part because it was the only option with the the predecessor keyboard controller. The Teensy++ 2.0 is discontinued, so I would no longer recommend it for new keyboard builds.
-
If you are an advanced user of the QMK firmware, note that despite QMK working on the Teensy 3.6, some features are not yet ported/working. As QMK was originally made for AVR micro controllers, you will likely find best overall QMK feature availability with the older Teensy++ 2.0.
Reference: full Teensy compatibility chart
TODO: add power consumption as a column. relevant for using the keyboard with a laptop on the go
| teensy | LEDs | Cost | input latency | clock speed | MCU | QMK | |----------------|------|--------|---------------|-------------|-------------|-----------------------------------------------------------------------| | teensy++ 2.0 | yes | $24.00 | 3.27ms | 16 MHz AVR | AT90USB1286 | 0.13.17 or newer | | ~~teensy 3.0~~ | no | | | 48 MHz M4 | MK20DX128 | untested | | ~~teensy 3.1~~ | no | | | | MK20DX256 | untested | | teensy LC | no | $11.65 | ? | 48 MHz M0+ | | development version | | teensy 3.2 | no | $19.80 | ? | 72 MHz M4 | | development version | | teensy 3.5 | yes | $24.25 | ? | 120 MHz M4F | MK64FX | unlikely (interest?) | | teensy 3.6 | yes | $29.25 | 1.97ms | 180 MHz M4F | MK66FX | 0.14.0 or newer | | teensy 4.0 | no | $19.95 | 0.9ms | 600 MHz M7 | MIMXRT1062 | 0.14.0 or newer | | teensy 4.1 | yes | $26.85 | 0.9ms | 600 MHz M7 | MIMXRT1062 | 0.14.0 or newer |
See [this blog post for more details on keyboard in
Related Skills
node-connect
349.7kDiagnose OpenClaw node connection and pairing failures for Android, iOS, and macOS companion apps
frontend-design
109.7kCreate distinctive, production-grade frontend interfaces with high design quality. Use this skill when the user asks to build web components, pages, or applications. Generates creative, polished code that avoids generic AI aesthetics.
openai-whisper-api
349.7kTranscribe audio via OpenAI Audio Transcriptions API (Whisper).
qqbot-media
349.7kQQBot 富媒体收发能力。使用 <qqmedia> 标签,系统根据文件扩展名自动识别类型(图片/语音/视频/文件)。

Security Score
Audited on Apr 5, 2026