NCAT
Flex 6xxx CAT via hamlib/rigctld protocol
Install / Use
/learn @kc2g-flex-tools/NCATREADME
Table of Contents
<!-- ABOUT THE PROJECT -->About The Project
We absolutely love our Flex radios! We just wish we had a Linux-native way to work with them so that Windows or Maestro isn't required.
nCAT enables you to present a hamlib interface to your Flex radio so that any hamlib-aware application can use it.
Built With
Getting Started
Connecting to an Existing GUI
If you have a Maestro, an "M" model radio, or a copy of SmartSDR or another GUI running somewhere, and you want nCAT to control (and be controlled by) that session, find that client's "station" name, and run
./nCAT -station Whatever
This mode will be familiar to those who have used CAT for Windows.
Headless mode
If you would like to create a new "headless" session, independent of any GUI client, run
$ ./nCAT -headless
Headless mode connects to the radio as a "GUI client", which means that it has its own slices and panadapters (even if you can't really see them), and counts towards the limit of 2 clients per radio.
In either case, a hamlib net protocol (rigctld) server will start on TCP port 4532.
Installation
- Download the latest binary using the Releases icon above or Releases
- Make it executible:
chmod +x nCAT
Usage
$ ./nCAT -h
Usage of ./nCAT:
  -headless
        run in headless mode
  -listen string
        hamlib listen [address]:port (default ":4532")
  -profile string
        global profile to load on startup for -headless mode
  -radio string
        radio IP address or discovery spec (default ":discover:")
  -slice string
        slice letter to control (default "A")
  -station string
        station name to bind to or create (default "Flex")
Multiple Instances
To run multiple nCAT instances, see scripts/multislice_startup.sh.
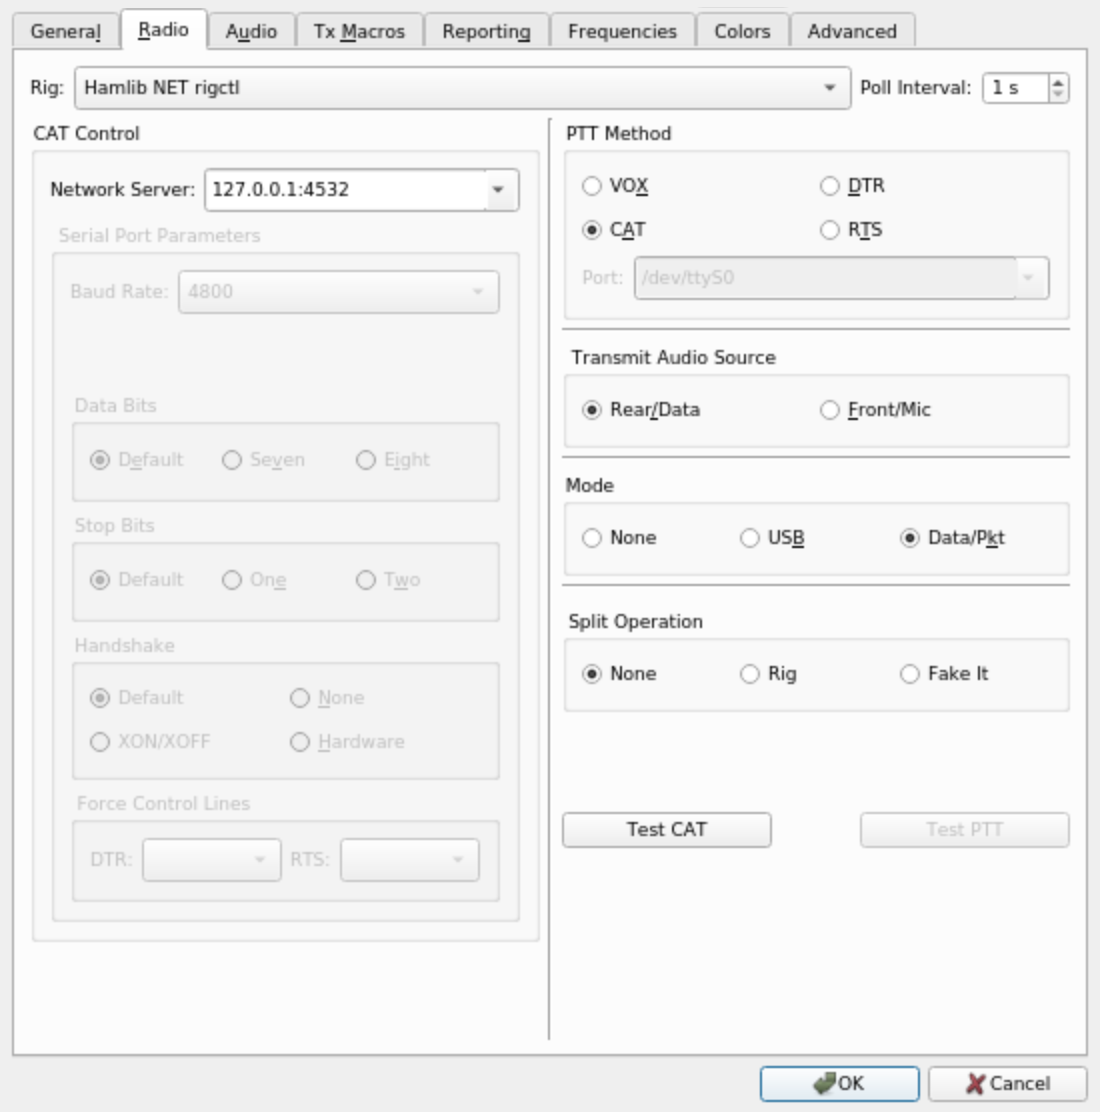
Using with WSJT-X
To setup WSJT-X with nCAT and hamlib, use the following settings:
Roadmap
See the open issues for a list of proposed features (and known issues).
<!-- CONTRIBUTING -->Contributing
Contributions are what make the open source community such an amazing place to be learn, inspire, and create. Any contributions you make are greatly appreciated.
- Fork the Project
- Create your Feature Branch (
git checkout -b feature/AmazingFeature) - Commit your Changes (
git commit -m 'Add some AmazingFeature') - Push to the Branch (
git push origin feature/AmazingFeature) - Open a Pull Request
License
MIT License. See LICENSE file.
