ICloudCoreDataStarter
Example Xcode swift iOS project for Core Data + iCloud syncing
Install / Use
/learn @jazzychad/ICloudCoreDataStarterREADME
iCloudCoreDataStarter
Hello, I'm Chad. For the last several months I have been working on Sticker Doodle, an app you should go download right now!
In the course of building Sticker Doodle (which you should go download right now), I ran into many brick walls and learned way too much about Core Data, iCloud sync, Collection and Table Views, and Diffable Data Sources.
There is documentation for each of those individually, but I could find no clear and simple example project that ties them all together in a neat little bow.
Well, that changes today.
DISCLAIMER: This repo is for educational purposes. While I believe that the code inside is production-ready, you should always read and thoroughly audit any code you ship in a production application.
This is an example Xcode iOS swift project that demonstrates using the following technologies:
- [X] Core Data
- [X] iCloud sync
- [X] Collection Views
- [X] Table Views
- [X] App Groups
It aims to implement a working app with the minimum amount of code to accomplish the following features:
- [X] UICollectionView/UITableView
- [X] ... using diffable data source
- [X] ... with Core Data's NSFetchedResultsController
- [X] Reloading cells on object update
- [X] Collection View cell context menu
- [X] Object insertion
- [X] Object deletion
- [X] Object updating
- [X] Collection View multi-selection toggling
- [X] Collection View drag-and-drop redording of objects
- [X] Syncing Core Data state between app and extensions (in real time)
- [X] iCloud syncing of Core Data between devices
- [X] Core Data value transformers
What this project is NOT:
- [ ] a Core Data tutorial
- [ ] an iCloud/CloudKit tutorial
- [ ] free tech support
Training
If you are interested in having a focused (paid) training session for your dev team about this topic, please contact:
support at jazzychad dot net
Prerequisites
- A moderate familiarity with how Core Data works and how to setup a Core Data database/model
- A moderate familiarity with setting up and dealing with iCloud containers
- The various configuration and settings screens in Xcode
SDK Requirements
This project uses only APIs availble in iOS 14 and earlier (i.e. there are no iOS 15 APIs present in this project).
Using this project
You should be able to clone this repo and compile/run the
iCloudCoreDataStarter scheme after setting your Development Team
in the Signing & Capabilities tab for the iCloudCoreDataStarter
and iMessageApp targets.
Building in the DEBUG configuration and using Automatically manage signing should allow you to run this example on simulators and local
development devices.
Provisioning for a RELEASE build is beyond the scope of this project.
Here We Go
For New Projects
If you are creating a new project and want to use Core Data and iCloud sync, make sure to check the two relevant boxes at the bottom of the dialog:
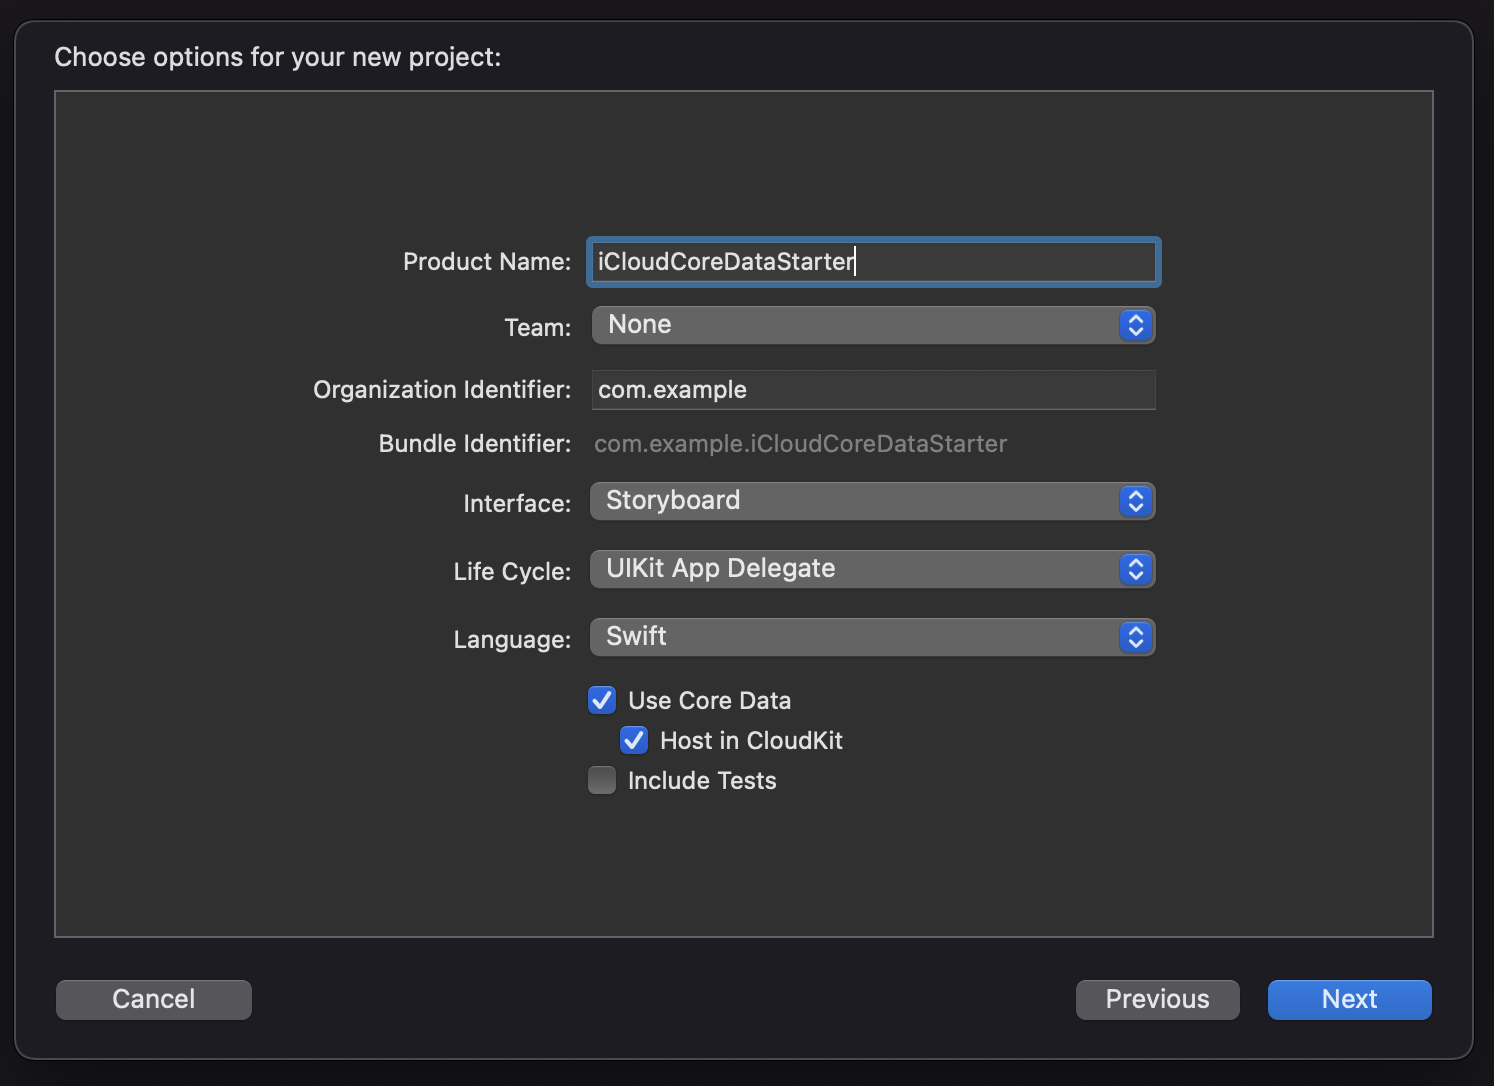
This has the advantage of creating the necessary .xcdatamodeld file
in your project to setup your database models, but it also creates
some boilerplate Core Data code in the AppDelegate which you can
remove if you plan on using the files in this example in other
projects.
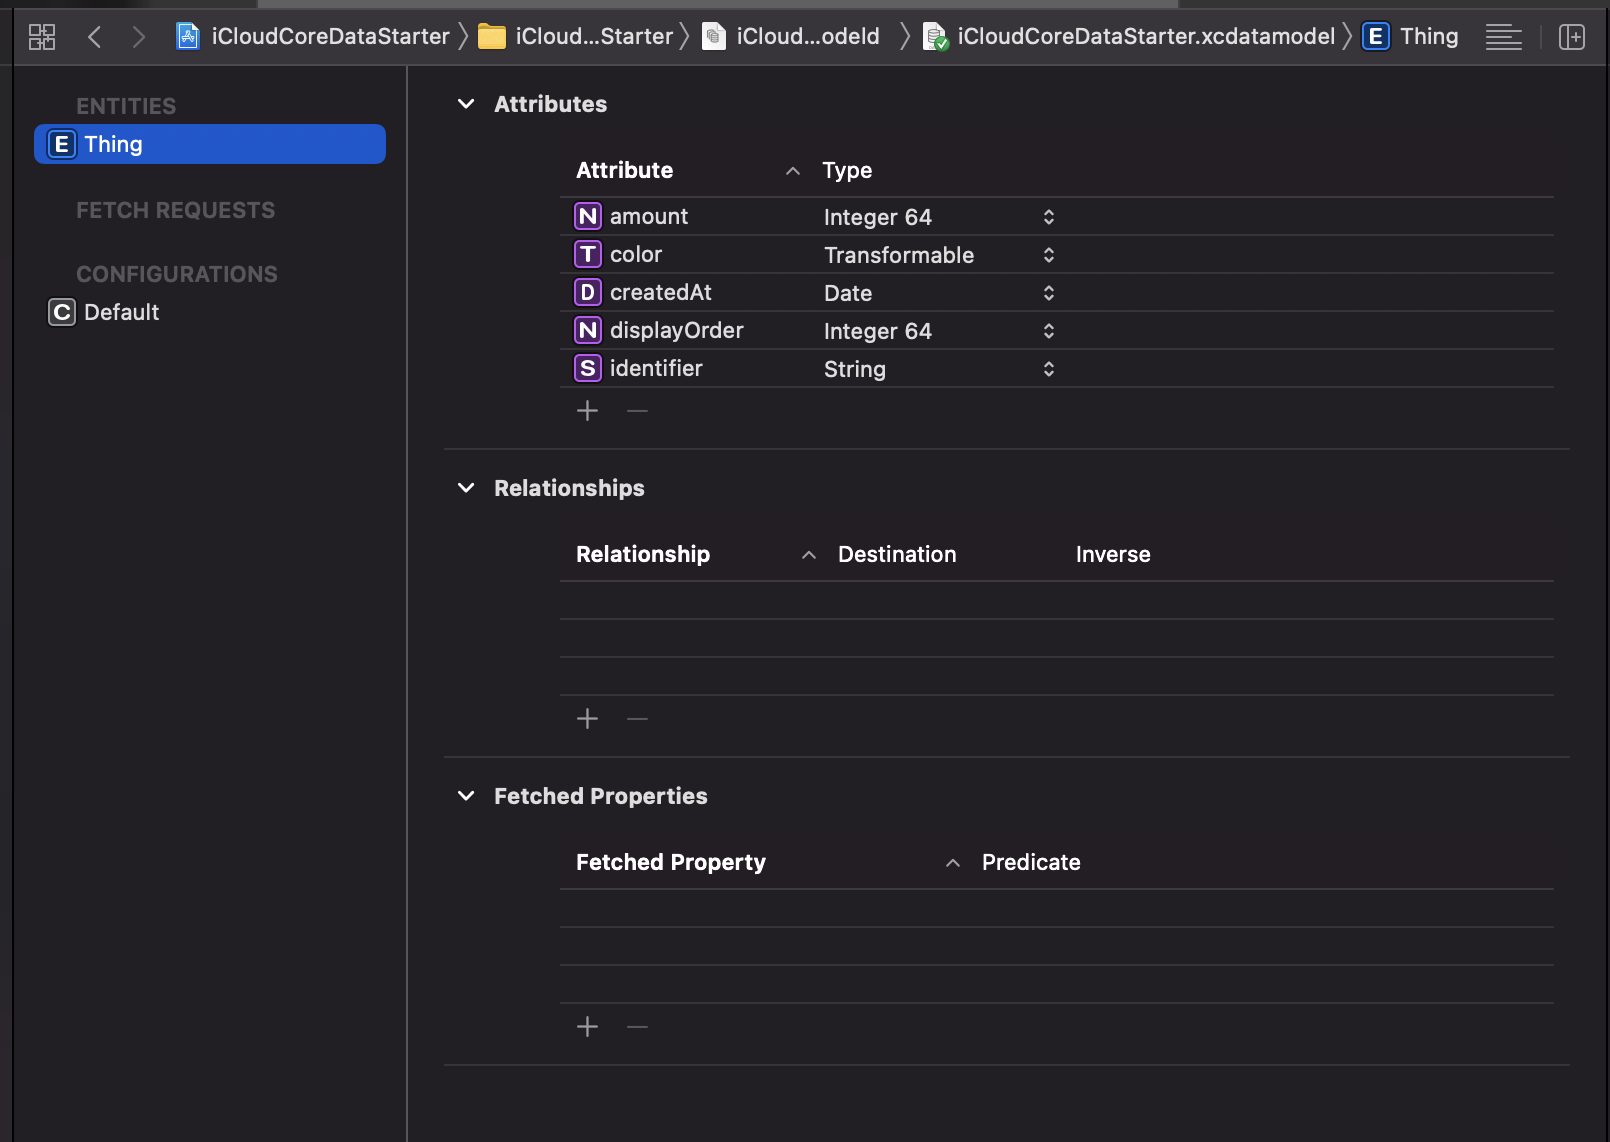
Core Data Model
In this example app, we are mainly concerned with the creation and
display of Thing objects. Things have two primary properties that
make a thing a thing:
amount: Int64- represents some quantity, I leave it up to your imaginationcolor: UIColor- makes the thing a little more visually appealing
Whenever I make a Core Data model, I always always always always add the following properties to it:
-
createdAt: Date- the date that this object was created (yes, there is also a creationDate field in the CKRecord object that backs this Core Data row, but in the cases where you are not backing your Core Data with iCloud, having this date readily available is extremely handy, so I have just made a habit of adding it). -
displayOrder: Int64- this is important for determining in what order to show objects in the UI and what we use to sort the fetch request (along with thecreatedAtdate). -
identifier: String- some unique identifier for the object. This could also be aUUIDinstead. This isn't strictly necessary in all use-cases, but it comes in really handy when you eventually run into a situation where you need to have it.
Our final example Thing model looks like this:
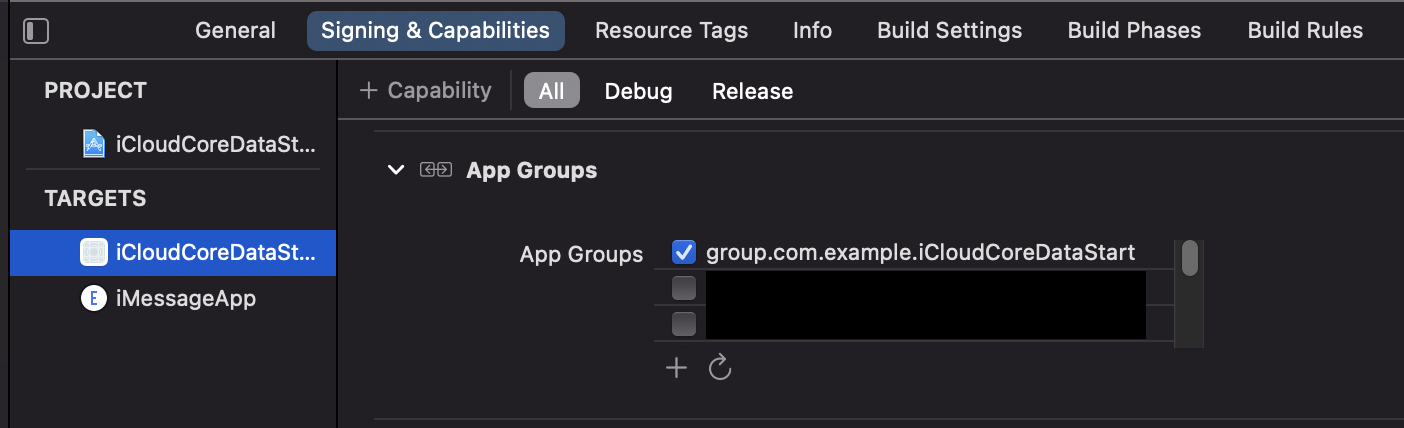
App Group
App Groups allow your apps and their extensions to (among other things) have a shared space on disk to read and write data. This is crucial for sharing data between apps and extensions, but it is especially good for sharing a Core Data store between apps and extensions.
An app group (group.com.example.iCloudCoreDataStarter) is created
and added to each app/extension target in the Signing & Capabilities
tab in Xcode.
App Group identifiers are scoped to your developer account, so you can use the one in this example project if you like.
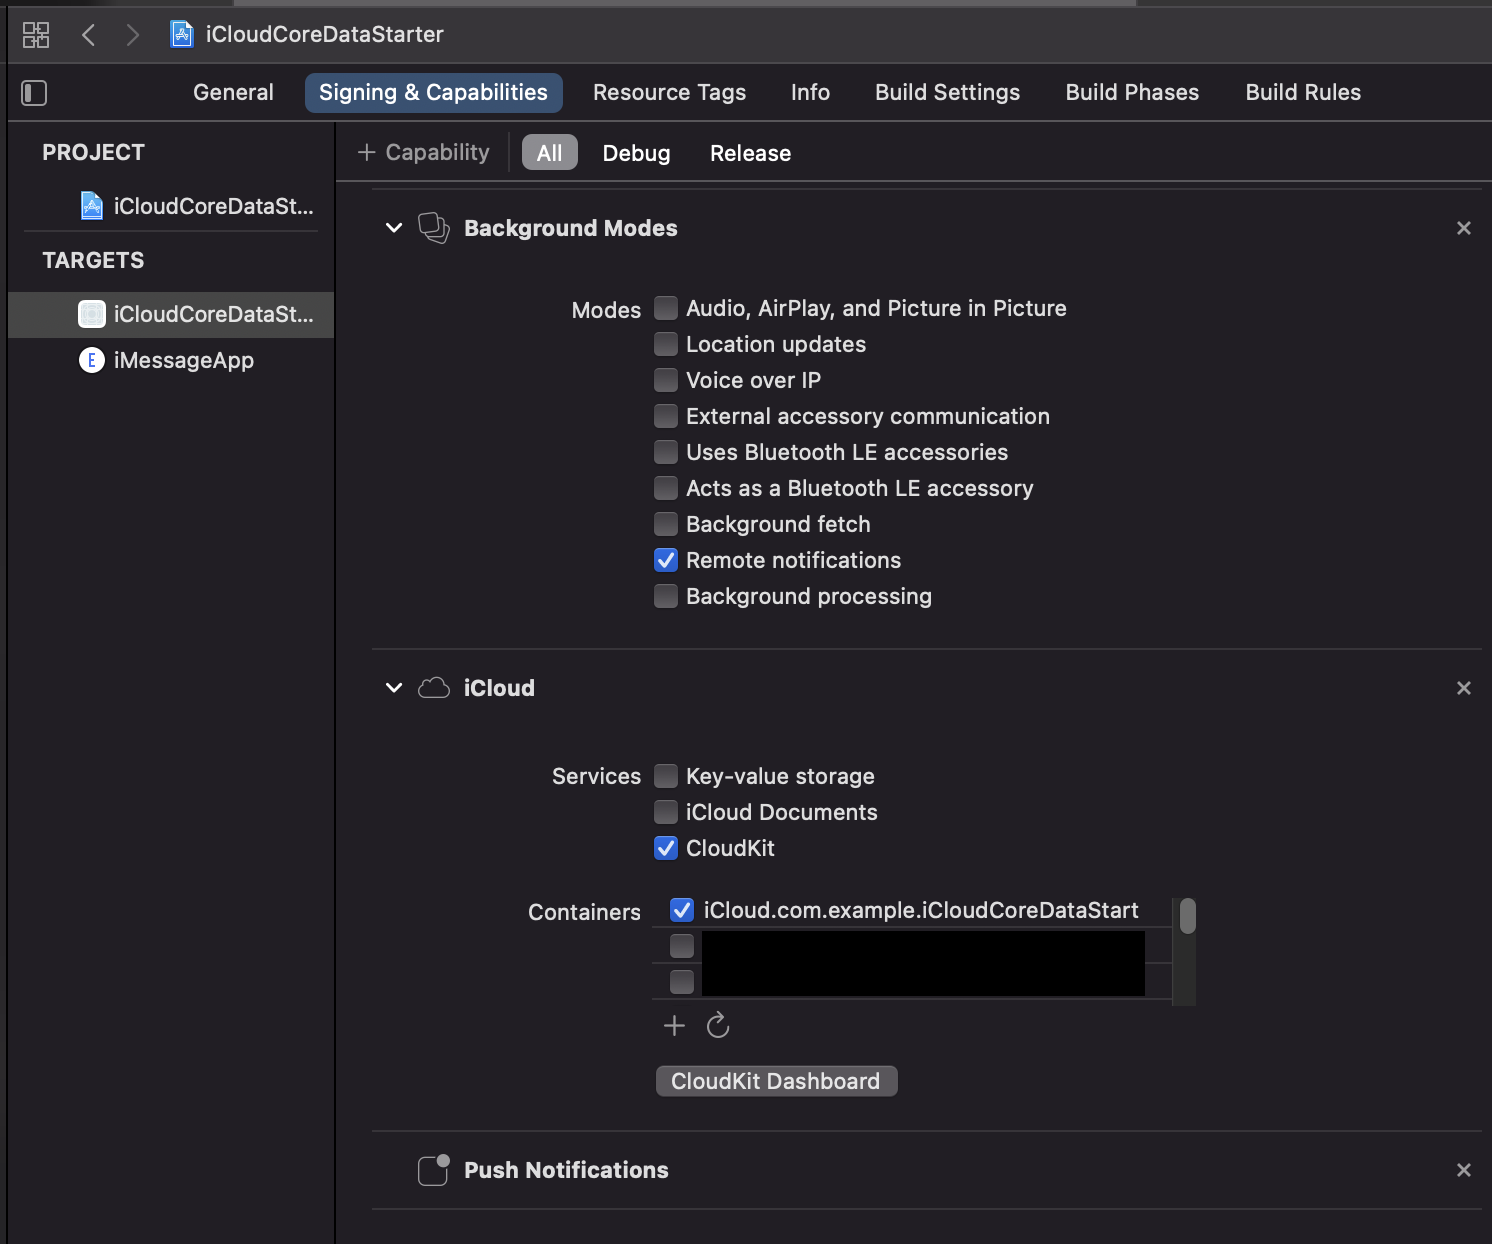
iCloud container
To enable iCloud sync for Core Data, you must create an iCloud
container (iCloud.com.example.iCloudCoreDataStarter.iCloud in this
example project) and enable the CloudKit service in the Signing & Capabilities tab in Xcode.
iCloud container identifiers are scoped to your developer account, so you can use the one in this example project if you like.
Adding CloudKit will typically also enable the Push Notification
capability for you. There is no other configuration you need to do
for push notifications to work with CloudKit - it just works.
However you will also need to add the Background Modes capability
in the Signing & Capabilities tab and select Remote notifications.
IMPORTANT!! Always remember to publish your iCloud container schema to Production before you publish your app to TestFlight or the App Store!!
Note about provisioning
Xcode will typically take care of creating the App Group and iCloud container and updating the provisioning profiles for you if you are building in Debug mode, but in a Release build you will probably need to create specific provisioning profiles for your apps/extensions that have the right entitlements.
CloudKit and Core Data logging
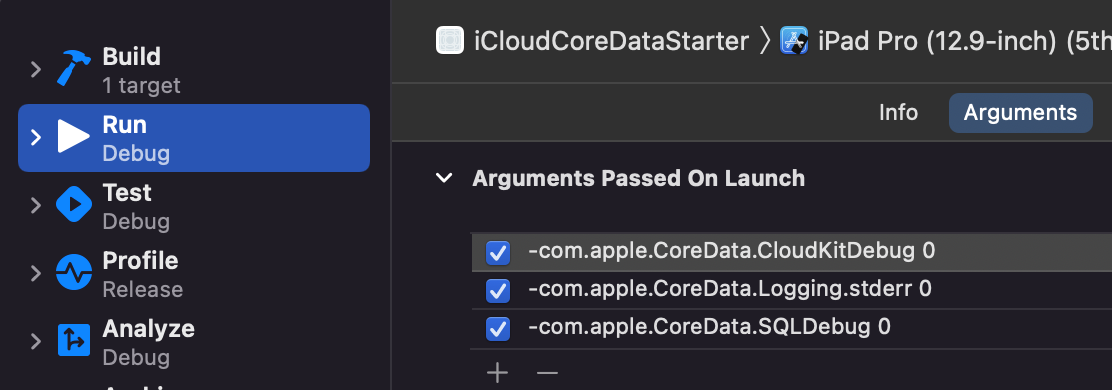
By default CloudKit will log a giant amount of information to the console and stderr. This can sometimes be useful to debug certain issues, but there is so much text that it will get in the way of other logging you may be doing in your app. You can suppress this output with the following Run Arguments in your Scheme:
-com.apple.CoreData.CloudKitDebug 0
-com.apple.CoreData.Logging.stderr 0
-com.apple.CoreData.SQLDebug 0
CoreDataStack
The bulk of the Core Data logic lives in the CoreDataStack folder of
the project. These files were designed and written such that there is
nothing specific about them to this example project, i.e. they could
be copied into another project and re-used as-is.
Let's take a look at what each file does:
CoreDataStack.swift
Handles the following jobs:
- [X] Provides a
CoreDataStack.sharedobject for dealing with Core Data objects throughout the app - [X] Create and configure an NSPersistentCloudKitContainer with appropriate settings
- [X] Creates the Core Data store file in the App Group on-disk location
- [X] Handles Core Data persistent history tracking and updating
Before using the CoreDataStack.shared object, you must provide a
configuration object which will add proper configuration to the Core
Data stack. As early as you can in your app/extension lifecycle, you
must call:
let config = CoreDataStackConfig(...)
configureCoreDataStack(withConfig: config)
The authorName property on CoreDataStack is also very
important. It is a way to tell which app/extension generated
transactions into the Core Data store. You must set this as early as
possible in the app/extension lifecycle. For example, in the main app:
CoreDataStack.shared.authorName = "app"
and in, for example, a Messages app extension:
CoreDataStack.shared.authorName = "iMessageApp"
The author name of the data store transactions help each process filter out which persistent history transactions need to be replayed into the current managed object context.
In this example project, you will see that both the configuration and
author name are set in
AppDelegate.application(_:didFinishLaunchingWithOptions:) in the
main app, and in the fetchedResultController initializer in
iMsgThingTableViewController of the Messages app extension.
Let's talk about the CoreDataStack.coerceObjectIds(managedObjects:)
function. In an ideal world, this method shouldn't be needed at all,
however I believe there is a nasty bug deep in the guts of the Core
Data framework which makes this function necessary.
When an NSManagedObject is created and added to its
NSManagedObjectContext, but (crucially) before .save() is called
on the manged object context, the new managed object will have a
temporary objectID (which can be checked with
managedObject.objectID.isTemporaryID).
Before .save() is called on the managed object context, this
temporary ID can be used to fetch the object, refer to it, etc... it
acts like a normal NSManagedObjectID -- HOWEVER,
Related Skills
node-connect
341.0kDiagnose OpenClaw node connection and pairing failures for Android, iOS, and macOS companion apps
frontend-design
84.4kCreate distinctive, production-grade frontend interfaces with high design quality. Use this skill when the user asks to build web components, pages, or applications. Generates creative, polished code that avoids generic AI aesthetics.
openai-whisper-api
341.0kTranscribe audio via OpenAI Audio Transcriptions API (Whisper).
commit-push-pr
84.4kCommit, push, and open a PR
