OneOffRender
Audio Reactive Music GLSL Shader render program.
Install / Use
/learn @hughesdo/OneOffRenderREADME
OneOffRender - Advanced Audio-Reactive Video Generator
A sophisticated video creation system that creates stunning audio-reactive videos using GLSL shaders. Choose from three powerful workflows:
- 🎨 Web Editor (RECOMMENDED): Professional browser-based timeline editor with drag-and-drop interface
- 🔧 OneOff Renderer: Quick command-line tool for testing individual shaders
- ⚡ Batch Processor: Automated rendering with random shader cycling
Here’s a demo video showing how it works:
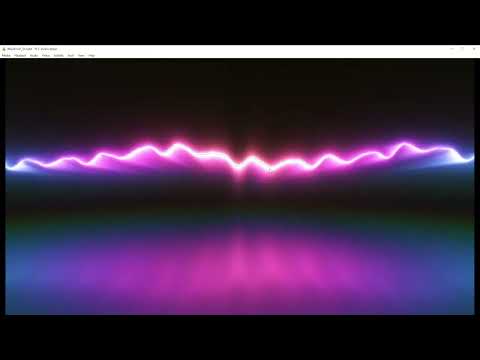
Watch the video on YouTube: OneOffRender for recording audio reactive shaders
📦 Installation & Setup
Prerequisites
Before you begin, ensure you have:
- Python 3.7+: Download from python.org
- ✅ Add Python to PATH during installation
- ✅ Verify: Run
python --versionin command prompt
- OpenGL 3.3+ Compatible GPU: Most modern graphics cards (2010+)
- ✅ Update graphics drivers to latest version
- 4GB+ RAM: Recommended for smooth rendering
- Internet Connection: For first-time FFmpeg download (one-time setup)
- Windows 10/11: Primary supported platform
Quick Installation
Option 1: Web Editor (Recommended)
# 1. Clone or download the repository
# 2. Double-click StartWebEditor.bat
StartWebEditor.bat

# The script will automatically:
# - Create Python virtual environment
# - Install all dependencies (Flask, librosa, moderngl, etc.)
# - Download FFmpeg/ffprobe (first-time only)
# - Launch the web editor on http://localhost:5000
Option 2: Batch Processor
# 1. Clone or download the repository
# 2. Double-click RunMe.bat
RunMe.bat

# The script will automatically:
# - Create Python virtual environment
# - Install all dependencies
# - Download FFmpeg/ffprobe (first-time only)
# - Process all audio files in Input_Audio/
Option 3: Manual Installation
# 1. Create virtual environment
python -m venv venv

# 2. Activate virtual environment
venv\Scripts\activate

# 3. Install dependencies
pip install -r requirements.txt

# 4. Verify installation
python verify_installation.py
python verify_ffmpeg.py
First-Time Setup
- Add Audio Files: Place MP3, WAV, or other audio files in
Input_Audio/folder - Add Video Files (optional): Place green screen videos in
Input_Video/folder - Launch: Run
StartWebEditor.batorRunMe.bat - Create: Start making audio-reactive videos!
Verify Installation
# Check all components
python verify_installation.py

# Check FFmpeg specifically
python verify_ffmpeg.py
Dependencies (Automatically Installed)
- Core Rendering: numpy, Pillow, moderngl, scipy
- Audio Processing: librosa, ffmpeg-python
- Web Editor: Flask, flask-cors
🔄 Keeping OneOffRender Updated
Automatic Updates from GitHub
Stay up-to-date with the latest shaders, features, and improvements using the built-in update system:
One-Click Update:
# Double-click to update from GitHub
refresh.bat
What the update does:
- ✅ Pulls latest code - New features, bug fixes, and improvements
- ✅ Downloads new shaders - Fresh audio-reactive effects and visuals
- ✅ Updates transitions - New transition effects between shaders
- ✅ Refreshes metadata - Updated shader descriptions and ratings
- ✅ Preserves your files - Your audio, videos, and settings stay safe
- ✅ Clears cache - Ensures fresh compilation of updated code
Safe Update Process:
- 🔒 Stashes local changes - Your customizations are preserved
- 🔒 Non-destructive - Virtual environment and user files untouched
- 🔒 Rollback support - Can restore your changes with
git stash pop - 🔒 Smart detection - Only updates when new changes are available
Manual Update (Alternative)
# If you prefer manual Git commands
git pull origin main
CacheClear.bat
python update_audio_metadata.py
After Updating
- Web Editor users: Press
Ctrl+Shift+Rin browser to refresh - Batch users: Next render automatically uses updated code
- Check Documentation/: New features and improvements documented
🎨 Web Editor (Primary Workflow - RECOMMENDED)
The Web Editor is the most comprehensive and user-friendly way to create videos. It provides a professional, visual editing experience with complete control over every aspect of your video.
✨ Key Features
Professional Timeline Editor
- Adobe After Effects-style interface: Multi-layer timeline with precise timing control
- Visual feedback: See exactly what you're creating as you build
- Zoom controls: Timeline zoom with dynamic tick marks for precise editing
- Audio waveform visualization: Visual representation of your music
Drag & Drop Interface
- Shaders: Drag audio-reactive GLSL shaders onto the timeline
- Transitions: Add smooth transitions between shader segments
- Videos: Layer green screen videos with automatic chroma keying
- Precise positioning: Move, resize, and arrange all elements visually
Asset Management
- Shader browser: Browse 35+ included shaders with preview images
- Star ratings: Rate shaders for easy organization (1-3 stars)
- Audio reactivity indicators: See which shaders respond to music
- Descriptions: Detailed information about each shader's visual style
Multi-Layer Compositing
- Shader layers: Multiple audio-reactive shader segments
- Transition layers: Smooth blending between shaders
- Video layers: Green screen video overlays with chroma key support
- Music layer: Audio track with waveform visualization
Green Screen Video Features
- Drag & drop green screen videos: Layer videos with automatic chroma keying
- Preview toggle: Right-click to enable/disable preview without affecting render
- Pre-render preview: See green screen videos synced with audio before rendering
- Advanced chroma key: Single-pass compositing with precise color matching (rgb(0, 214, 0))
- Auto-management: Preview automatically disabled after render, re-enabled before next render
- Visual indicators: Ghostly appearance (50% opacity, diagonal stripes) when preview disabled
Advanced Controls
- Undo/Redo: Full history support for all edits
- Timeline controls: Play, pause, scrub through your composition
- Real-time preview: See changes immediately
- Export settings: Configure resolution, quality, and output format
🚀 Quick Start - Web Editor
Launch the editor:
# Double-click to launch
StartWebEditor.bat

# Or run manually
cd web_editor
python app.py
Open in browser: Navigate to http://localhost:5000
Create your first video:
- Select Music: Click an audio file from the left panel
- Add Shaders: Drag shaders from the right panel onto the timeline
- Add Transitions: Drag transitions between shader segments
- Adjust Timing: Resize and move elements to match your music
- Render: Click "Render Video" and wait for processing
📚 Web Editor Documentation
- User Guide:
Documentation/WEB_EDITOR_README.md - Quick Start Tutorial:
Documentation/QUICK_START.md - Technical Architecture:
Documentation/ARCHITECTURE.md - Complete Specification:
Documentation/WEB_EDITOR_SPEC.md
🎯 Why Use the Web Editor?
- ✅ Visual control: See exactly what you're creating
- ✅ Precise timing: Frame-accurate positioning
- ✅ Easy to learn: Intuitive drag-and-drop interface
- ✅ Professional results: Multi-layer compositing with transitions
- ✅ Flexible workflow: Mix shaders, videos, and effects freely
- ✅ No coding required: Everything is visual and interactive
🔧 OneOff Renderer (Quick Testing Tool)
The OneOff Renderer is a command-line tool for quickly testing and rendering individual shaders. Perfect for shader developers or when you want to preview a single shader without setting up a full timeline.
🎯 Purpose
- Quick testing: Render any shader in seconds
- Shader development: Test new shaders before adding to projects
- Preview generation: Create quick previews of shader effects
- Simple workflow: No timeline setup required
📝 Usage
Basic syntax:
python oneoff.py <shader_name> <duration>
Parameters:
shader_name: Name of shader file (with or without .glsl extension)duration: Duration in seconds (e.g.,30) or MM:SS format (e.g.,01:30)
Examples:
# Render for 5 seconds
python oneoff.py "MoltenHeart.glsl" 5

# Render for 30 seconds
python oneoff.py "Cosmic Nebula2.glsl" 30

# Render for 1 minute 30 seconds
python oneoff.py "Bubble Colors" 01:30

# Extension is optional
python oneoff.py Gyroid Art 45
⚙️ How It Works
- Automatic audio: Uses the first audio file found in
Input_Audio/directory - Config settings: Respects all
config.jsonsettings (resolution, quality, etc.) - Single shader: Disables multi-shader cycling and transitions
- Output naming: Creates
{shader_name}_{duration}s.mp4inOutput_Video/ - Full audio reactivity: Complete frequency analysis and audio texture support
🎵 Audio Reactivity
All shaders receive real-time audio data:
- FFT spectrum: 512-bin frequency analysis
- Waveform data: High-resolution audio waveform
- Bass/treble: Automatic frequency band extraction
- Synchronized: Perfect sync between audio and visuals
💡 Use Cases
- Testing new shaders: Quick preview before adding to web editor
- Shader development: Iterate rapidly on shader code
- Content creation: Generate simple single-shader videos
- Quality checking: Verify shader behavior with different audio
⚡ Batch Processor (Automated Workflow)
The Batch Processor is the original automate
