BackstopJS
Catch CSS curve balls.
Install / Use
/learn @garris/BackstopJSREADME


![]()
BackstopJS
BackstopJS automates visual regression testing of your webapp – comparing screenshots over time.
News
Backstop 6.3.2 -- now with support for Node 20 Many thanks to @dgrebb for this doozy of a maintainance release!
EmberJS users -- check out our ember-backstop test helper! https://github.com/garris/ember-backstop
Want to learn how to Backstop from a pro? Check out visual regression testing with BackstopJS on udemy.com by Walmyr Filho
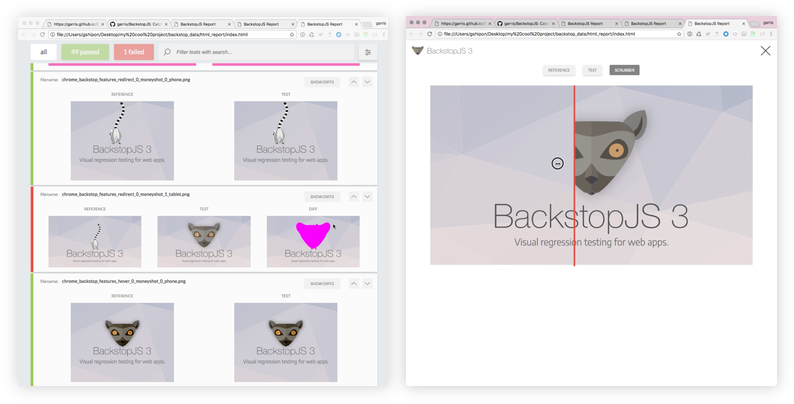
Backstop Features
- In-browser reporting UI with...
- layout settings for print and screen
- scenario display filtering
- reference, test, visual diff inspector
- cool scrubber thingy
- approving a test
- Integrated Docker rendering -- to eliminate cross-platform rendering shenanigans
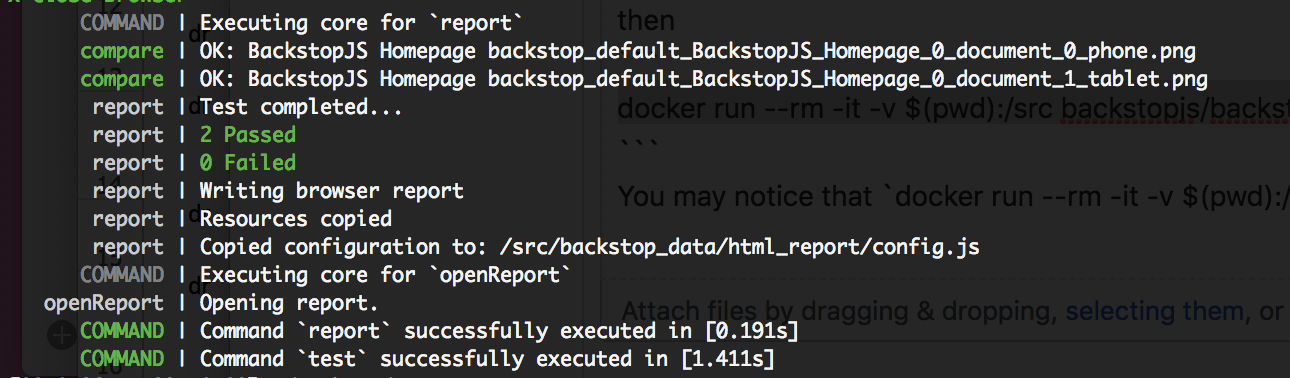
- CLI reports
- Render tests with Chrome Headless
- Simulate user interactions with Playwright or Puppeteer scripts
- JUnit reports
- Plays nice with CI and source control
- Run globally or locally as a standalone package app or
require('backstopjs')right into your node app - Incredibly easy to use: just 3 commands go a long long way!
Install BackstopJS Now
npm install -g backstopjs
Contents
- Install BackstopJS Now
- The BackstopJS Workflow
- Getting Started
- Using BackstopJS
- Developing, Bug Fixing, Contributing...
- Troubleshooting
- Tutorials, Extensions and More
- Credits
The BackstopJS Workflow
backstop init: Set up a new BackstopJS instance -- specify URLs, cookies, screen sizes, DOM selectors, interactions etc. (see examples directory)backstop test: BackstopJS creates a set of test screenshots and compares them with your reference screenshots. Any changes show up in a visual report. (Run this after making CSS changes as many times as needed.)backstop approve: If the test you ran looks good, then go ahead and approve it. Approving changes will update your reference files with the results from your last test. Future tests are compared against your most recent approved test screenshots.
Getting Started
Installation
Global Installation (Recommended)
npm install -g backstopjs
Local Installation
BackstopJS will run as a totally stand alone app -- but installing locally allows you to do this...
const backstop = require('backstopjs');
See Integration Options to learn about cool BackstopJS integration options!
Initializing Your Project
If you don't already have BackstopJS set up... BackstopJS can create a default configuration file and project scaffolding in your current working directory. Please note: this will overwrite any existing files!
cd to your project's directory and run...
backstop init
Working with Your Config File
By default, BackstopJS places backstop.json in the root of your project. And also by default, BackstopJS looks for this file when invoked.
Pass a --config=<configFilePathStr> argument to test using a different config file.
JS based config file
You may use a javascript based config file to allow comments in your config. Be sure to export your config object as a node module.
Example: Create a backstop.js
module.exports = { Same object as backstop.json }
and then backstop test --config="backstop.js"
Required Config Properties
As a new user setting up tests for your project, you will be primarily concerned with these properties...
id– Used for screenshot naming. Set this property when sharing reference files with teammates -- otherwise omit and BackstopJS will auto-generate one for you to avoid naming collisions with BackstopJS resources.viewports– An array of screen size objects your DOM will be tested against. Add as many as you like -- but add at least one.scenarios– This is where you set up your actual tests. The important sub properties are...scenarios[n].label– Required. Also used for screenshot naming.scenarios[n].url– Required. Tells BackstopJS what endpoint/document you want to test. This can be an absolute URL or local to your current working directory.
[!TIP] No other SCENARIO properties are required. Other properties can just be added as necessary.
Generating Test Bitmaps
backstop test
This will create a new set of bitmaps in bitmaps_test/<timestamp>/
Once the test bitmaps are generated, a report comparing the most recent test bitmaps against the current reference bitmaps will display.
Pass a --filter=<scenarioLabelRegex> argument to just run scenarios matching your scenario label.
[!TIP] The
--filterargument offers a useful shortcut for re-running a single test or failed tests.
Pass a --docker flag to render your test in a Docker container -- this will help with consistency if you are attempting to compare references across multiple environments.
Approving Changes
backstop approve
When running this command, all images (with changes) from your most recent test batch will be promoted to your reference collection. Subsequent tests will be compared against your updated reference files.
Pass a --filter=<image_filename_regex> argument to promote only the test captures matching your scenario filename. The filenames (which by default include scenario and viewport names) are displayed in the visual and cli reports.
[!TIP] Remember to pass a
--config=<configFilePathStr>argument if you passed that when you ran your last test.
Using BackstopJS
Scenario Properties
Scenario properties, which may be global, are described throughout this document and processed sequentially in the following order...
| Property | Description |
|--------------------------|--------------------------------------------------------------------------------------------------------------------------------|
| label | [required] Tag saved with your reference images |
| onBeforeScript | Used to set up browser state e.g. cookies. |
| cookiePath | Import cookies in JSON format (available with default onBeforeScript, see setting cookies below) |
| url | [required] The URL of your app state |
| referenceUrl | Specify a different state or environment when creating reference. |
| readyEvent | Wait until this string has been logged to the console. |
| readySelector | Wait until this selector exists before continuing. |
| readyTimeout | Timeout for readyEvent and readySelector (default: 30000ms) |
| delay | Wait for x milliseconds |
| hideSelectors | Array of selectors set to visibility: hidden |
| removeSelectors | Array of selectors set to display: none |
| onReadyScript | After the above conditions are met -- use this script to modify UI state prior to screenshots, e.g., hovers, clicks, etc. |
| keyPressSelectors | Takes an array of selectors and string values -- simulates multiple sequential keypress interactions. |
| hoverSelector | Move the pointer over the specified DOM element prior to the screenshot. |
| hoverSelectors | Playwright and Puppeteer only ta
Related Skills
node-connect
336.9kDiagnose OpenClaw node connection and pairing failures for Android, iOS, and macOS companion apps
frontend-design
83.0kCreate distinctive, production-grade frontend interfaces with high design quality. Use this skill when the user asks to build web components, pages, or applications. Generates creative, polished code that avoids generic AI aesthetics.
openai-whisper-api
336.9kTranscribe audio via OpenAI Audio Transcriptions API (Whisper).
commit-push-pr
83.0kCommit, push, and open a PR
