ESPloitV2
WiFi Keystroke Injection Tool designed for an Atmega 32u4/ESP8266 Paired via Serial (Cactus WHID Firmware). Also features Serial, HTTP, and PASV FTP exfiltration methods and an integrated Credential Harvester Phishing tool called ESPortal.
Install / Use
/learn @exploitagency/ESPloitV2README
ESPloitV2
ESPloitV2
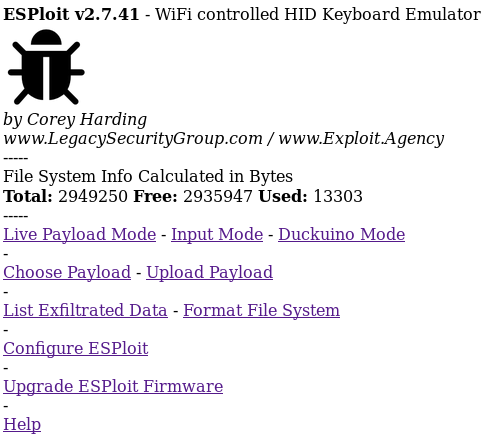
Created by Corey Harding
www.LegacySecurityGroup.com / www.Exploit.Agency
https://github.com/exploitagency/ESPloitV2
ESPloit is a WiFi controlled HID Keyboard Emulator similar to the USB Rubber Ducky by Hak5. This version was created specifically for the Cactus WHID which is a USB stick that utilizes an ESP-12S WiFi module with a serial connection to a 32u4 microcontroller. The device has 4M of flash storage more than capable of storing the firmware and a number of payloads. Unlike the Rubber Ducky this device has WiFi allowing the device to host its own access point or connect to an existing network. This allows users to upload and pick between payloads or even type out "live payloads" without uploading a file, and like the Rubber Ducky, ESPloit allows you to set up a payload to run upon insertion of the device. The device also supports upgrading the firmware over WiFi, deleting payloads, reformatting the file system, WiFi and basic configuration, and more.
ESPloit is distributed under the MIT License. The license and copyright notice can not be removed and must be distributed alongside all future copies of the software.
Video Demo
Initial Flashing
Download and Install the Arduino IDE from http://www.Arduino.cc
Open Arduino IDE.
Go to File - Preferences. Locate the field "Additional Board Manager URLs:"
Add "http://arduino.esp8266.com/stable/package_esp8266com_index.json" without quotes.
Click "Ok"
If Arduino IDE gives you the following error:
"Error downloading http://arduino.esp8266.com/stable/package_esp8266com_index.json"
Use "https://github.com/esp8266/Arduino/releases/download/2.3.0/package_esp8266com_index.json" instead.
Select Tools - Board - Boards Manager. Search for "esp8266".
Install "esp8266 by ESP8266 community version 2.3.0". Click "Close".
Select Sketch - Include Library - Manage Libraries. Search for "Json".
Install "ArduinoJson by Benoit Blanchon version 5.11.0" and click "Close"
Download https://github.com/exploitagency/esp8266FTPServer/archive/feature/bbx10_speedup.zip
Click Sketch - Include Library - Add .ZIP Library and select bbx10_speedup.zip from your Downloads folder.
The Arduino IDE is now configured and ready for the code.
Use git to clone this repo: https://github.com/exploitagency/ESPloitV2.git
or
Download/extract the repo as a zip file: https://github.com/exploitagency/ESPloitV2/archive/master.zip
Load the esp8266Programmer sketch from the flashing folder.
Select Tools - Board - "LilyPad Arduino USB".
Select the Port your device is connected to under Tools - Port.
Upload the sketch.
Open the ESP_Code sketch from the source folder.
Select Tools - Board - "Generic ESP8266 Module".
Select Tools - Flash Size - "4M (3M SPIFFS)".
Select Sketch - "Export Compiled Binary".
Now flash the firmware to the ESP-12S chip using one of the following tools.
Linux: https://github.com/AprilBrother/esptool
Example: python esptool.py --port=/dev/ttyACM0 --baud 115000 write_flash 0x00000 ESP_Code.ino.generic.bin --flash_size 32m
Windows: https://github.com/nodemcu/nodemcu-flasher
NOTE: Do not try to connect to the access point or test anything yet, the device won't work until after the next step.
Finally open the Arduino_32u4_code sketch from the source folder.
Select Tools - Board - "LilyPad Arduino USB".
Select the Port your device is connected to under Tools - Port.
Upload the sketch.
Your ESPloit is now ready to configure and or use.
Initial configuration
ESPloit by default creates an Access Point with the SSID "Exploit" with a password of "DotAgency".
Connect to this access point and open a web browser pointed to "http://192.168.1.1"
You are now greeted with the main menu of ESPloit. From here there are several options.
Upload Payload: Upload a payload.txt file
Choose Payload: Choose a payload to run
Live Payload Mode: Type out or copy/paste a payload to run without uploading
Duckuino Mode: Convert and optionally run Ducky Script payloads to ESPloit compatible script
Input Mode: Use the device as a keyboard/mouse substitute
List Exfiltrated Data: Lists any exfiltrated data
Configure ESPloit: Configure WiFi and basic settings
Format File System: Format the file system
Upgrade ESPloit Firmware: Upgrade the ESP-12S ESPloit firmware from a web browser
Help: Brings up this help file
The default administration username is "admin" and password "hacktheplanet". This username and password is used to Configure ESPloit or to Upgrade the Firmware.
Resetting to default configuration/Recovering device
Plug the device into your computer.
Open the Arduino IDE.
Select Tools - Board - "LilyPad Arduino USB".
Select Tools - Port and the port the device is connected to.
Select Tools - "Serial Monitor".
Select "38400 baud".
Now type in "ResetDefaultConfig:". Without the quotes but be sure to include the colon symbol.
Click Send.
You should now receive the following reply "Resetting configuration files back to default settings."
Wait about 15 seconds or until the LED blinks and unplug and replug in the device.
The device has now been reset back to default settings.
Connect to the Access Point with the SSID "Exploit" with a password of "DotAgency".
Open a web browser pointed to "http://192.168.1.1"
The default administration username is "admin" and password "hacktheplanet".
NOTE: Certain devices seem to have trouble connecting to a password protected ESP8266 access point. The symptoms of this involve repeatedly being prompted to enter the password and being unable to connect to the ESP8266 via WiFi. This can be solved by following the above instructions but instead issuing the command "ResetDefaultConfig:OpenNetwork" via serial. The device will be restored to the factory defaults(with the exception of now being an unsecured network). The device will reboot and you may now connect to it as an unsecured WiFi access point with an SSID of "Exploit". You should now be able to establish a connection.
Configure ESPloit
Default credentials to access the configuration page:
username "admin"
password "hacktheplanet"
WiFi Configuration
Network Type
Access Point Mode: Create a standalone access point(No Internet Connectivity-Requires Close Proximity)
Join Existing Network: Join an existing network(Possible Internet Connectivity-Could use Device Remotely)
Hidden: Choose whether or not to use a hidden SSID when creating an access point
SSID: SSID of the access point to create or of the network you are choosing to join
Password: Password of the access point which you wish to create or of the network you are choosing to join
Channel: Channel of the access point you are creating
IP: IP to set for ESPloit
Gateway: Gateway to use, make it the same as ESPloit's IP if an access point or the same as the router if joining a network
Subnet: Typically set to 255.255.255.0
ESPloit Administration Settings:
Username: Username to configure/upgrade ESPloit
Password: Password to configure/upgrade ESPloit
Payload Settings
Delay Between Sending Lines of Code in Payload: Delay in milliseconds between sending lines from payload or when manually inserting a "DELAY" in the payload(Default: 2000)
Automatically Deploy Payload Upon Insetion: Choose Yes or No to automatically deploy a payload when inserting the device
Automatic Payload: Choose the location of the payload to run upon insertion
Scripting a Payload
ESPloit uses its own scripting language and not Ducky Script,
although a Ducky Script to ESPloit converter is available at: https://exploitagency.github.io/Duckuino/index.html
Examples of ESPloit's scripting language can be seen below.
COMMANDS ARE CASE SENSITIVE! Do not insert any spaces after a command unless intentional and as part of a string, etc. Do not place any blank lines in a payload!
Commenting code:
--"Rem: Comment"
--Set comments
Set the default delay for a specific payload:
--"DefaultDelay:X"
--Overrides the default delay set in the ESPloit configuration portal but only for this specific payload
--Delay is in milliseconds and defined as the wait between sending lines in the payload
--Example: "DefaultDelay:10000" will wait 10 seconds between sending each line in the payload
Set a one time delay between sending lines in payload
--"CustomDelay:X"
--The default delay will still apply for all other lines except this one
--Example: "CustomDelay:5000" will ignore the default delay for this line and waits 5 seconds before sending the next line in the payload
To make a generic delay:
-"Delay"
--"Delay" would wait for The Default Delay x 2 before proceeding to next item in payload
For individual keypresses or combinations of key presses:
-"Press:X" or "Press:X+Y" or "Press:X+Y+Z" and so forth
--Expects Decimal Key Code Values for X,Y,Z,etc
--Sending the following "Press:131+114" with the device's USB plugged into a Windows machine would output KEY_LEFT_GUI(Windows_Key)+r thus launching the RUN prompt
--List of modifier keys(GUI,ALT,CTRL,ETC) at https://www.arduino.cc/en/Reference/KeyboardModifiers
--ASCII table lookup at http://www.asciitable.com/
To type out strings of text:
-"Print:XYZ" Types out "XYZ"
--Sending the following via software serial "Print:www.Exploit.Agency" would type out "www.Exploit.Agency" on the machine connected via USB
To type out strings of text and presses ENTER:
-"PrintLine:XYZ" Types out "XYZ" then presses ENTER
--Sending the following "PrintLine:www.Exploit.Agency" woul
