Vectorflow
VectorFlow is a high volume vector embedding pipeline that ingests raw data, transforms it into vectors and writes it to a vector DB of your choice.
Install / Use
/learn @dgarnitz/VectorflowREADME
Introduction
VectorFlow is an open source, high throughput, fault tolerant vector embedding pipeline. With a simple API request, you can send raw data that will be chunked, embedded and stored in any vector database or returned back to you.
This current version is an MVP. We recommend using it with Kubernetes in production (see below for details). For text-based files, it supports TXT, PDF, HTML and DOCX.
Run it Locally
With three commands you can run VectorFlow locally:
git clone https://github.com/dgarnitz/vectorflow.git
cd vectorflow
./setup.sh
Embed Documents with Client
To start embedding documents locally, install the VectorFlow Client python library in your python application's virtual environment.
pip install vectorflow-client
then run the following
from vectorflow-client.client.vectorflow import Vectorflow

vectorflow = Vectorflow()
vectorflow.embeddings_api_key = os.getenv("OPEN_AI_KEY")
paths = ['path_to_your_file1', 'path_to_your_file2', ...]
response = vectorflow.upload(paths)
You do not need to clone the VectorFlow repo to utilize the client functionality via pip. For more instructions see the README.md in the client directory.
See the appendix for details on how to use the testing_clients scripts.
Docker-Compose
The best way to run VectorFlow is via docker compose. If you are running this on Mac, please grant Docker permissions to read from your Documents folder as instructed here. If this fails, remove the volume section from the docker-compose.yml.
1) Set Environment Variables
First create a folder, env_scripts, in the root for all the environment variables, then create env_vars.env in the env_scripts folder to add all the environment variables mentioned below. You only need to set the LOCAL_VECTOR_DB variable if you are running qdrant, Milvus or Weaviate locally.
INTERNAL_API_KEY=your-choice
POSTGRES_USERNAME=postgres
POSTGRES_PASSWORD=your-choice
POSTGRES_DB=vectorflow
POSTGRES_HOST=postgres
RABBITMQ_USERNAME=guest
RABBITMQ_PASSWORD=guest
RABBITMQ_HOST=rabbitmq
LOCAL_VECTOR_DB=qdrant | weaviate
API_STORAGE_DIRECTORY=/tmp
MINIO_ACCESS_KEY=minio99
MINIO_SECRET_KEY=minio123
MINIO_ENDPOINT=minio:9000
MINIO_BUCKET=vectorflow
You can choose a variable for INTERNAL_API_KEY, POSTGRES_PASSWORD, and POSTGRES_DB, but they must be set.
2) Run Docker-Compose
Make sure you pull Rabbit MQ, Postgres, Min.io into your local docker repo. We also recommend running a vector DB in locally, so make sure to pull the image of the one you are using. Our docker-compose file will spin up qdrant by default and create two index/collections. If you plan to run Milvus or Weaviate, you will have to configure them on your own.
docker pull rabbitmq
docker pull postgres
docker pull qdrant/qdrant | docker pull semitechnologies/weaviate
docker pull minio/minio
Then run:
docker-compose build --no-cache
docker-compose up -d
Note that the init containers are running a script that sets up the database schema, vector DB and Min.io object store. These containers stop after the script completes. For qdrant, make sure to pull version 1.9.1 since that is the version the qdrant client python package is supposed to work with.
Using VectorFlow
The best way to use VectorFlow is with the python client.
To use VectorFlow for development, make an HTTP request to your API's URL - for example, localhost:8000 from your development machine, or vectorflow_api:8000 from within another docker container.
Request & Response Payload
All requests require an HTTP Header with Authorization key which is the same as your INTERNAL_API_KEY env var that you defined before (see above). You must pass your vector database api key with the HTTP Header X-VectorDB-Key if you are running a connecting to a cloud-based instance of a vector DB, and the embedding api key with X-EmbeddingAPI-Key if you are using OpenAI. HuggingFace Sentence Transformer embeddings do not require an api key, but you must follow the above steps to run the container with the model you need.
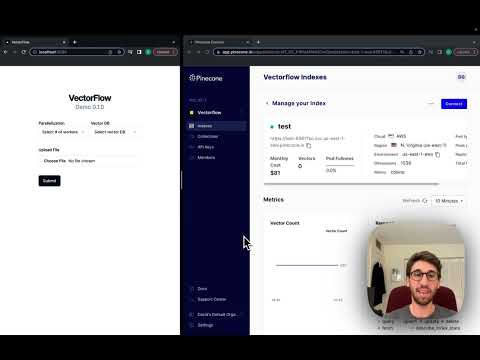
VectorFlow currently supports Pinecone, Qdrant and Weaviate vector databases.
Embed a Single File
To submit a single file for embedding, make a POST request to the /embed endpoint with a file attached, the 'Content-Type: multipart/form-data' header and the following payload:
{
    'SourceData=path_to_txt_file'
    'LinesPerBatch=4096'
    'EmbeddingsMetadata={
        "embeddings_type": "OPEN_AI",
        "chunk_size": 512,
        "chunk_overlap": 128,
        "chunk_strategy": "EXACT | PARAGRAPH | SENTENCE | CUSTOM",
        "model": "text-embedding-3-small | text-embedding-3-large | text-embedding-ada-002"
    }'
    'VectorDBMetadata={
        "vector_db_type": "PINECONE | QDRANT | WEAVIATE",
        "index_name": "index_name",
        "environment": "env_name"
    }'
    'DocumentID=your-optional-internal-tracking-id'
}
This will create a job and you will get the following payload back:
{
    'message': f"Successfully added {batch_count} batches to the queue",
    'JobID': job_id
}
Right now this endpoint only supports uploading single files at a time, up to 25 MB due to timeout issues. Note that it may be deprecated.
Embed Multiple Files At Once
To submit multiple files for embedding, make a POST request to the /jobs endpoint. The payload is the same as for single file embedding except the way you attach multiple files is different:
{
    'files=[
        ('file',  ('test_pdf.pdf', open(file1_path, 'rb'), 'application/octet-stream')),
        ('file', ('test_medium_text.txt', open(file2_path, 'rb'), 'application/octet-stream'))
    ]'
}
NOTE: You must stream the files to the endpoint, not send it as a conventional post request or it will fail.
This endpoint will create one job per file uploaded. You will get the following JSON payload back:
{
    'successful_uploads': successfully_uploaded_files,
    'failed_uploads': failed_uploads,
    'empty_files_count': empty_files_count,
    'duplicate_files_count': duplicate_files_count
}
Where successfully_uploaded_files is a list of tuples containing (file name, job id) and failed_uploads is a list of file names that failed to upload so you can retry them.
Get a Single Job Status
To check the status of a job, make a GET request to this endpoint: /jobs/<int:job_id>/status. The response will be in the form:
{
    'JobStatus': job_status
}
Get Multiple Job Statuses
To check the status of multiples job, make a POST request to this endpoint: /jobs/status. The request body will be in the form:
{
    'JobIDs': job_ids
}
and the response will be in the form
{
    'Jobs': [{'JobID': job_id, 'JobStatus': job_status}, ...]}
There is an example in testing_clients/get_jobs_by_ids.py.
Vector Database Standard Metadata Schema
VectorFlow enforces a standardized schema for uploading data to a vector store:
id: string
source_data: string
source_document: string
embeddings: float array
The id can be used for deduplication and idempotency. Please note for Weaviate, the id is called vectorflow_id.
We plan depre