Cvzone
This is a Computer vision package that makes its easy to run Image processing and AI functions. At the core it uses OpenCV and Mediapipe libraries.
Install / Use
/learn @cvzone/CvzoneREADME
CVZone
This is a Computer vision package that makes its easy to run Image processing and AI functions. At the core it uses OpenCV and Mediapipe libraries.
Installation
You can simply use pip to install the latest version of cvzone.
pip install cvzone
Examples
For sample usage and examples, please refer to the Examples folder in this repository. This folder contains various examples to help you understand how to make the most out of cvzone's features.
Video Documentation
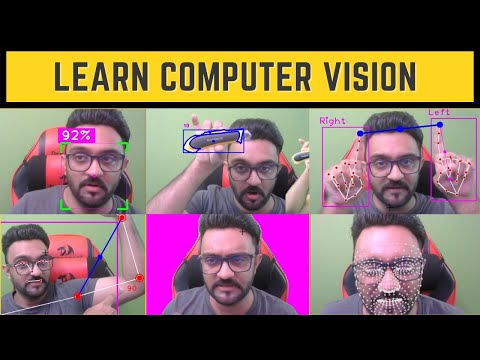
Table of Contents
- Installations
- Corner Rectangle
- PutTextRect
- Download Image from URL
- Overlay PNG
- Rotate Image
- Stack Images
- FPS
- Finding Contours
- Color Module
- Classification Module
- Face Detection
- Face Mesh Module
- Selfie Segmentation Module
- Hand Tracking Module
- Pose Module
- Serial Module
- Plot Module
Installations
To install the cvzone package, run the following command:
pip install cvzone
Corner Rectangle
<div align="center"> <img src="Results/cornerRect2.jpg" alt="Corner Rectangle CVZone"> </div>
import cv2
import cvzone  # Importing the cvzone library

# Initialize the webcam
cap = cv2.VideoCapture(2)  # Capture video from the third webcam (0-based index)

# Main loop to continuously capture frames
while True:
    # Capture a single frame from the webcam
    success, img = cap.read()  # 'success' is a boolean that indicates if the frame was captured successfully, and 'img' contains the frame itself

    # Add a rectangle with styled corners to the image
    img = cvzone.cornerRect(
        img,  # The image to draw on
        (200, 200, 300, 200),  # The position and dimensions of the rectangle (x, y, width, height)
        l=30,  # Length of the corner edges
        t=5,  # Thickness of the corner edges
        rt=1,  # Thickness of the rectangle
        colorR=(255, 0, 255),  # Color of the rectangle
        colorC=(0, 255, 0)  # Color of the corner edges
    )

    # Show the modified image
    cv2.imshow("Image", img)  # Display the image in a window named "Image"

    # Wait for 1 millisecond between frames
    cv2.waitKey(1)  # Waits 1 ms for a key event (not being used here)
PutTextRect
<div align="center"> <img src="Results/putTextRect.jpg" alt="putTextRect CVZone"> </div>
import cv2
import cvzone  # Importing the cvzone library

# Initialize the webcam
cap = cv2.VideoCapture(2)  # Capture video from the third webcam (0-based index)

# Main loop to continuously capture frames
while True:
    # Capture a single frame from the webcam
    success, img = cap.read()  # 'success' is a boolean that indicates if the frame was captured successfully, and 'img' contains the frame itself

    # Add a rectangle and put text inside it on the image
    img, bbox = cvzone.putTextRect(
        img, "CVZone", (50, 50),  # Image and starting position of the rectangle
        scale=3, thickness=3,  # Font scale and thickness
        colorT=(255, 255, 255), colorR=(255, 0, 255),  # Text color and Rectangle color
        font=cv2.FONT_HERSHEY_PLAIN,  # Font type
        offset=10,  # Offset of text inside the rectangle
        border=5, colorB=(0, 255, 0)  # Border thickness and color
    )

    # Show the modified image
    cv2.imshow("Image", img)  # Display the image in a window named "Image"

    # Wait for 1 millisecond between frames
    cv2.waitKey(1)  # Waits 1 ms for a key event (not being used here)
Download Image from URL
import cv2
import cvzone

imgNormal = cvzone.downloadImageFromUrl(
    url='https://github.com/cvzone/cvzone/blob/master/Results/shapes.png?raw=true')

imgPNG = cvzone.downloadImageFromUrl(
    url='https://github.com/cvzone/cvzone/blob/master/Results/cvzoneLogo.png?raw=true',
    keepTransparency=True)
imgPNG =cv2.resize(imgPNG,(0,0),None,3,3)

cv2.imshow("Image Normal", imgNormal)
cv2.imshow("Transparent Image", imgPNG)
cv2.waitKey(0)
Overlay PNG
<div align="center"> <img src="Results/overlayPNG.jpg" alt="overlayPNG CVZone"> </div>import cv2
import cvzone
# Initialize camera capture
cap = cv2.VideoCapture(2)
# imgPNG = cvzone.downloadImageFromUrl(
# url='https://github.com/cvzone/cvzone/blob/master/Results/cvzoneLogo.png?raw=true',
# keepTransparency=True)
imgPNG = cv2.imread("cvzoneLogo.png",cv2.IMREAD_UNCHANGED)
while True:
# Read image frame from camera
success, img = cap.read()
imgOverlay = cvzone.overlayPNG(img, imgPNG, pos=[-30, 50])
imgOverlay = cvzone.overlayPNG(img, imgPNG, pos=[200, 200])
imgOverlay = cvzone.overlayPNG(img, imgPNG, pos=[500, 400])
cv2.imshow("imgOverlay", imgOverlay)
cv2.waitKey(1)
Rotate Image
<div align="center"> <img src="Results/rotateImage.jpg" alt="rotateImage CVZone"> </div>import cv2
from cvzone.Utils import rotateImage # Import rotateImage function from cvzone.Utils
# Initialize the video capture
cap = cv2.VideoCapture(2) # Capture video from the third webcam (index starts at 0)
# Start the loop to continuously get frames from the webcam
while True:
# Read a frame from the webcam
success, img = cap.read() # 'success' will be True if the frame is read successfully, 'img' will contain the frame
# Rotate the image by 60 degrees without keeping the size
imgRotated60 = rotateImage(img, 60, scale=1,
keepSize=False) # Rotate image 60 degrees, scale it by 1, and don't keep original size
# Rotate the image by 60 degrees while keeping the size
imgRotated60KeepSize = rotateImage(img, 60, scale=1,
keepSize=True) # Rotate image 60 degrees, scale it by 1, and keep the original size
# Display the rotated images
cv2.imshow("imgRotated60", imgRotated60) # Show the 60-degree rotated image without keeping the size
cv2.imshow("imgRotated60KeepSize", imgRotated60KeepSize) # Show the 60-degree rotated image while keeping the size
# Wait for 1 millisecond between frames
cv2.waitKey(1) # Wait for 1 ms, during which any key press can be detected (not being used here)
Stack Images
<div align="center"> <img src="Results/stackImages.jpg" alt="stackImages CVZone"> </div>import cv2
import cvzone
# Initialize camera capture
cap = cv2.VideoCapture(2)
# Start an infinite loop to continually capture frames
while True:
# Read image frame from camera
success, img = cap.read()
# Convert the image to grayscale
imgGray = cv2.cvtColor(img, cv2.COLOR_BGR2GRAY)
# Resize the image to be smaller (0.1x of original size)
imgSmall = cv2.resize(img, (0, 0), None, 0.1, 0.1)
# Resize the image to be larger (3x of original size)
imgBig = cv2.resize(img, (0, 0), None, 3, 3)
# Apply Canny edge detection on the grayscale image
imgCanny = cv2.Canny(imgGray, 50, 150)
# Convert the image to HSV color space
imgHSV = cv2.cvtColor(img, cv2.COLOR_BGR2HSV)
# Create a list of all processed images
imgList = [img, imgGray, imgCanny, imgSmall, imgBig, imgHSV]
# Stack the images together using cvzone's stackImages function
stackedImg = cvzone.stackImages(imgList, 3, 0.7)
# Display the stacked images
cv2.imshow("stackedImg", stackedImg)
# Wait for 1 millisecond; this also allows for keyboard inputs
cv2.waitKey(1)
FPS
import cvzone
import cv2

# Initialize the FPS class with an average count of 30 frames for smoothing
fpsReader = cvzone.FPS(avgCount=30)

# Initialize the webcam and set it to capture
cap = cv2.VideoCapture(0)
cap.set(cv2.CAP_PROP_FPS, 30)  # Set the frames per second to 30

# Main loop to capture frames and display FPS
while True:
    # Read a frame from the webcam
    success, img = cap.read()

    # Update the FPS counter and draw the FPS on the image
    # fpsReader.update returns the current FPS and the updated image
    fps, img = fpsReader.update(img, pos=(20, 50),
                                bgColor=(255, 0, 255), textColor=(255, 255, 255),
                                scale=3, thickness=3)

    # Display the image with the FPS counter
    cv2.imshow("Image", img)

    # Wait for 1 ms to show this frame, then continue to the next frame
    cv2.waitKey(1)
Finding Contours
import cv2           # Importing the OpenCV library for computer vision tasks
import cvzone       # Importing the cvzone library for additional functionalities
import numpy as np  # Importing NumPy library for numerical operations

# Download an image containing shapes from a given URL
imgShapes = cvzone.downloadImageFromUrl(
    url='https://github.com/cvzone/cvzone/blob/master/Results/shapes.png?raw=true')

# Perform edge detection using the Canny algorithm
imgCanny = cv2.Canny(imgShapes, 50, 150)

# Dilate the edges to strengthen the detected contours
imgDilated = cv2.dilate(imgCanny, np.ones((5, 5), np.uint8), iterations=1)

# Find contours in the image without any corner filtering
imgContours, conFound = cvzone.findContours(
    imgShapes, imgDilated, minArea=1000, sort=True,
    filter=None, drawCon=True, c=(255, 0, 0), ct=(255, 0, 255),
    retrType=
