Cuttlebelle
The react static site generator that separates editing and code concerns
Install / Use
/learn @cuttlebelle/CuttlebelleREADME
Cuttlebelle


<p align="center">The react static site generator with editing in mind</p>
<p align="center">Visit our website</p>

🔥 Why yet another static site generator?
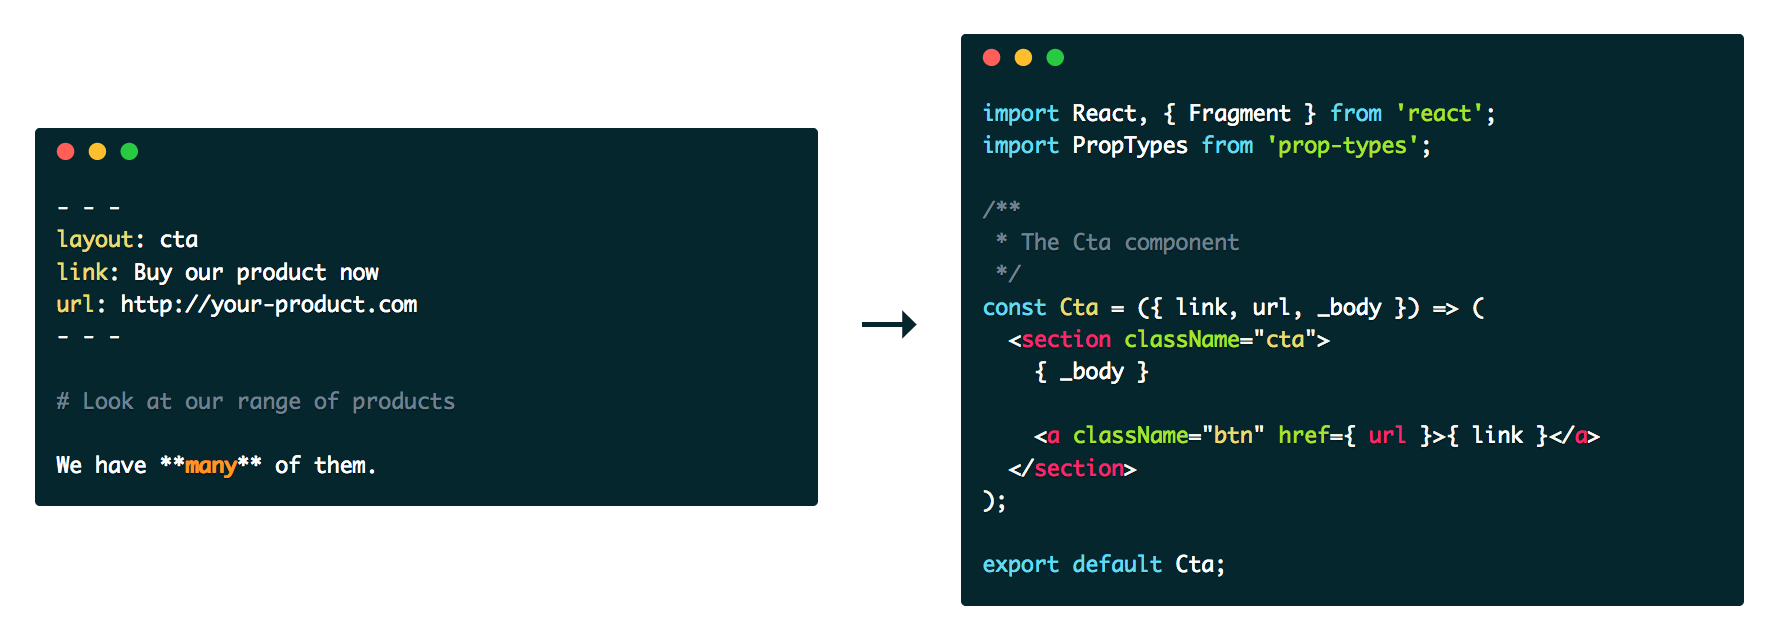
All static site generators I have used restrict you to use one layout per page. Todays webdesign needs have outgrown this and we often find ourself either adding code into our content pages (markdown files, liquid templates) or content into our code. That makes updating and maintaining a page hard, especially for a non-technical content author.
I needed a generator that can separate content from code as cleanly as possible while still staying a static site generator and as dynamic as possible.
React comes with the component paradigm and was exactly what I’m looking for. JSX enables a very easy templating like way to write components while still keeping the power of javascript. No more templating languages that only do half of what you need. Use javascript to write your layouts.
Contents
Requirements
To use Cuttlebelle you need at least node >= 12.
Install
npm install cuttlebelle -g
Then run cuttlebelle in your working folder.
💡Tip: I recommend installing Cuttlebelle globally as it exposes the cuttlebelle command to your system.
If you for some reason want to install it locally, consider adding a npm script to your package.json to make
running cuttlebelle easier:
{
	"name": "your name",
	"version": "1.0.0",
	"description": "Your description",
	"main": "index.js",
	"scripts": {
+		"build": "cuttlebelle",
+		"watch": "cuttlebelle -w",
		"test": "echo \"Error: no test specified\" && exit 1"
	},
	"devDependencies": {
		"cuttlebelle": "^1.0.0"
	}
	"keywords": [],
	"author": "",
	"license": "ISC"
}
Then run npm run build to run cuttlebelle.
Getting started
After installing cuttlebelle, create a folders called content and code and start populating them.
Each folder with an index.yml file will become an index.html in cuttlebelles generated pages.
.
├── index
│   ├── index.yml
│   ├── partial1.md
│   └── partial2.md
├── page1
│   ├── index.yml
│   └── subpage1
│       ├── index.yml
│       ├── partial1.md
│       └── partial2.md
├── page2
│   ├── index.yml
│   ├── partial1.md
│   └── partial2.md
└── shared
    ├── component1.md
    └── component2.md
.
├── index.html
├── page1
│   ├── index.html
│   └── subpage1
│       └── index.html
└── page2
    └── index.html
Consider this example to see how pages are constructed with partials and layouts:
An index.yaml page
<table> <tbody> <tr> <th>index.yml</th> <th></th> <th>page layout</th> </tr> <tr> <td valign="top">layout: page
title: Homepage
main:
- header.md
- body.md
import React from "react";

export default ({ title, main }) => (
  <html>
  <head>
    <title>{ title }</title>
  </head>
  <body>
    <main>
      { main }
    </main>
  </body>
  </html>
);
A header.md partial
<table> <tbody> <tr> <th>partial header.md</th> <th></th> <th>header layout</th> </tr> <tr> <td valign="top">---
layout: header
headline: First post
sub: Clear content separation
---
import React from "react";

export default ({ headline, sub }) => (
  <header>
    <h1 className="header__headline">{ headline }</h1>
    {
      sub
        && <p className="header__sub">{ sub }</p>
    }
  </header>
);
A body.md partial
<table> <tbody> <tr> <th>partial body.md</th> <th></th> <th>body layout</th> </tr> <tr> <td valign="top">---
layout: body
headline: First post
---
**Hello world**
import React from "react";

export default ({ _body, headline }) => (
  <article>
    <h2>{ headline }</h2>
    <div className="body-text">{ _body }</div>
  </article>
);
Will give us this HTML
<table> <tbody> <tr> <th>resulting static HTML file</th> </tr> <tr> <td valign="top"><!DOCTYPE html>
<html>
<head>
<title>Homepage</title>
</head>
<body>
<main>
<header>
<h1 class="header__headline">First post</h1>
<p class="header__sub">Clear content separation</p>
</header>
<article>
<h2>First post</h2>
<div class="body-text"><strong>Hello world</strong></div>
</article>
</main>
</body>
</html>
Usage
CLI

cuttlebelle
This will generate all pages into the site folder (unless specified otherwise).
Init
For when you’re just starting out on a new project use the init option. It will generate the folder structure for you and add some files for you to get
started quickly.
cuttlebelle init
Watch
You can also run the highly optimized watch while adding content or developing your layouts.
cuttlebelle watch
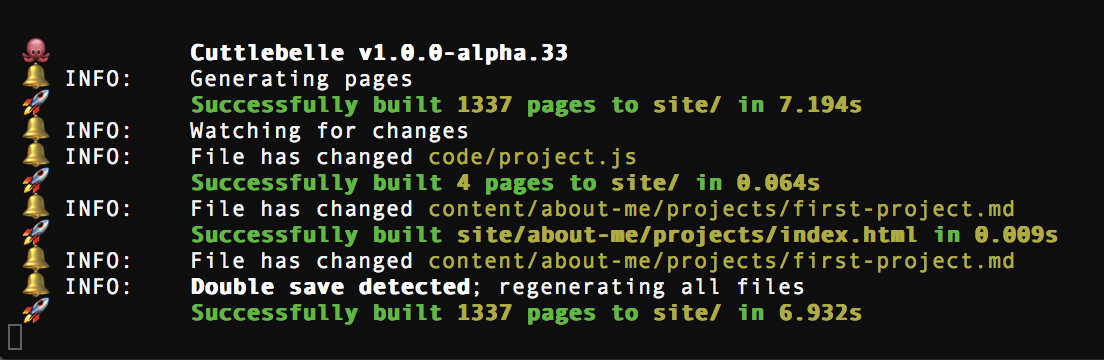
This command will first build your pages and then watch for changes in any of them.
It will dutifully only build the absolute minimum of pages once it detects a change somewhere. It is so eager to only build those pages that it thinks are
relevant that it misses sometimes. In cases where you add content from the _pages prop in one of your layouts for instance. I have added a new and somewhat
genius trick to catch cases like that.
Introducing the double save <sup>TM</sup>
If you feel like the watch may have missed a page and you don’t want to leave your editor to complain about it to the watch, just save your file twice quickly like a double click. The watch will detect the double save<sup>TM</sup> and generate all pages for you again.
💡Tip: You can change the timeout of the watch to detect a double save via the watchTimeout setting.
Watch flags
No generator flag
Sometimes you may only want to start a watch and not rebuild all pages. For that use the no-generate option:
cuttlebelle watch --no-generate
Silent flag
The watch notifies you each time it encounters an error so you don’t have to watch the watch. You can disable that behavior via the silent option.
cuttlebelle watch --silent
Docs
Cuttlebelle comes with a nifty feature that will auto-document your layouts if you use the right propTypes and comments. Read more about how in the self documenting section.
cuttlebelle docs
Version
To display the version of your cuttlebelle install all you have to do is run the version flag:
cuttlebelle --version
Help
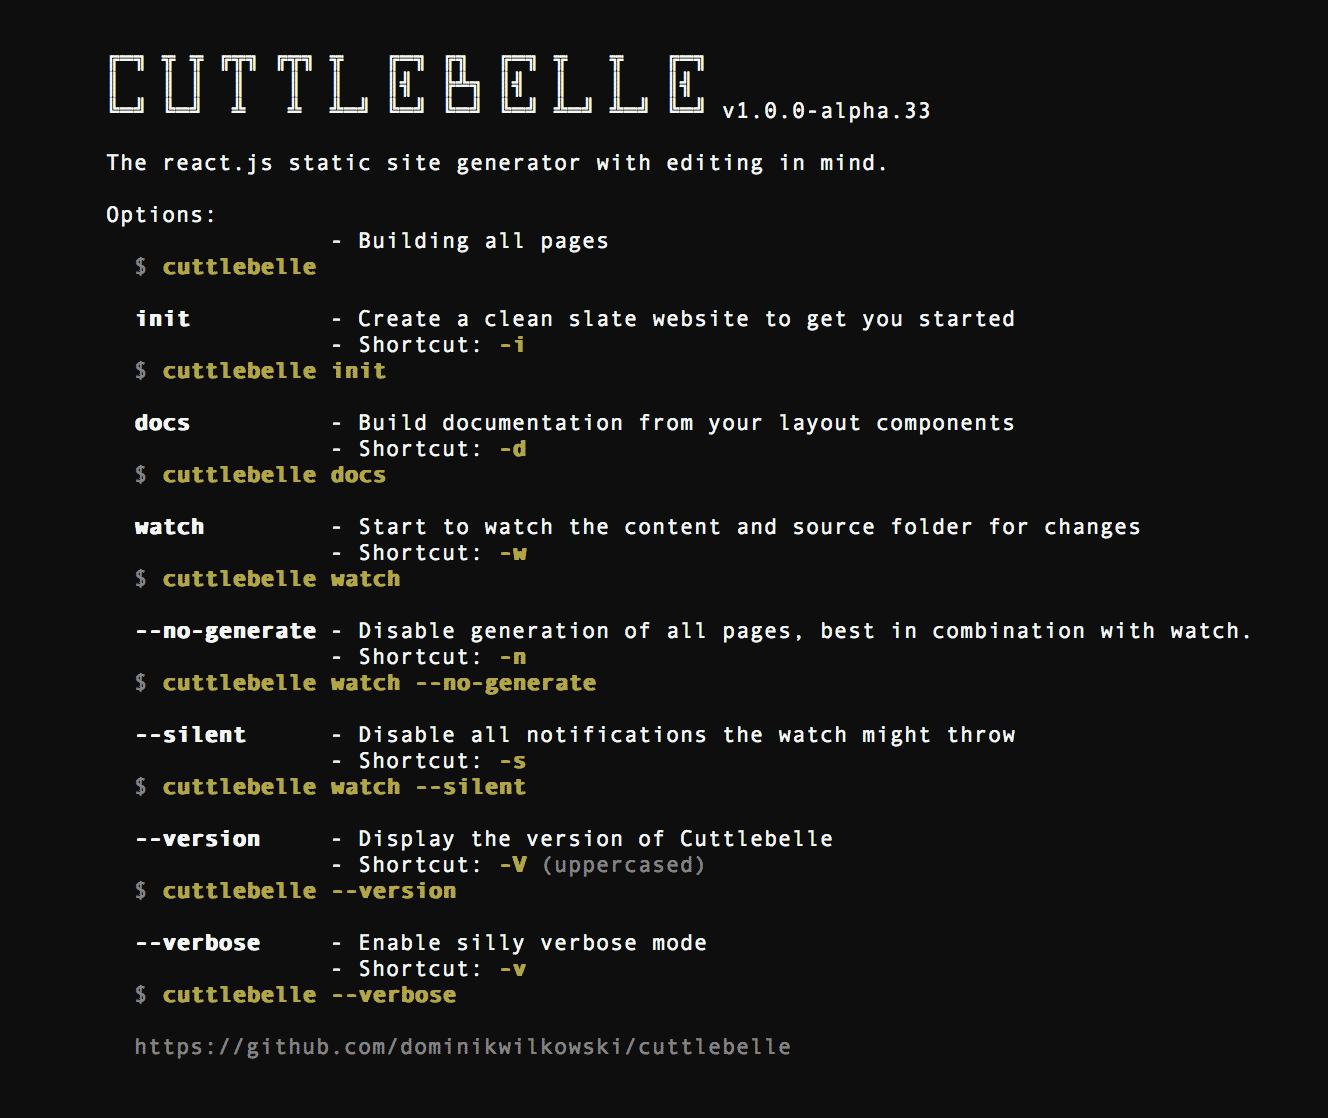
Of course there is also a help option. Just run it with the help flag:
cuttlebelle help
Your content
The default folder structure divides content into the content/ folder and the layout and component react files into the code/ folder.
.
├── content/           # The content folder
│   ├── page1/         # Each folder represents a page and will be converted to `page1/index.html`
│   │                  # 💡 As long as it contains an `index.yml` file.
│   │
│
