SupportDocs
Generate help centers for your iOS apps. Hosted by GitHub and always up-to-date.
Install / Use
/learn @aheze/SupportDocsREADME

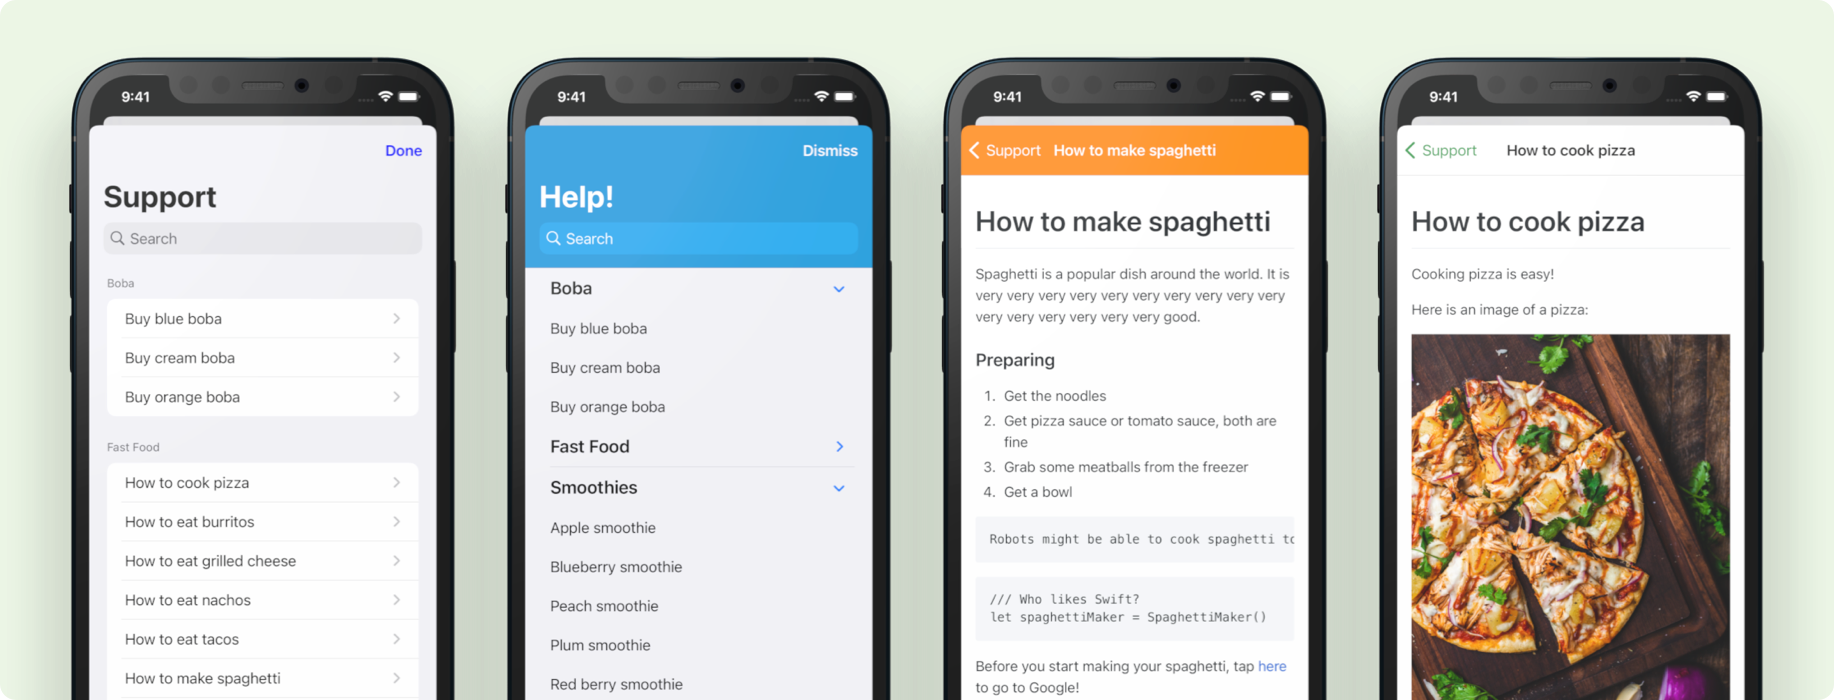
Generate help centers for your iOS apps, with Markdown!
All you need to do is write your documents on GitHub, and install the library in your app. SupportDocs' custom GitHub Action and GitHub Pages will take care of the rest.
Table of Contents

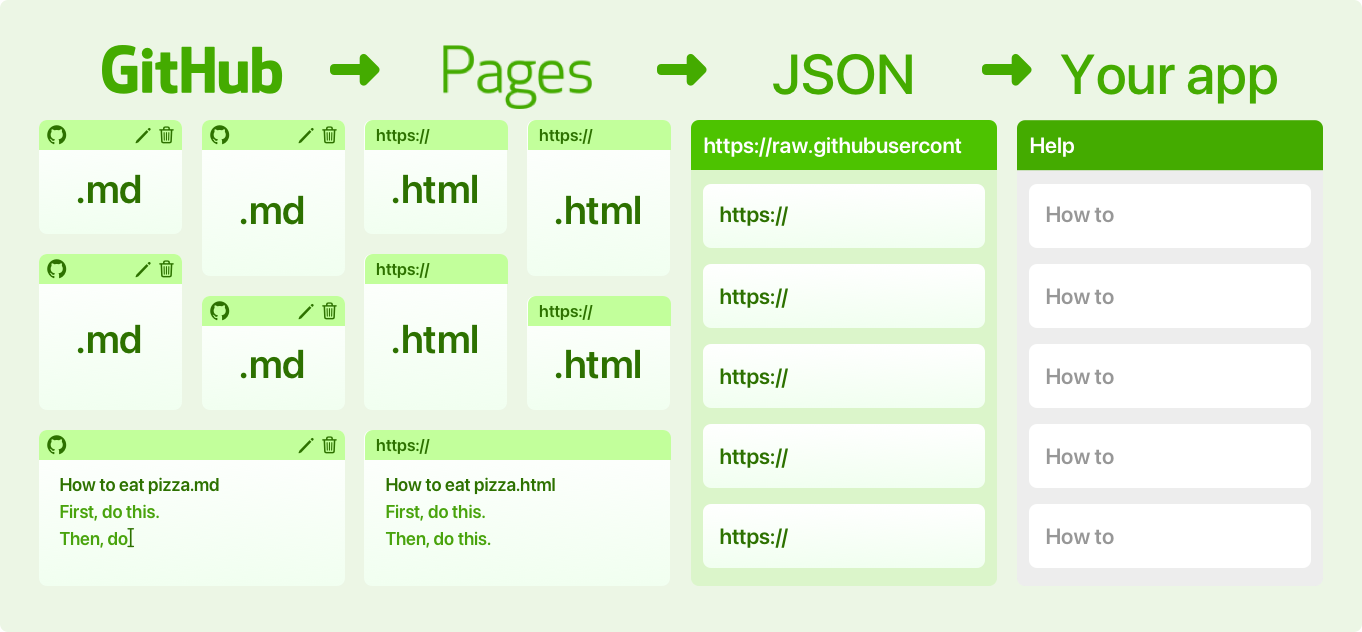
How It Works
- Write documents in Markdown, on GitHub
- GitHub Pages will convert them into HTML and host it for free
- A custom GitHub Action will generate a JSON data source for you
- The SupportDocs library will download the JSON and display it to your users!
The SupportDocs library is written in SwiftUI, so it's only for iOS 13 and above.
Installation
Installing SupportDocs takes two steps:
- Set up the GitHub repository where you write and host your documents
- Install the library inside your app
Set Up the GitHub Repository
This will be where you write your documents. GitHub Pages will translate your Markdown into HTML, and a custom GitHub Action will automatically compile the web pages into a JSON file.
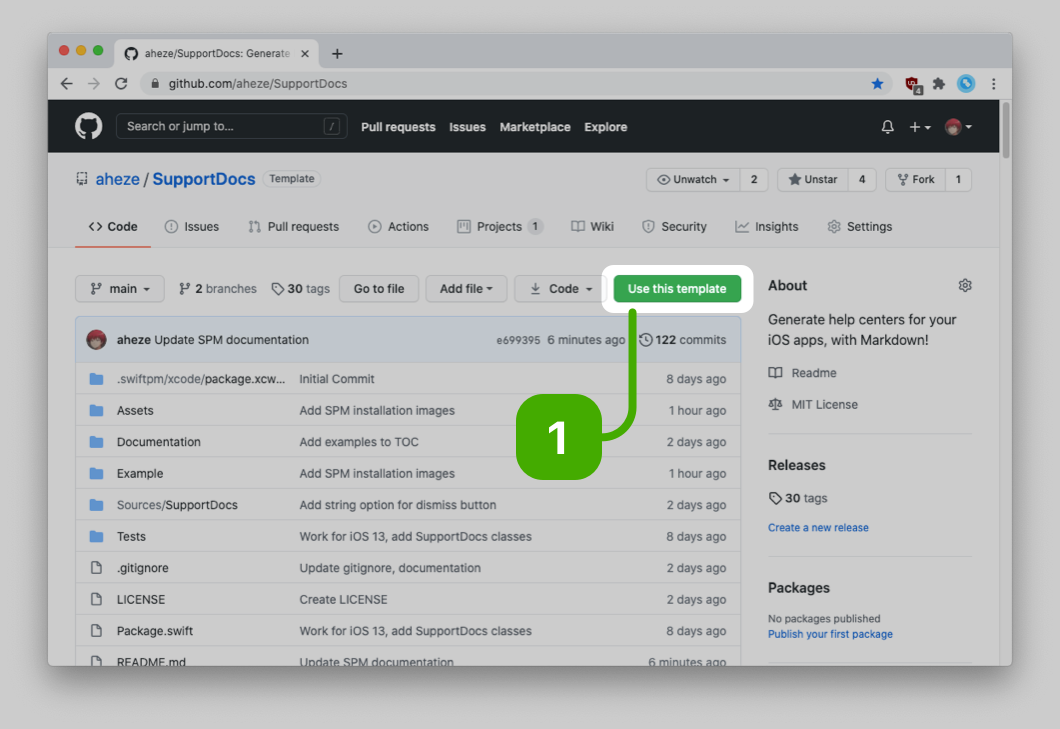
- Scroll up to the top of this page and click <kbd>Use this template</kbd>
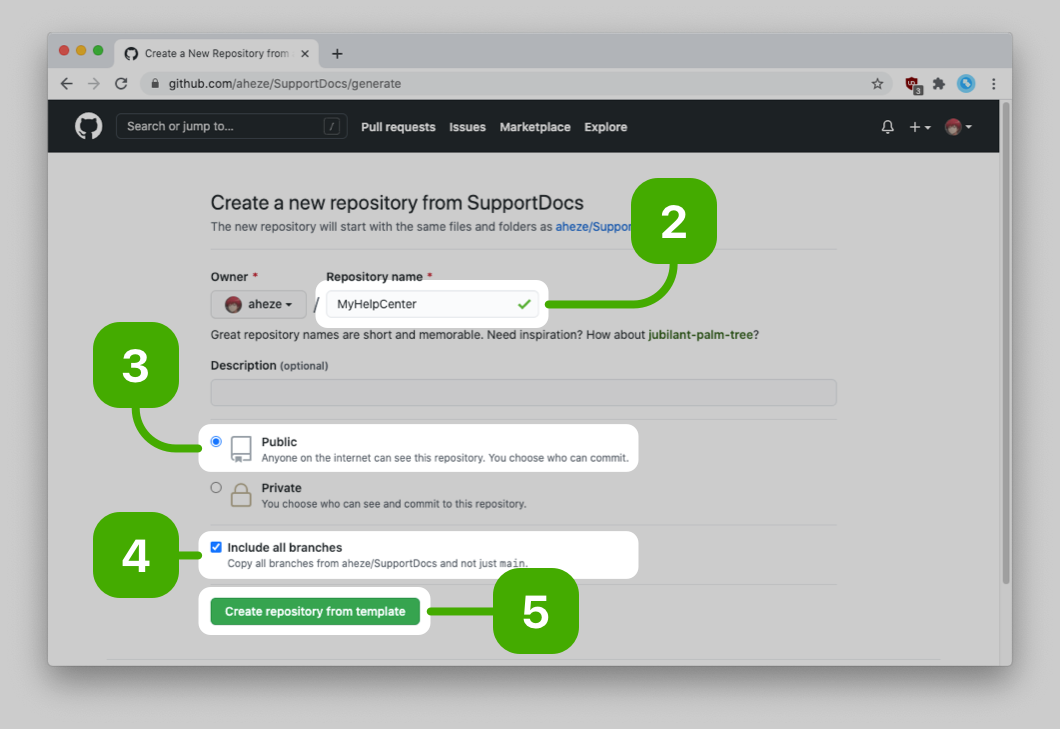
- Enter a repository name -- this can be whatever you want
- Make sure it's set to
Public(If you are using the free version of GitHub, GitHub Pages only works for public repos) - Make sure to check Include all branches. This is really important.
- Click <kbd>Create repository from template</kbd>
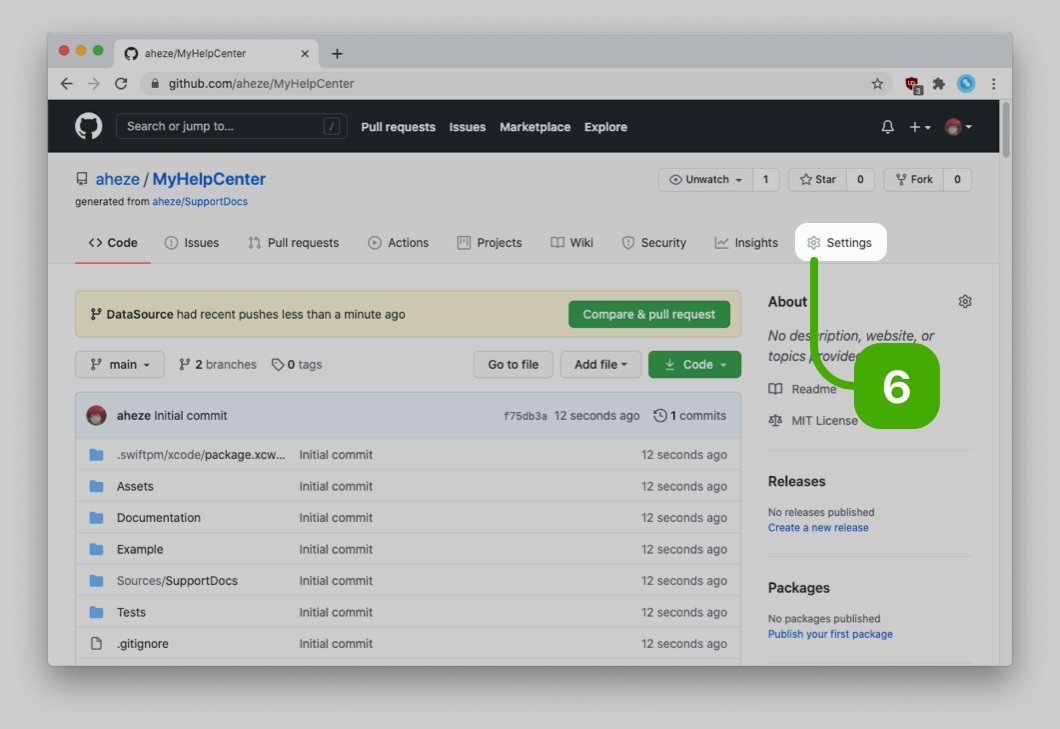
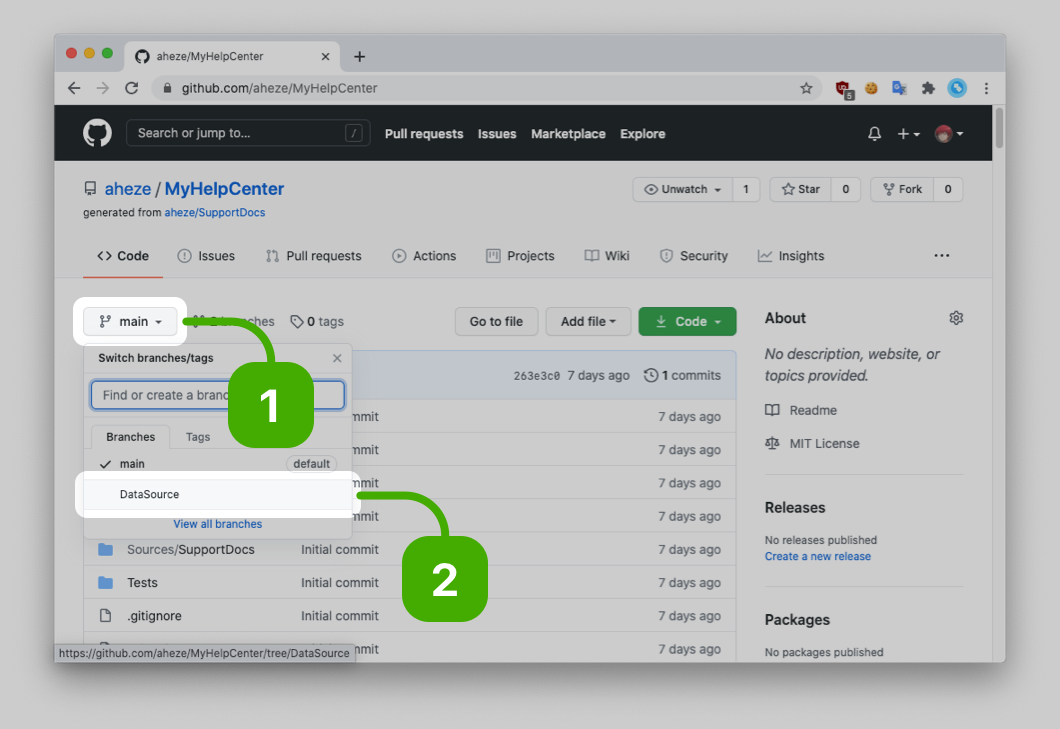
- In your brand new repository, click the <kbd>Settings</kbd> tab
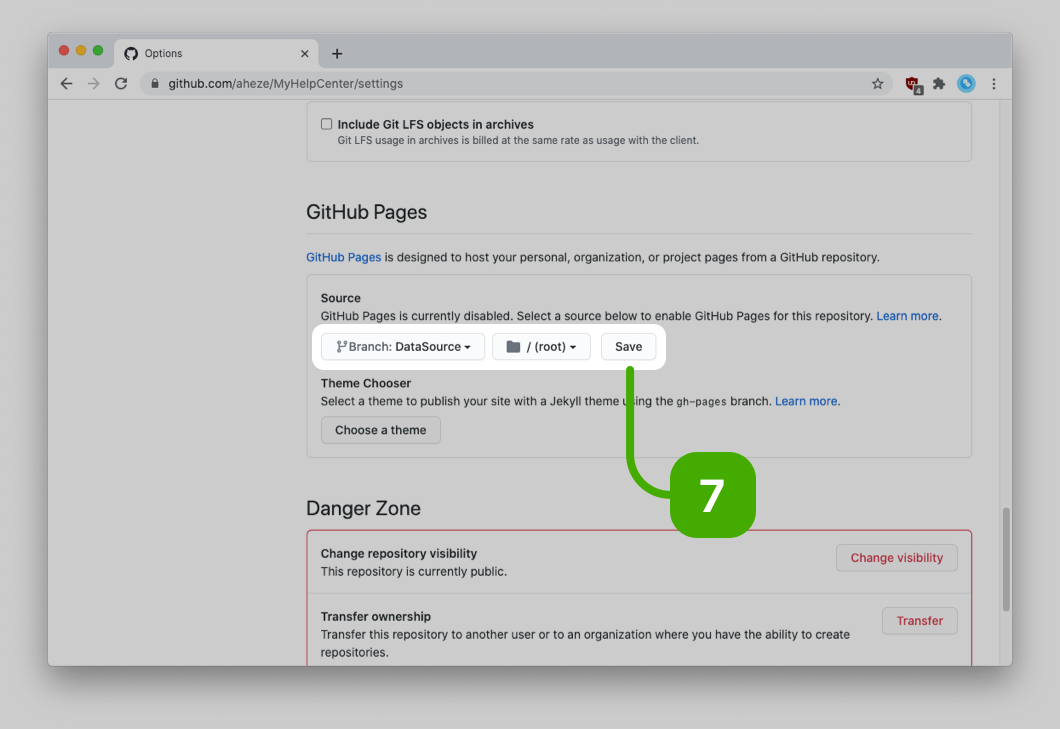
- Scroll down to the GitHub Pages section, and select
DataSourcebranch and / (root) folder. Then click <kbd>Save</kbd>. - That's it for the GitHub repository! Now time to install the library in your app.
|  |
|  |
| ------------------------------------------------------------------------------------------------- | ------------------------------------------------------------------------------------------------- |
|
|
| ------------------------------------------------------------------------------------------------- | ------------------------------------------------------------------------------------------------- |
|  |
|  |
|
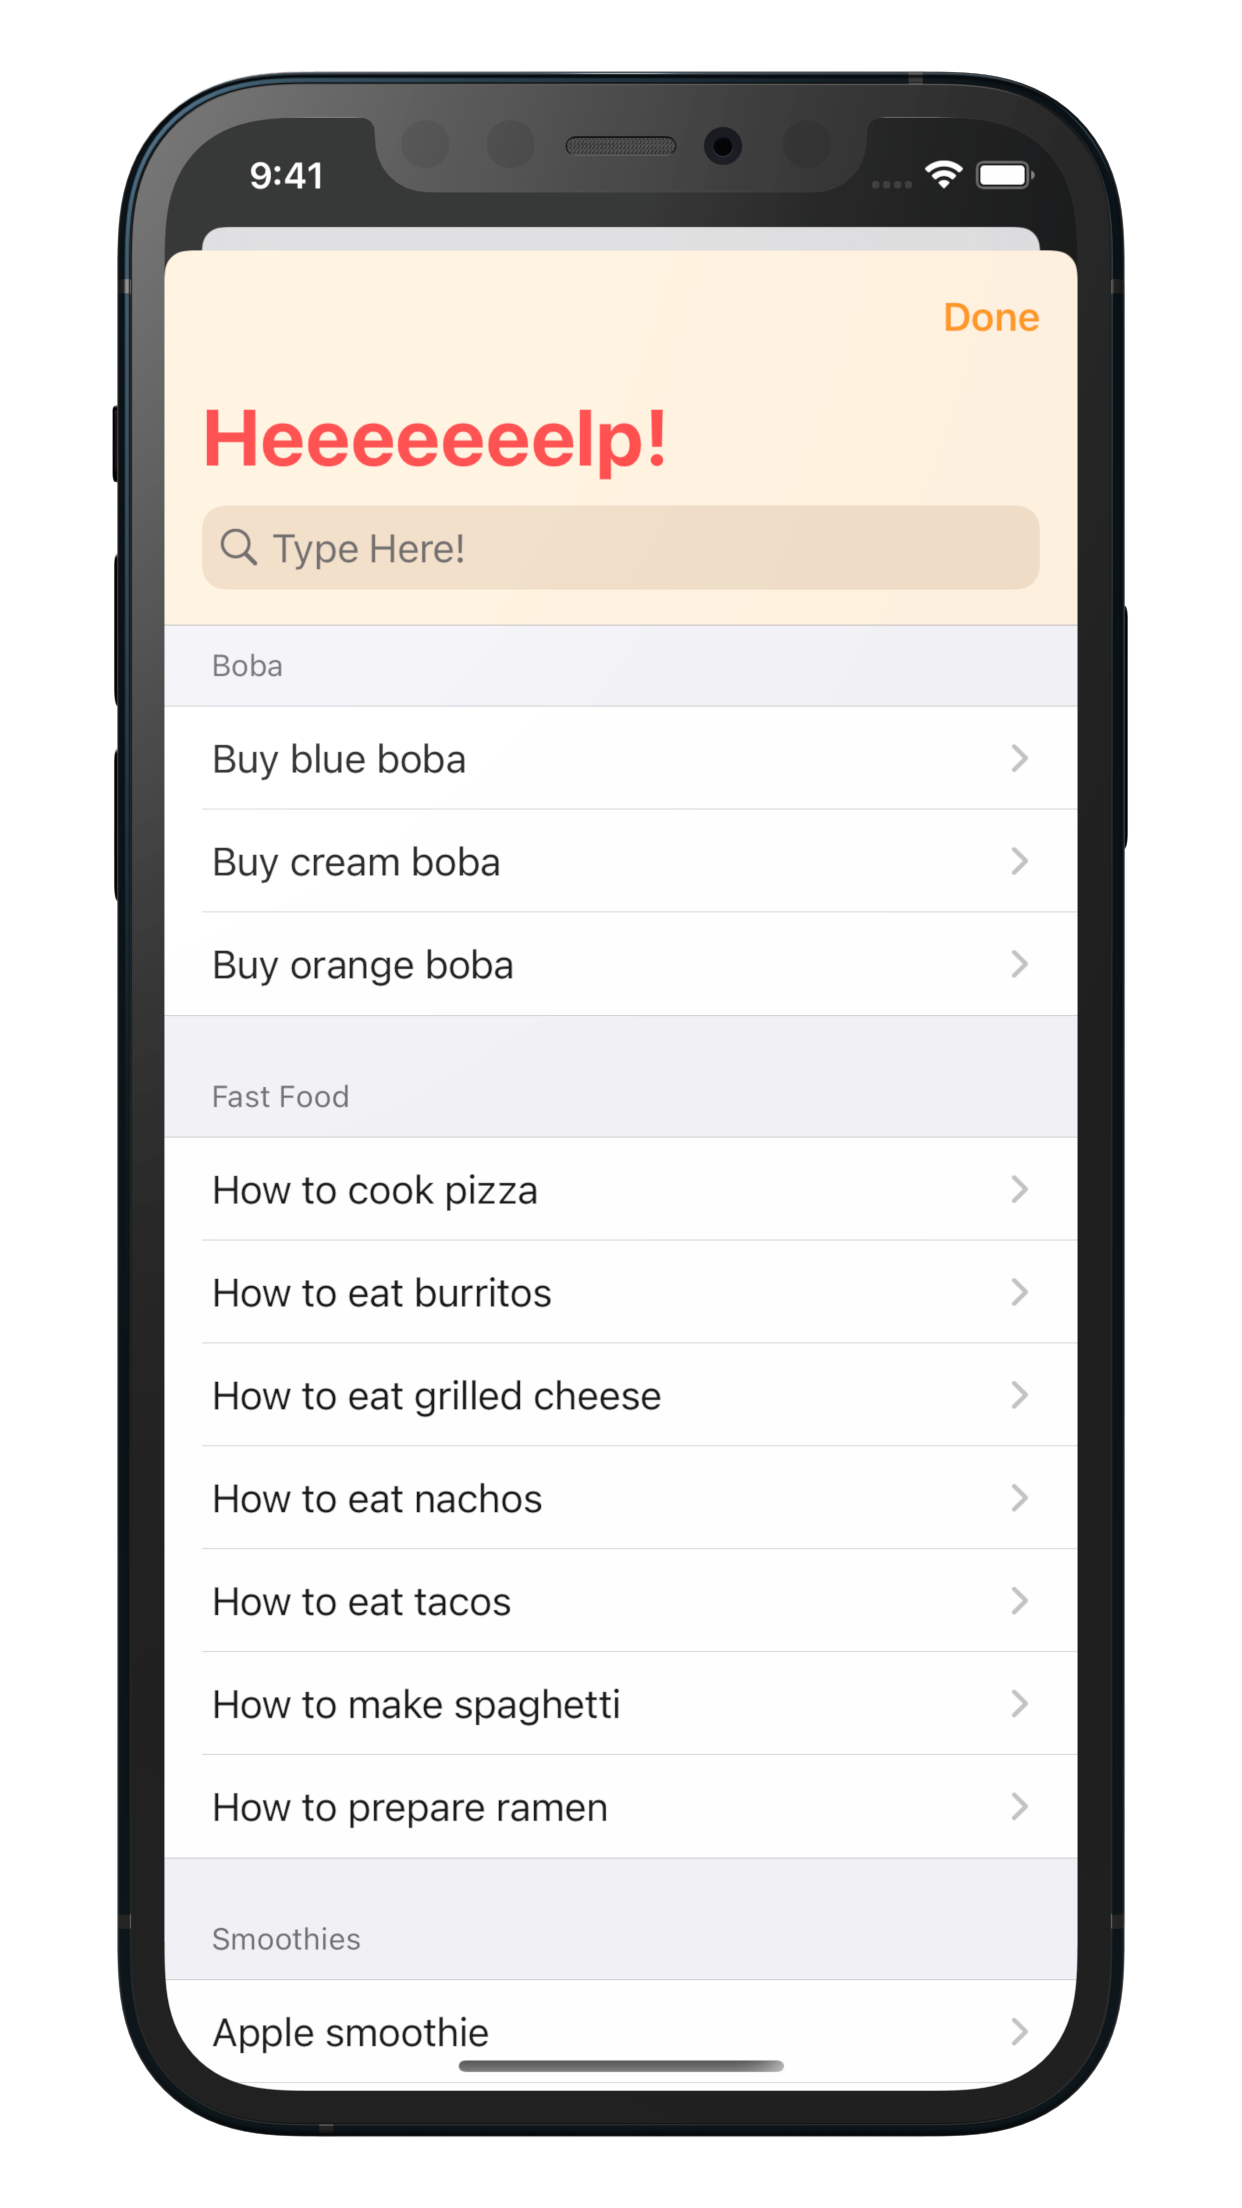
Install the Library
This is the actual interface that your users will see. You can install using CocoaPods or Swift Package Manager, whichever one you prefer.
CocoaPods
CocoaPods is a dependency manager for Cocoa projects. For usage and installation instructions, visit their website. To install SupportDocs into your Xcode project using CocoaPods, add it in your Podfile:
pod 'SupportDocs'
Swift Package Manager
The Swift Package Manager is built into Xcode, which makes it really easy to use.
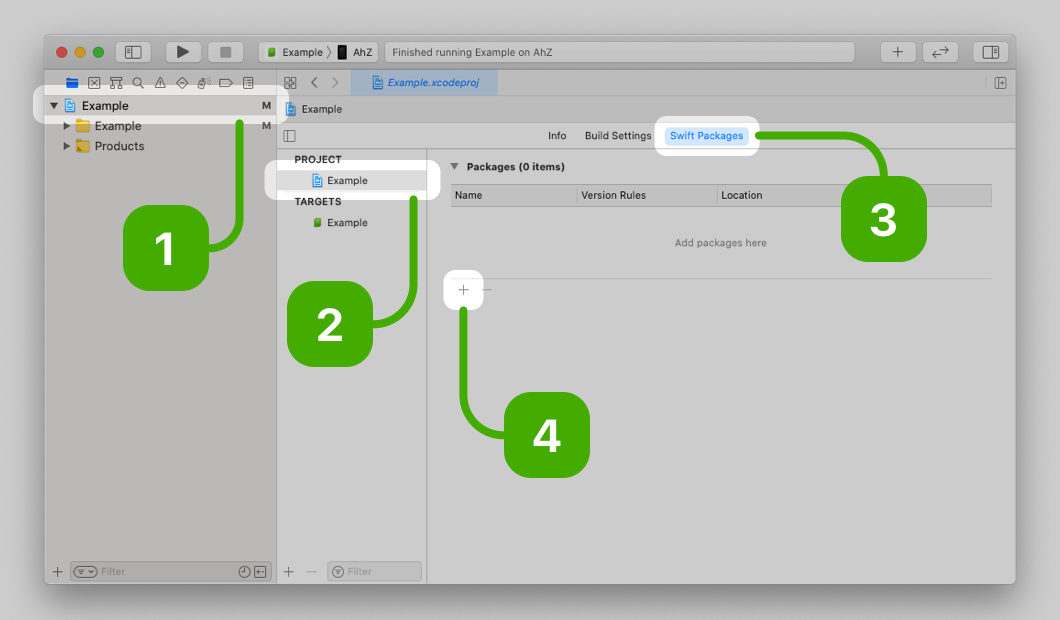
- Go to your project settings
- Click your project
- Switch to the <kbd>Swift Packages</kbd> tab
- Click the <kbd>+</kbd> button
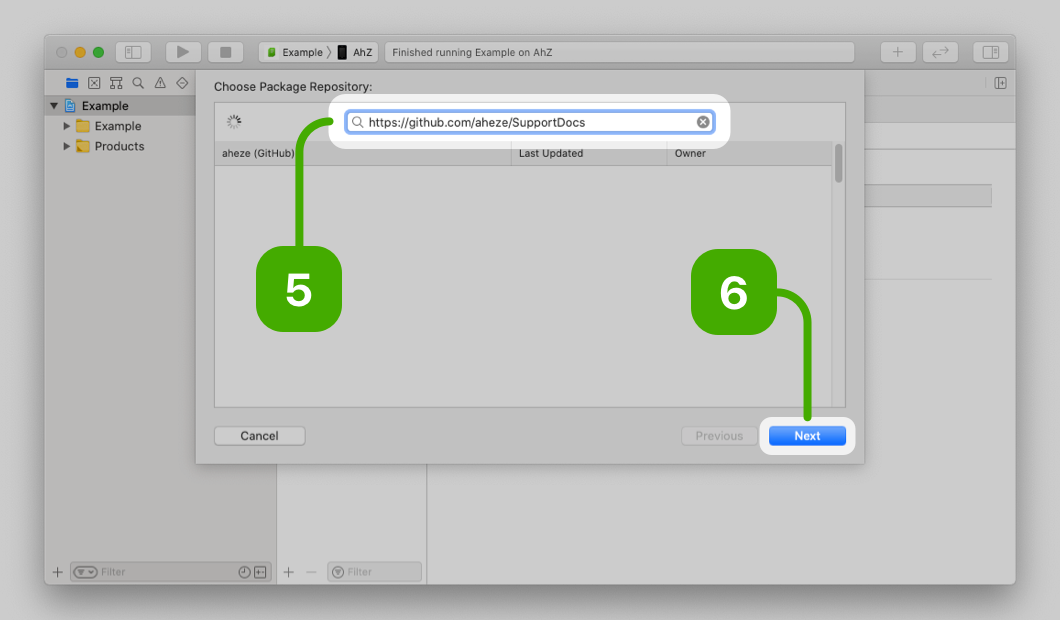
- Enter
https://github.com/aheze/SupportDocsin the text field - Click <kbd>Next</kbd>
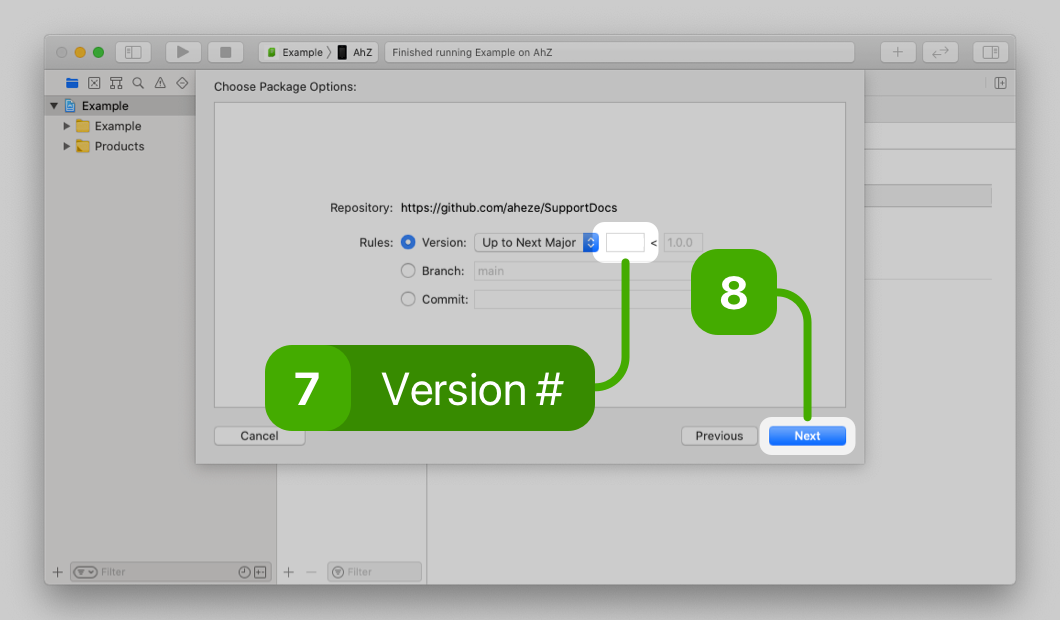
- Enter the latest version,
1.1.0, in the text field. Leave <kbd>Up to Next Major</kbd> selected. - Click <kbd>Next</kbd>
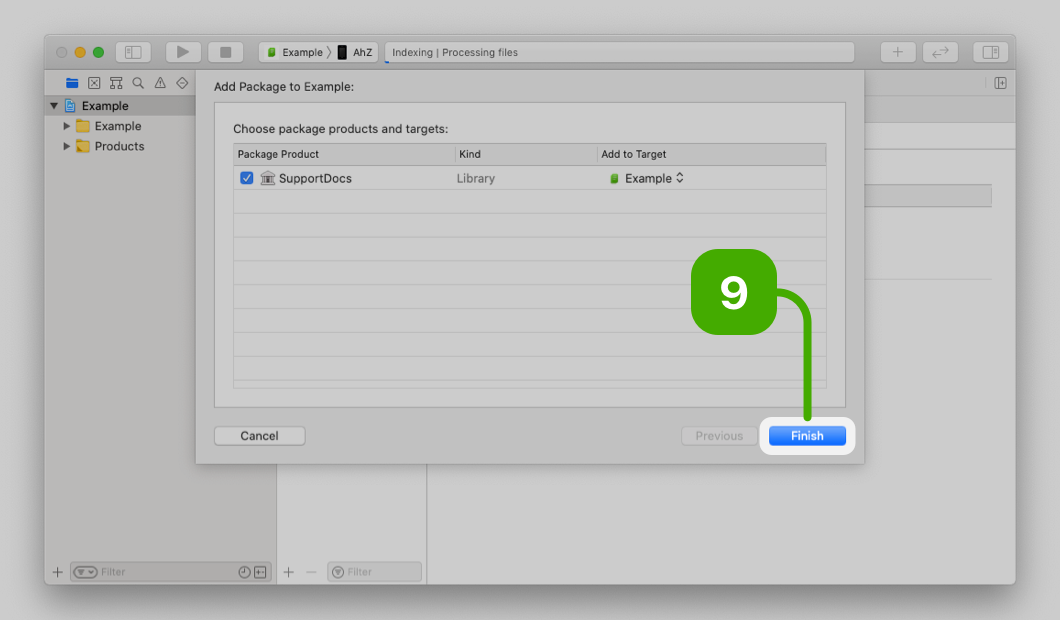
- Click <kbd>Finish</kbd>, and you're done!
|  |
|  |
| ------------------------------------------------------------------------------------------ | ------------------------------------------------------------------------------------------ |
|
|
| ------------------------------------------------------------------------------------------ | ------------------------------------------------------------------------------------------ |
|  |
|  |
|
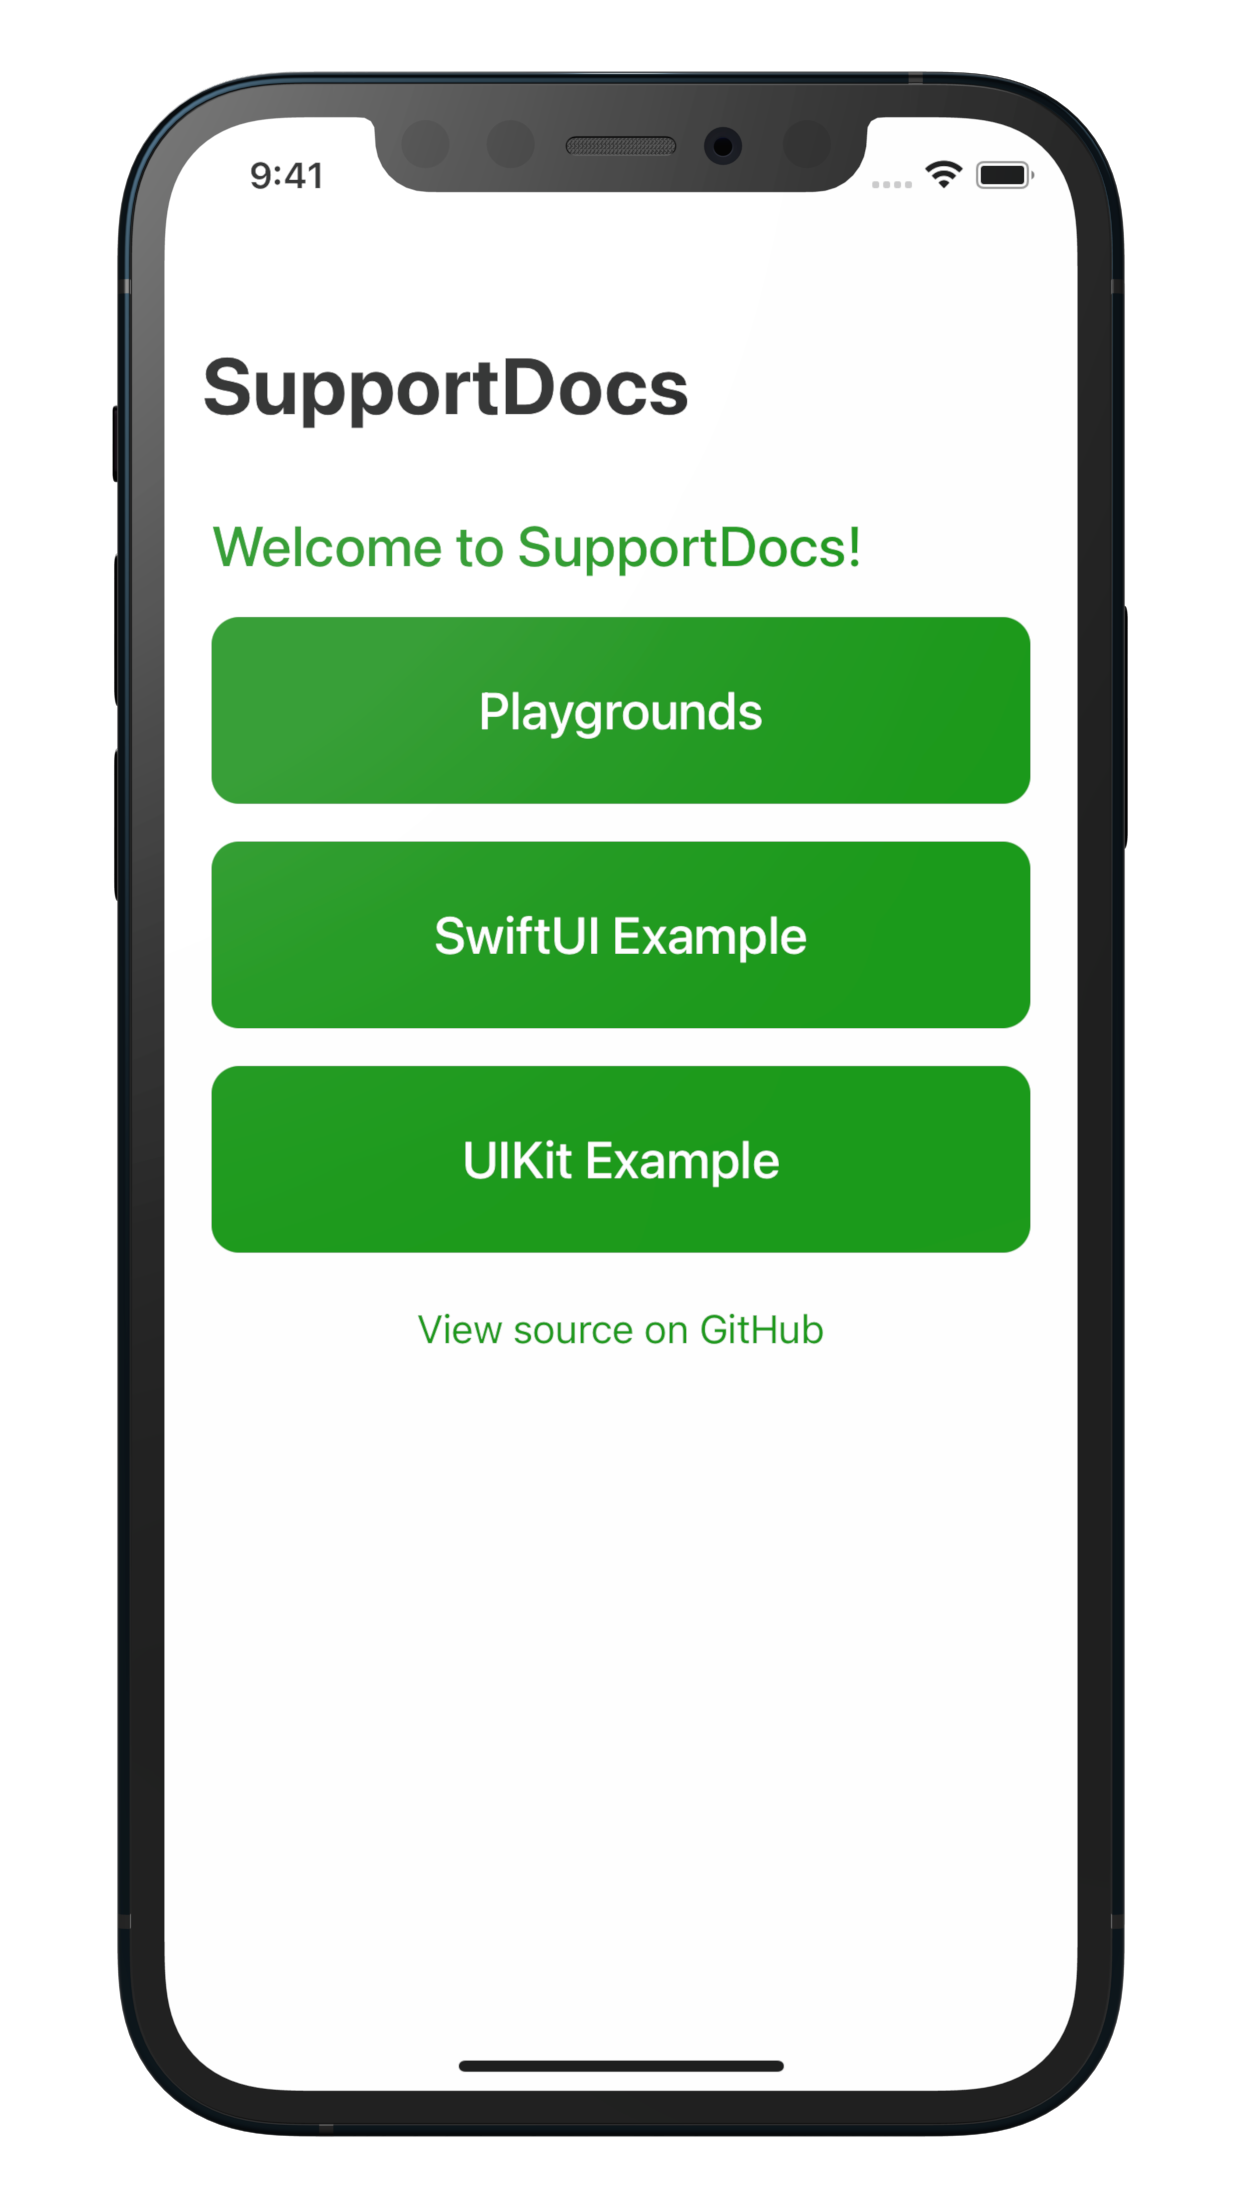
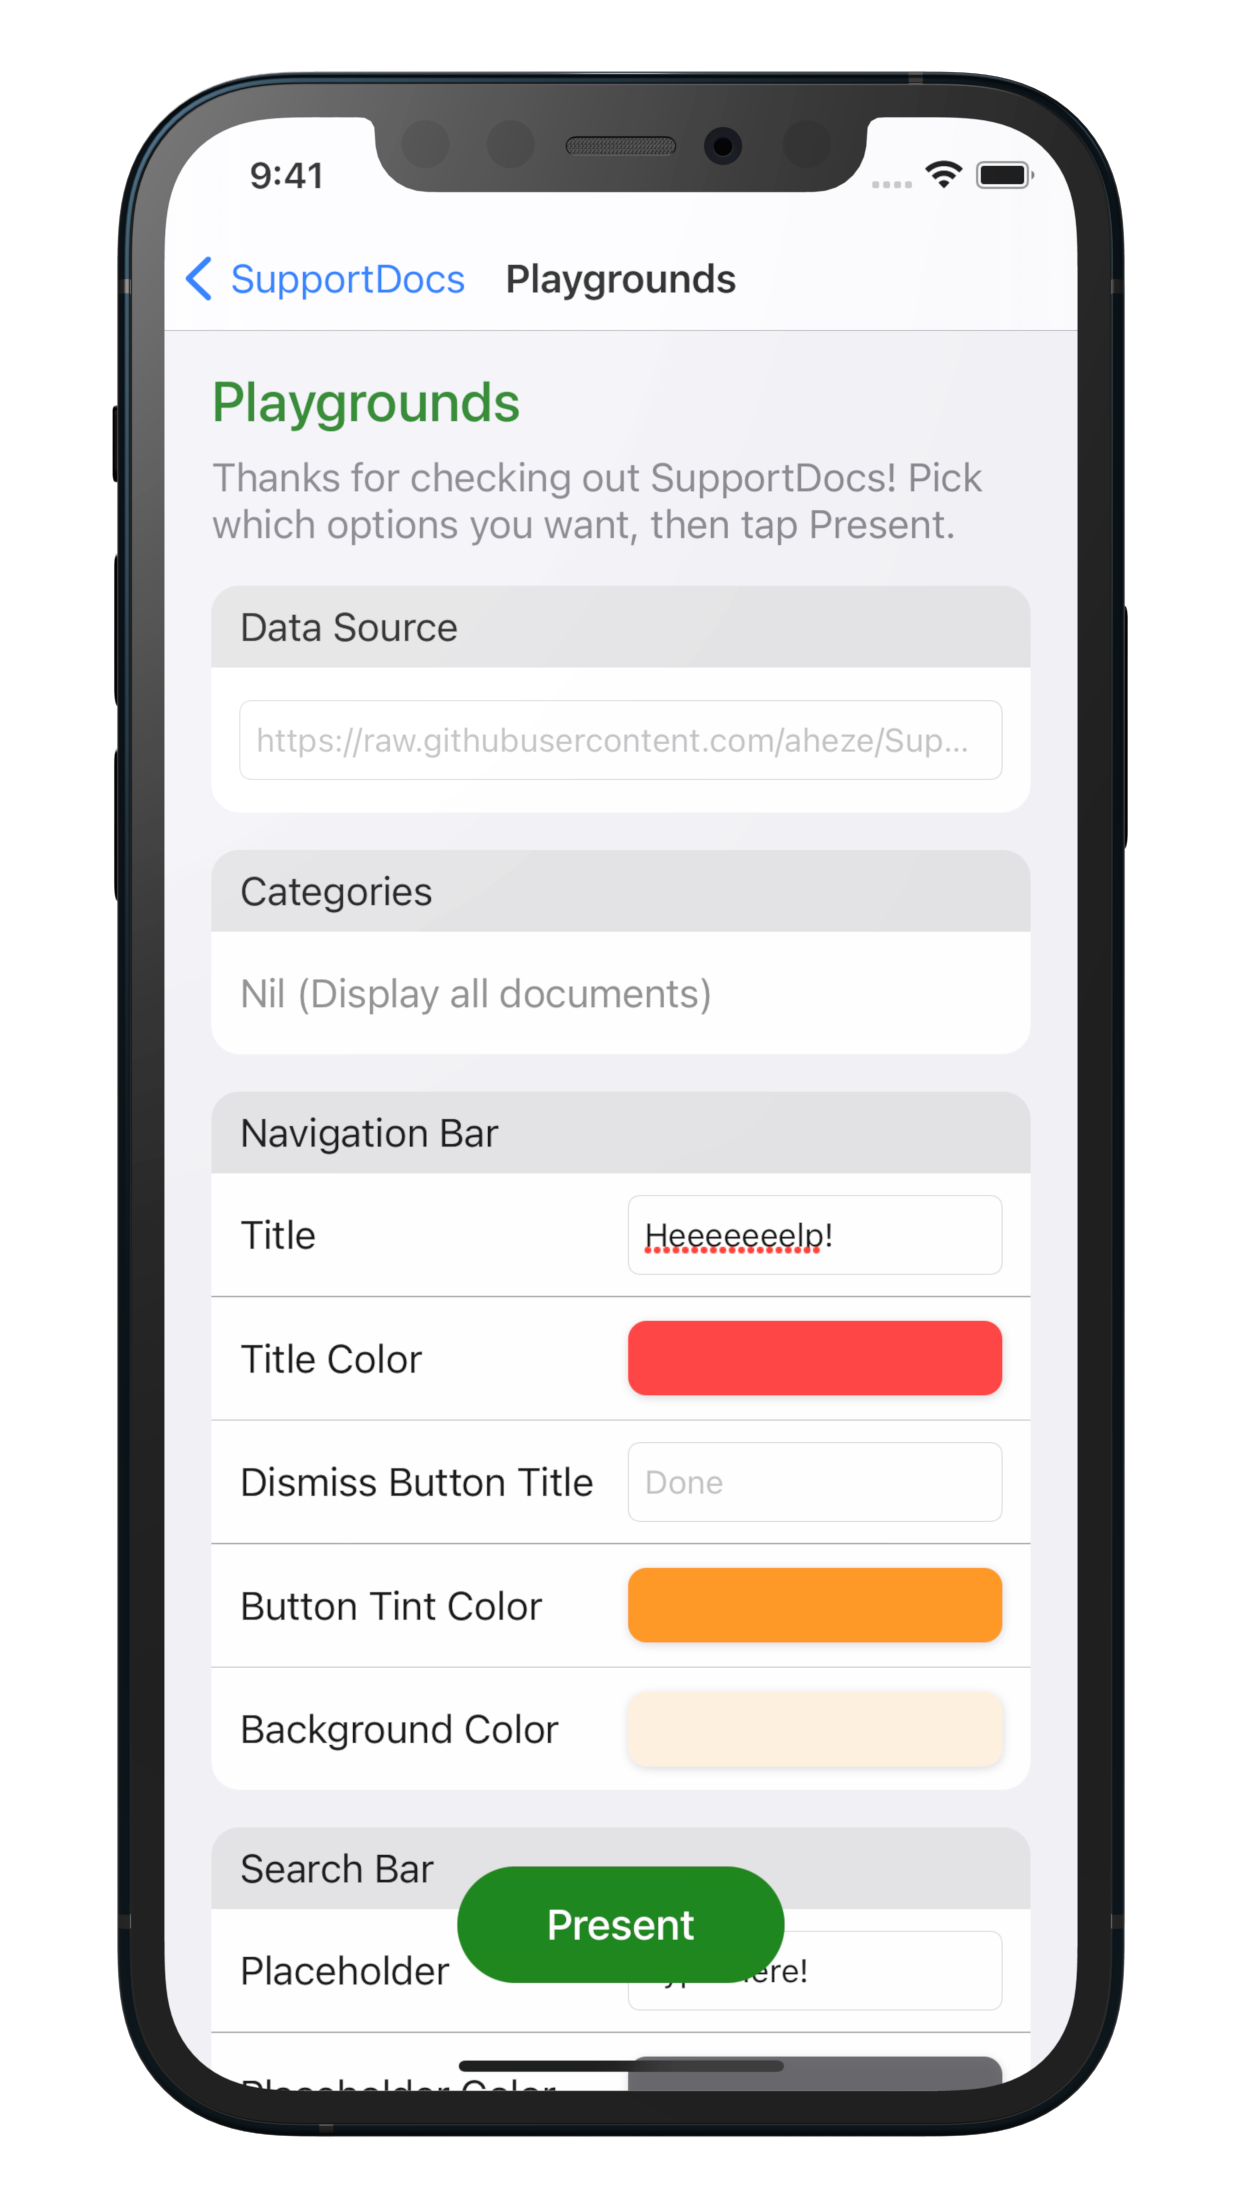
Example Project
Check out the example project in the Example folder! It contains a playground where you can play around with how SupportDocs is displayed.
 |
|  |
|  --- | --- | ---
Usage
SupportDocs is pretty simple to use, with two parts: the GitHub repository and the library in your app.
The GitHub repository is where you add and edit your documents using Markdown. This is online, so you can edit at any time and always show the latest information to your users. All your documents are compiled into a single JSON file, the URL of which you'll pass into the library. The library is what's displayed to your users, in your app. All it needs is the URL of the JSON file, and you can either use SwiftUI or UIKit to embed it.
<details> <summary><strong>Show Extended Documentation</strong></summary> </details>Using the GitHub Repository
In you brand new repository that you set up earlier, switch to the DataSource branch. The example documents are inside the Sample-Boba, Sample-FastFood, and Sample-Smoothies folders -- take a look around. Here's a guide:
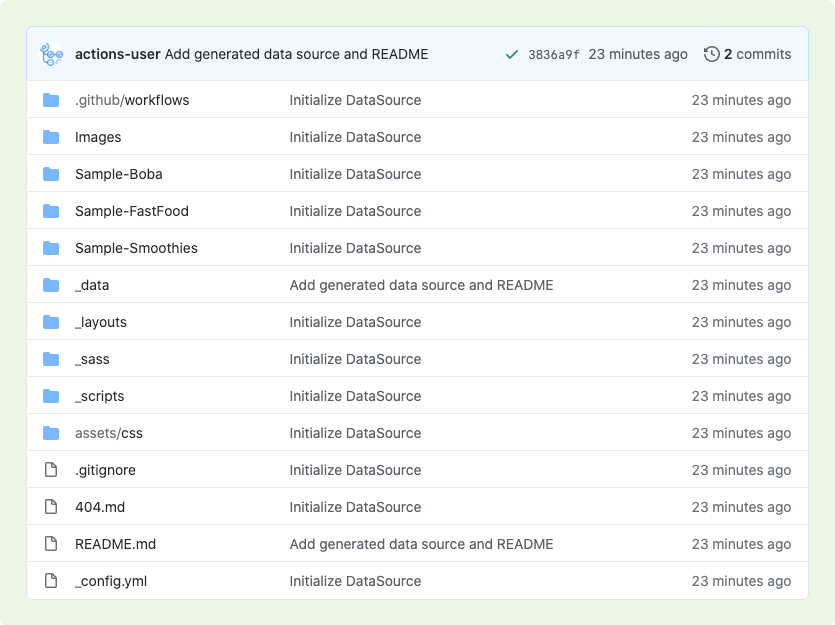
.github/workflowsis for the GitHub Action, for compiling your documents into JSONImagescontains the images used in the example documentsSample-Bobacontains all documents tagged with <kbd>boba</kbd>Sample-FastFoodcontains all documents tagged with <kbd>fastFood</kbd>Sample-Smoothiescontains all documents tagged with <kbd>smoothies</kbd>_datacontains the generated data source URL_layoutsis for GitHub Pages to convert your Markdown into HTML_sassis where you can customize the look of the HTML, including light and dark mode colors_scriptscontains the script used by the GitHub Action, as well as the README template. This template is what you should edit if you want to change the README at all -- if you change it directly, your changes will be overriden.assets/cssapplies the_sass.gitignoreis for git to ignore unnecessary files404.mdis the 404 document that will be displayed if your URLs are wrong. You can also pass this intooptions.other.error404in case your data source URL fails.README.mdis for your reference. It contains a link to the data source URL, and a table of contents that shows all your documents. Do not edit this file directly -- instead, edit the file in_scripts/README.md._config.ymlsets the default theme, "Primer," for GitHub Pages. We recommend that you don't change this, as we customized dark mode specifically for the "Primer" theme -- you'll need to configureassets/css/main.scssif you use your own theme.
Docum
