MuskCult
A beginners quickstart guide to Git
Install / Use
/learn @Gothamv/MuskCultREADME
The Repo for 'Learn the Basics of Git in Under 10 Minutes' on Medium.
Learn the Basics of Git in Under 10 Minutes
Yes, the title is clickbait. There is no way you can understand the basics of git technology in just 10 minutes. But you can get pretty close in about 25 minutes. And that is the purpose of this article.
If you want to get started on learning about Git technology, you’ve come to the right place. This is a comprehensive beginner’s guide to Git. There are many clients for Git. The technology is all the same no matter the client. But in this guide, we’ll be using GitHub to understand Git.
You can read a Portuguese supplement to the article by @2504Guimaraes here. Translations are welcome! Just send me a pull request.
Let’s get started!
What is Version Control?
Version control is a system that records changes to a file or set of files over time so that you can recall specific versions later. So ideally, we can place any file in the computer on version control.
Umm… Okay… But Why Tho?
Here’s Why:
A Version Control System (VCS) allows you to revert files back to a previous state, revert the entire project back to a previous state, review changes made over time, see who last modified something that might be causing a problem, who introduced an issue and when, and more. Using a VCS also means that if you screw things up or lose files, you can generally recover easily. And sometimes you just want to know “who wrote this crap”, and having access to that information is worthwhile 😈.
So What is Git?
Git is a version-control system for tracking changes in computer files and coordinating work on those files among multiple people. Git is a Distributed Version Control System. So Git does not necessarily rely on a central server to store all the versions of a project’s files. Instead, every user “clones” a copy of a repository (a collection of files) and has the full history of the project on their own hard drive. This clone has all of the metadata of the original while the original itself is stored on a self-hosted server or a third-party hosting service like GitHub.
Git helps you keep track of the changes you make to your code. It is basically the history tab for your code editor(With no incognito mode 🌚). If at any point while coding you hit a fatal error and don’t know what’s causing it you can always revert back to the stable state. So it is very helpful for debugging. Or you can simply see what changes you made to your code over time.
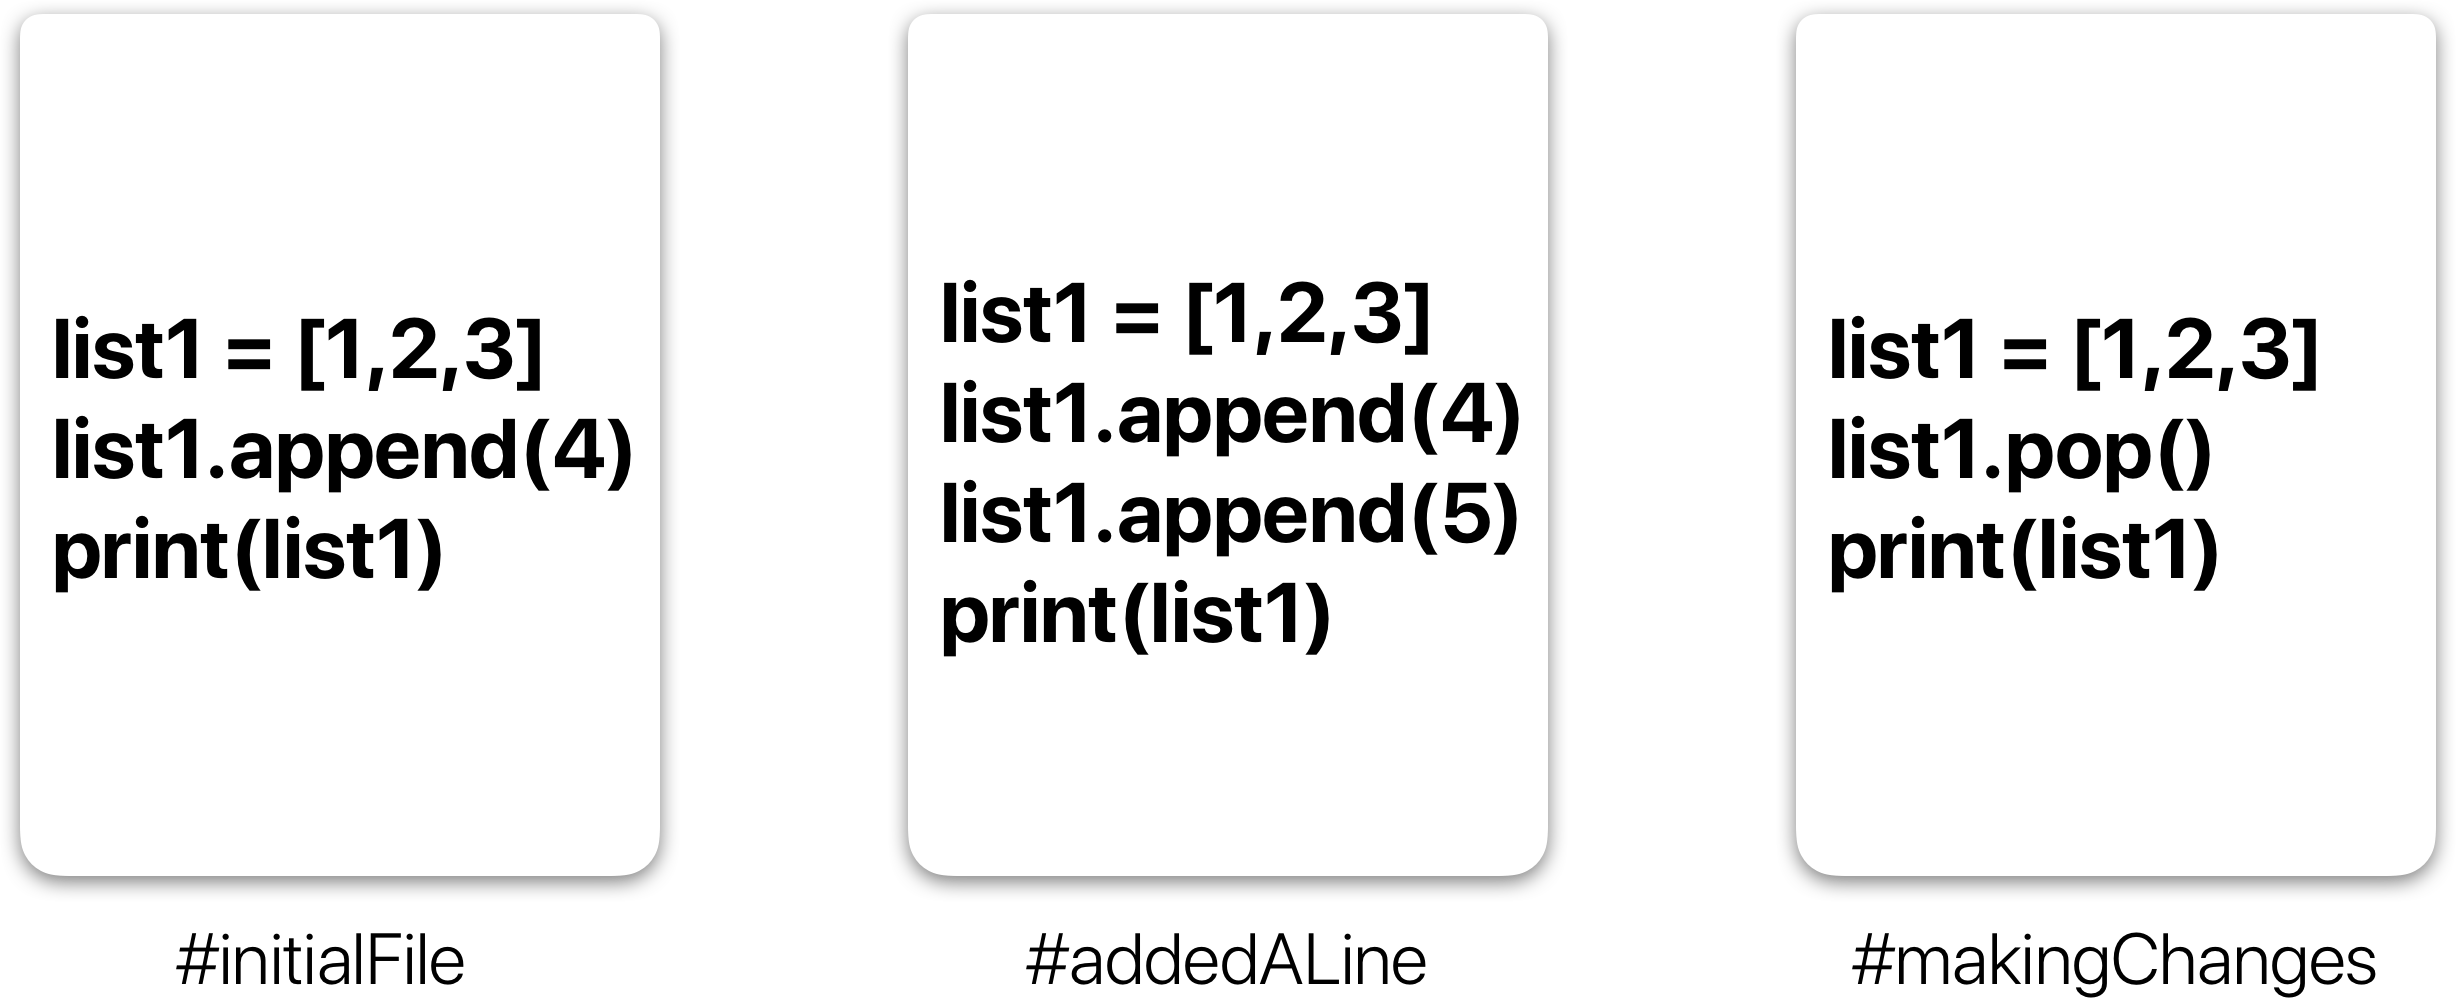
In the example above, all three cards represent different versions of the same file. We can select which version of the file we want to use at any point in time. So I can jump to and fro to any version of the file in the git time continuum.
Git also helps you synchronise code between multiple people. So imagine you and your friend are collaborating on a project. You both are working on the same project files. Now Git takes those changes you and your friend made independently and merges them into a single “Master” repository. So by using Git you can ensure you both are working on the most recent version of the repository. So you don’t have to worry about mailing your files to each other and working with a ridiculous number of copies of the original file. And collaborating long-distance becomes as easy as HTML 🙃.
Git Workflow:
Before we start working with Git commands, it is necessary that you understand what it represents.
What is a Repository?
A repository a.k.a. repo is nothing but a collection of source code.
There are four fundamental elements in the Git Workflow.
Working Directory, Staging Area, Local Repository, and Remote Repository.
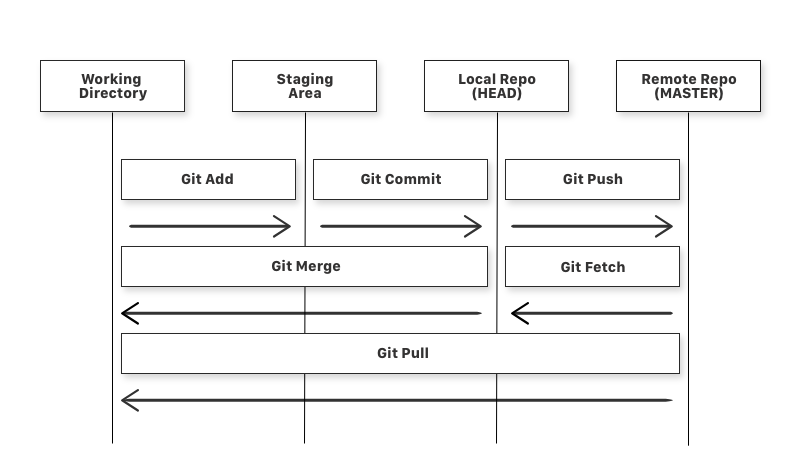
If you consider a file in your Working Directory, it can be in three possible states.
-
It can be staged. This means the files with the updated changes are marked to be committed to the local repository but not yet committed.
-
It can be modified. This means the files with the updated changes are not yet stored in the local repository.
-
It can be committed. This means that the changes you made to your file are safely stored in the local repository.
-
git add is a command used to add a file that is in the working directory to the staging area.
-
git commit is a command used to add all files that are staged to the local repository.
-
git push is a command used to add all committed files in the local repository to the remote repository. So in the remote repository, all files and changes will be visible to anyone with access to the remote repository.
-
git fetch is a command used to get files from the remote repository to the local repository but not into the working directory.
-
git merge is a command used to get the files from the local repository into the working directory.
-
git pull is a command used to get files from the remote repository directly into the working directory. It is equivalent to a git fetch and a git merge .
Now that we know what Git is and its basic terminologies, let’s see how we can place a file under git. We’re going to do it the right way and the difficult way. Without any GUI applications.
I’m assuming you already have a file you want to place under version control. If not create a sample folder named ‘MuskCult’ and place some sample code files in it.
Step 0: Make a GitHub Account. Duh.
If you don't already have one, you can make one here.
Step 1: Make sure you have Git installed on your machine.
If you are on a Mac, fire up the terminal and enter the following command:
$ git --version
This will prompt open an installer if you don’t already have git. So set it up using the installer. If you have git already, it’ll just show you which version of git you have installed.
If you are running Linux(deb), enter the following in the terminal:
$ sudo apt install git-all
If you are on Windows:
$ get a mac
Just kidding… Relax… The number of people I triggered… Phew… Go to this link or this link for more info on how to get it.
Step 2: Tell Git who you are.
Introduce yourself. Slide in. Seriously, mention your Git username and email address, since every Git commit will use this information to identify you as the author.
$ git config --global user.name "YOUR_USERNAME"

$ git config --global user.email "im_satoshi@musk.com"

$ git config --global --list # To check the info you just provided

Step 3: Generate/check your machine for existing SSH keys. (Optional)
Why you ask? Using the SSH protocol, you can connect and authenticate to remote servers and services. With SSH keys, you can connect to GitHub without supplying your username or password at each visit.
Follow this link to learn more about SSH. Go here to check if you have an existing SSH key. Go here to generate a SSH Key. Go here to add the SSH key to your GitHub account. And finally, go here to test its connection.
If you did setup SSH, every git command that has a link you replace it by:
Instead of : https://github.com/username/reponame

You use    : git@github.com/username/reponame.git

           Note : You can use both ways alternatively
I’ll be using SSH protocol in this tutorial.
Step 4: Let’s Git
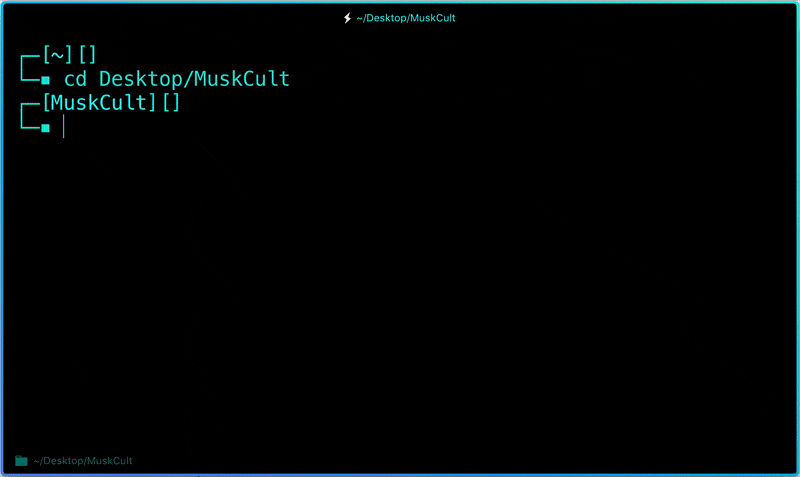
Create a new repository on GitHub. Follow this link. Now, locate the folder you want to place under git in your terminal.
$ cd Desktop/MuskCult
Initialize Git:
And to place it under git, enter:
$ touch README.md   # To create a README file for the repository
$ git init         # Initiates an empty git repository
Now go edit the README.md file to provide information about the repository.
Add files to the Staging Area for commit:
Now to add the files to the git repository for commit:
$ git add .
# Adds all the files in the local repository and stages them for commit

OR if you want to add a specific file

$ git add README.md
# To add a specific file
Before we commit let’s see what files are staged:
$ git status # Lists all new or modified files to be committed

Commit Changes you made to your Git Repo:
Now to commit files you added to your git repo:
$ git commit -m "First commit"
# The message in the " " is given so that the other users can read the message and see what changes you made
Uncommit Changes you just made to your Git Repo:
Now suppose you just made some error in your code or placed an unwanted file inside the repository, you can unstage the files you just added using:
$ git reset HEAD~1
# Remove the most recent commit
# Commit again!